BRITAX RÖMER RÖMER KID Mode D'emploi
Table des Matières
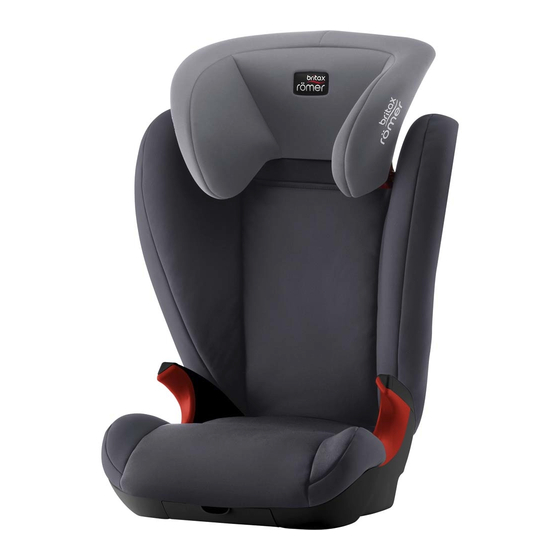
RÖMER KID
Mode d'emploi
Nous sommes heureux que notre
RÖMER KID puisse accompagner
votre enfant en toute sécurité pendant
un nouveau chapitre de sa vie.
Pour protéger efficacement votre
enfant, le RÖMER KID doit
impérativement être utilisé et
installé de la manière décrite dans
le présent mode d'emploi.
Pour toute question complémentaire,
n'hésitez pas à nous contacter.
BRITAX RÖMER
Kindersicherheit GmbH
Table des matières
1. Habilitation .....................................2
2. Utilisation dans le véhicule ..........3
le véhicule .....................................4
3.1 Fixation du dossier ..................6
l'appui-tête ...............................7
3.3 Stabilisation du dossier ...........8
de votre enfant ........................9
est bien protégé ....................12
4. Consignes d'entretien ................13
4.1 Nettoyage ..............................13
4.2 Retrait de la housse ..............14
4.3 Remise en place de la housse 15
5. Remarques relatives à
l'élimination .................................15
6. 2 ans de garantie .........................16
7. Carte de garantie / Procès-verbal
de remise .....................................18
Gebruiksaanwijzing
Gefeliciteerd met de aankoop van de
RÖMER KID: de juiste keuze om uw
kind veilig door een nieuwe levensfase
te begeleiden.
De RÖMER KID moet voor een
juiste bescherming van uw kind
altijd zo worden gebruikt en
gemonteerd als in deze
gebruiksaanwijzing beschreven.
Als u nog vragen hebt over het
gebruik, neem dan contact met ons
op.
BRITAX RÖMER
Kindersicherheit GmbH
Inhoud
1. Geschiktheid .................................2
2. Gebruik in de auto .........................3
3. Beveiliging van uw kind in
de auto ...........................................4
3.1 Bevestiging van de rugleuning 6
3.2 Instelling van de hoogte van
de hoofdsteun .........................7
3.3 Ruststand van de rugleuning ..8
3.4 De gordel bij uw kind omdoen .9
3.5 Zo is uw kind goed beveiligd .12
4. Onderhoudshandleiding .............13
4.1 Reiniging ...............................13
4.2 De bekleding verwijderen ......14
4.3 De bekleding bevestigen .......15
5. Afvalverwijderingsinstructies ....15
6. 2 jaar garantie ..............................16
7. Garantiekaart/
overdrachtscontrole ...................19
User instructions
We are pleased that our RÖMER KID
may accompany your child safely
through a new stage of his or her life.
In order to protect your child
correctly, the RÖMER KID must
always be used and installed as
described in these instructions.
If you have any further questions
regarding its use, please feel free to
contact us.
BRITAX RÖMER
Kindersicherheit GmbH
Contents
1. Suitability .......................................2
2. Use in the vehicle ..........................3
3. Securing your child in the vehicle 4
3.1 Attaching the backrest .............6
3.2 Adjusting the height of the
headrest ..................................7
3.3 Attaching the backrest .............8
3.4 Securing your child ..................9
4. Care instructions .........................13
4.1 Cleaning ................................13
4.2 Removing the cover ..............14
4.3 Re-fitting the cover ................15
5. Notes regarding disposal ...........15
6. 2-year warranty ............................16
Table des Matières

Manuels Connexes pour BRITAX RÖMER RÖMER KID


Sommaire des Matières pour BRITAX RÖMER RÖMER KID
-
Page 1: Table Des Matières
RÖMER KID Mode d’emploi Gebruiksaanwijzing User instructions Nous sommes heureux que notre Gefeliciteerd met de aankoop van de We are pleased that our RÖMER KID RÖMER KID puisse accompagner RÖMER KID: de juiste keuze om uw may accompany your child safely votre enfant en toute sécurité... -
Page 2: Habilitation
Habilitation Geschiktheid Suitability Homologation Goedkeuring Certification Vérification et Controle en goedkeuring Tested and certified RÖMER RÖMER homologation selon conform ECE* R 44/04 according to ECE* R 44/04 RÖMER autokinder Child ECE* R 44/04 Siège auto zitje safety seat Groep Lichaamsgewicht Group Body weight Groupe... -
Page 3: Utilisation Dans Le Véhicule
Utilisation dans le Gebruik in de auto Use in the vehicle véhicule Gevaar! Als uw kind in het Danger! Should your child be kinderzitje slechts met een secured in the vehicle seat with Danger ! Si vous attachez votre tweepuntsgordel is beveiligd, only a 2-point belt, he or she enfant dans le siège à... -
Page 4: Sécurité De Votre Enfant
Sécurité de votre enfant Beveiliging van uw kind Securing your child in dans le véhicule in de auto the vehicle For the protection of your Pour protéger votre enfant Ter bescherming van uw kind child • Les principes suivants sont à •... - Page 5 Pour protéger tous les Ter bescherming van alle For the protection of all passagers passagiers vehicle occupants En cas de freinage d’urgence ou Bij een noodstop of een ongeval In the case of an emergency stop or d’accident, les objets et personnes kunnen niet vastgezette voorwerpen an accident unsecured persons or non attachés risquent de blesser...
-
Page 6: Fixation Du Dossier
3.1 Fixation du dossier 3.1 Bevestiging van de 3.1 Attaching the backrest rugleuning Le siège enfant se compose d'une Het kinderzitje bestaat uit een The child seat is composed of a seat assise et d'un dossier à appui-tête zitkussen en een rugleuning cushion and a backrest with an... -
Page 7: Réglage En Hauteur De L'appui-Tête
3.2 Réglage en hauteur de 3.2 Instelling van de hoogte 3.2 Adjusting the height of l'appui-tête van de hoofdsteun the headrest Danger ! Le siège enfant ne Gevaar! Als de rugleuning Danger! Do not use the child doit jamais être utilisé non wordt opgeklapt, mag zich in de seat when it is free standing, installé, même pour l’essayer. -
Page 8: Stabilisation Du Dossier
Faites asseoir votre enfant et Laat uw kind in het kinderzitje Have your child sit down in the child contrôlez la hauteur. plaatsnemen en controleer de seat and check the height. Attention ! Renouvelez cette hoogte. Caution! Repeat this process until opération autant de fois que Voorzichtig! Herhaal dit proces the headrest... -
Page 9: Mise En Place De La Ceinture De Votre Enfant
Inclinez à présent le dossier vers Laat vervolgens de rugleuning Now incline the backrest l'arrière jusqu'à ce que l'équerre ver naar achteren leunen totdat de backwards until the displacement s'appuie à plat sur le dossier du afstandshoek vlak tegen de angle lies flat along the back of siège du véhicule. - Page 10 2. Passez la ceinture dans les 2. Autogordel in de rode 2. Inserting the vehicle seat belt guidages rouges du siège enfant. gordelgeleiders van het kinderzitje into the red belt guides of the child leggen. seat. Passez la sangle diagonale et la sangle ventrale du côté...
- Page 11 N'oubliez pas que la sangle Controleer of de diagonale gordel Please also make sure that the diagonale doit passer sur la over het sleutelbeen van uw kind diagonal belt section runs above clavicule de votre enfant, et non loopt en niet vast tegen de hals ligt. your child's collarbone and does not dans son cou.
-
Page 12: Voici Comment Votre Enfant Est Bien Protégé
3.5 Voici comment votre 3.5 Zo is uw kind goed 3.5 Checklist to ensure that enfant est bien protégé beveiligd your child is buckled up correctly Vérifiez, pour la protection de Controleer voor de veiligheid votre enfant, que... van uw kind of... For the safety of your child, please check that... -
Page 13: Nettoyage
Consignes d’entretien Onderhoudshandleiding Care instructions Pour conserver l’efficacité de Voor het behoud van de To retain the protective effect la protection beschermende werking • En cas de collision à une vitesse • Bij ongevallen waarbij de • In an accident at a collision speed supérieure à... -
Page 14: Retrait De La Housse
Le siège auto ne doit pas être Het autokinderzitje mag niet The child seat must not be utilisé sans housse. zonder bekleding worden used without the seat cover. gebruikt. • De bekleding kan worden • La housse peut être enlevée et •... -
Page 15: Remise En Place De La Housse
Défaites les boutonnières Maak de knoopgaten van de Unhook the buttonholes of the l'appui-tête 3. hoofdsteun los. headrest 3. Maintenant vous pouvez retirer la De bekleding kan nu worden You can now pull the cover off. housse. verwijderd. 4.3 Re-fitting the cover 4.3 Remise en place de la 4.3 De bekleding bevestigen housse... -
Page 16: Ans De Garantie
2 ans de garantie 2 jaar garantie 2-year warranty Pour ce siège auto / bicyclette /cette Wij geven 2 jaar garantie op fabricage- For this car/bicycle child seat / poussette, nous accordons une en materiaalfouten in deze pushchair we provide a 2-year garantie de 2 ans pour les défauts de autokinderzitjes/fietskinderzitjes/ warranty against manufacturing or... - Page 17 Fermoir : au cas où le fermoir Slot: Eventuele problemen met het can be washed out. Please refer to présenterait des dysfonctionnements, slot zijn meestal het gevolg van your user instructions. ceux-ci sont souvent dus aux verontreinigingen die kunnen worden Please contact your retailer directly in encrassements qui peuvent être verwijderd door het slot met water te...
-
Page 18: Carte De Garantie / Procès-Verbal De Remise
Carte de garantie / Procès-verbal de remise Procès-verbal de remise : 1. Intégralité contrôlé J’ai contrôlé le siège auto / Nom : ________________________________________________ en ordre bicyclette / la poussette et vérifié qu’ils ont été remis en bon état Adresse : ________________________________________________ et complet, et que toutes les fonctions sont parfaitement... - Page 19 Garantiekaart/overdrachtscontrole Overdrachtscontrole: 1. Volledigheid gecontroleerd Ik heb het autokinderzitje/ Naam: _______________________________________________ in orde het fietskinderzitje/de kinderwagen gecontroleerd Adres: _______________________________________________ en mijzelf ervan overtuigd dat het zitje/de kinderwagen Postcode: _______________________________________________ compleet en volledig 2. Controle van de functionerend aan mij is werking Plaats: _______________________________________________...
-
Page 20: Warranty Card / Transfer Check
Warranty Card / Transfer Check Transfer Check: 1. Completeness examined I have checked the child car/ Name: ____________________________________________ bicycle seat / pushchair and am sure that the seat was Address: ____________________________________________ complete on delivery and that all functions are sound. Post Code: ____________________________________________ 2.