Publicité
Liens rapides
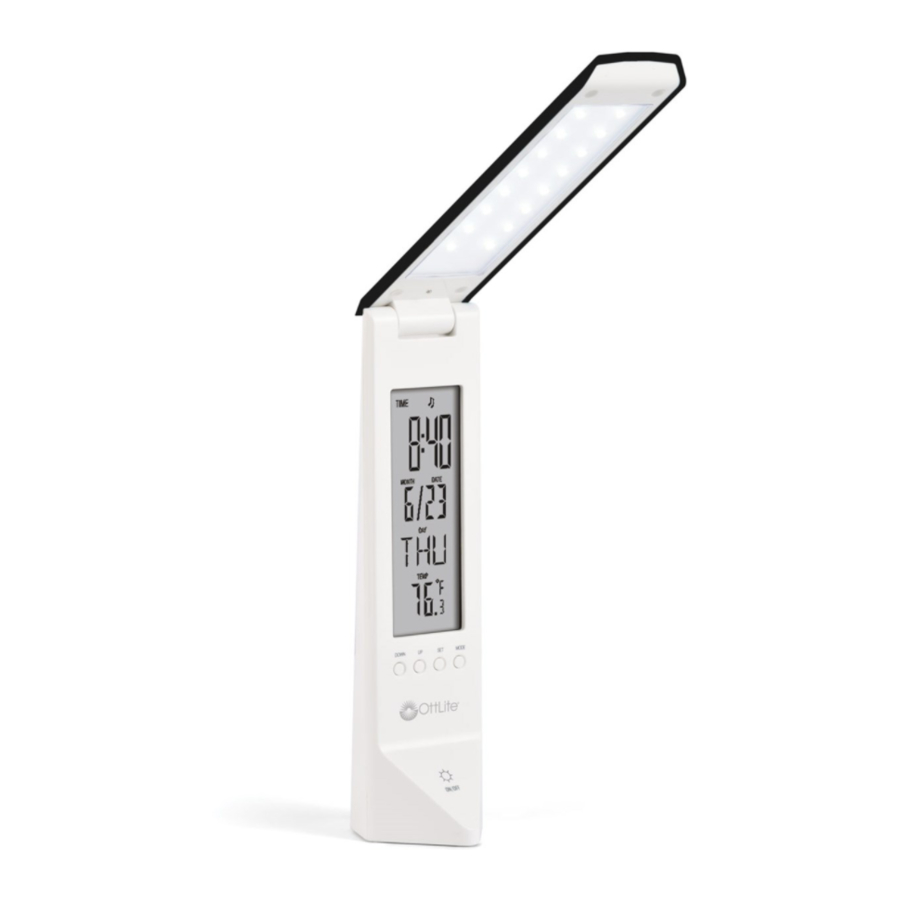
Multi-Function LED Travel Light
2YMWG9
2YMK29
2YM219
2YM809
INS140121
B
C
A
ENGLISH
CONGRATULATIONS! You've purchased the finest in natural lighting
technology with your new OttLite
®
product.
PRODUCT REGISTRATION FORM
Please complete the enclosed Product Registration Form and return it today
by mail, or register online by going to: OttLite.com/warranty.
NOTE: THIS UNIT IS FULLY ASSEMBLED
1. Remove lamp from packing placing lamp body base (A) flat on a steady
surface.
2. To open lamp, hold lamp body base (A) firmly and lift LED Light Source
(B) as needed.
3. Turn the lamp ON & OFF by slightly touching switch (C) located in the front
of lamp body base (A).
4. Charge product using included USB cable or AC adapter.
5. The LED charging indicator located in the lower back of lamp will change
from "RED" to "GREEN" when fully charged.
6. To engage light dimming see "Brightness Control" section.
7. To set calendar and alarm see "Setting Calendar and Alarm" section.
8. To set temperature transfer see "Temperature Transfer" section.
9. To install or remove button cell battery see "Battery Install" section.
BRIGHTNESS CONTROL SETTING:
1. Press switch (C) to turn lamp on. Lamp will be on the brightest setting.
2. To dim brightness to its lowest setting, slightly press and hold switch (C)
until it reaches the lowest setting.
3. To bring light back to full-brightness, slightly press and hold switch (C)
until it reaches the highest setting.
Operation for setting calendar, alarm, temperature transfer,
and battery install
SETTING DATE AND TIME:
1. Under normal mode, press SET key and enter date and time setting mode,
press SET again to enter the next setting. The sequence of setting is:
HOUR-MINUTE-YEAR-MONTH-DAY-BACK.
2. Press UP and DOWN setting, the day of the week will vary accordingly.
3. Under setting mode, press MODE key or no operation in 60 seconds will
back from set mode, and display the time.
4. Under normal mode, press UP transfer 12 and 24 hours format.
5. A CR2025, 3V Lithium battery is needed to power calendar.
SNOOzE ALARM FUNCTION
1. Under normal mode, press MODE enter alarm mode.
2. Under alarm mode, press "SET" enter alarm setting, press "SET" again
and enter the next setting, the sequence of setting is the following:
HOUR-MINUTE-SNOOZE-MUSIC-BACK.
3. Press UP and DOWN key to set.
4. Under alarm mode, press UP and DOWN to open and close the function
of alarm & snooze function, press it again and enter the next function in
sequence, OPEN the alarm-open the snooze-close alarm and snooze.
HZ-718
Multi-Function LED Travel Light
5. When "alarm time" is reached, the alarm will last 1 minute, snooze time
reach, alarm will ring again, press "SET" key or any button can stop alarm.
Temperature Transfer and Battery installation
1. Under normal mode, press DOWN key transfer Celsius and Fahrenheit.
2. To remove/install button cell battery: pull battery compartment door
located in the lamp body base (A) until the full battery can be seen. Push
battery upward to remove. Button cell battery is to be installed with the
"+" or flat side facing upward.
NOTE: The important safety instructions appearing in this instruction sheet
are not meant to cover all possible conditions and situations that may occur.
It must be understood that common sense, caution, and care must be used
with any electrical product.
Caution! Any change or modification to product not expressly
recognized by OttLite Technologies voids OttLite's responsibility
for proper function of product.
FCC Part 15
NOTE: This equipment has been tested and found to comply with the
limits for a Class B digital device, pursuant to Part 15 of the FCC rules.
These limits are designed to provide reasonable protection against harmful
interference in a residential installation. This equipment generates, uses
and can radiate radio frequency energy and, if not installed and used in
accordance with the instructions, may cause harmful interference to radio
communications. However, there is no guarantee that the interference will
not occur in a particular installation. If this equipment does cause harmful
interference to radio or television reception, which can be determined by
turning the equipment off and on, the user is encouraged to try to correct
the interference by one or more of the following measures:
• Reorient or relocate the receiving antenna.
• Increase the separation between the equipment and receiver.
• Connect the equipment into an outlet on a circuit different from
that of the receiver.
• Consult the dealer or an experienced radio/TV technician for help.
This Class B digital apparatus complies with Canadian
ICES-003.
Specifications
USB: 5V, 500mA / Input power: 5V, 500mA
Built-in Lithium Battery: 3.7V / 600mAh
Power for calendar: Button cell CR2032 / 3V
AC/DC Adaptor: Input: 100-240V, 50/60 Hz, 0.3A / Output: 5.0V DC, 500mA
Accessories:
• USB cord
• AC Adaptor
REV063014
Publicité

Manuels Connexes pour OttLite 2YMWG9


Sommaire des Matières pour OttLite 2YMWG9
- Page 1 1. Under normal mode, press DOWN key transfer Celsius and Fahrenheit. Please complete the enclosed Product Registration Form and return it today by mail, or register online by going to: OttLite.com/warranty. 2. To remove/install button cell battery: pull battery compartment door located in the lamp body base (A) until the full battery can be seen.
- Page 2 6. Pour activer la gradation de l’éclairage, voir la section « Contrôle de la luminosité ». 6. Para regular la intensidad de la luz, consulte la sección “Control de la luminosidad” expressément approuvé par OttLite Technologies peut faire annuler la garantie ¡Cuidado! Cualquier cambio o modificación al producto que no sea expresamente 7.