Chapitres
Table des Matières

Manuels Connexes pour Medion AKOYA P55005


Sommaire des Matières pour Medion AKOYA P55005
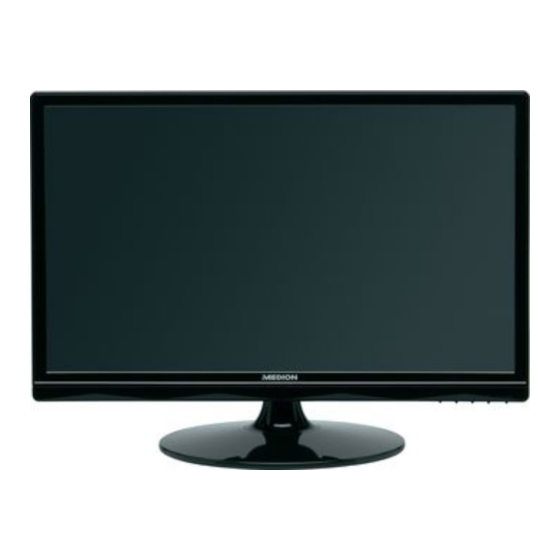
- Page 1 59,9 cm / 23,6" Wide Screen Multimedia Monitor MEDION AKOYA ® ® P55005 (MD 20120) MUSTER Bedienungsanleitung Instruction Manual Mode d'emploi Manual de instrucciones Istruzioni per l'uso Handleiding...
-
Page 2: Table Des Matières
Inhalt Hinweise zu dieser Anleitung ....................2 Unsere Zielgruppe ............................2 Die Qualität ..............................2 Der Service ..............................2 Bestimmungsgemäßer Gebrauch ....................2 Lieferumfang ........................2 Sicherheitshinweise ......................3 Betriebssicherheit ............................3 ... -
Page 3: Hinweise Zu Dieser Anleitung
Hinweise zu dieser Anleitung Lesen Sie unbedingt diese Anleitung aufmerksam durch und befolgen Sie alle aufgeführten Hinweise. So gewährleisten Sie einen zuverlässigen Betrieb und eine lange Lebenserwartung Ihres TFT-Bildschirms. Halten Sie diese Anleitung stets griffbereit in der Nähe Ihres TFT-Bildschirms. Bewahren Sie die Bedienungsanleitung gut auf, um sie bei einer Veräußerung des TFT-Bildschirms dem neuen Besitzer weiter geben zu können. -
Page 4: Sicherheitshinweise
Sicherheitshinweise Betriebssicherheit Lassen Sie Kinder nicht unbeaufsichtigt an elektrischen Geräten spielen. Kinder können mögliche Gefahren nicht immer richtig erkennen. Halten Sie das Verpackungsmaterial, wie z.B. Folien von Kindern fern. Bei Missbrauch könnte Erstickungsgefahr bestehen. Öffnen Sie niemals das Gehäuse des TFT-Bildschirms (elektrischer Schlag, Kurzschluss und Brandgefahr)! ... -
Page 5: Reparatur
Reparatur Überlassen Sie die Reparatur Ihres TFT-Bildschirms ausschließlich qualifiziertem Fachpersonal. Im Falle einer notwendigen Reparatur wenden Sie sich bitte ausschließlich an unsere autorisierten Servicepartner. Vorgesehene Umgebung Der TFT-Bildschirm kann bei einer Umgebungstemperatur von 0° C bis +40° C und bei einer relativen Luftfeuchtigkeit von <... -
Page 6: Normen / Elektromagnetische Verträglichkeit
Normen / Elektromagnetische Verträglichkeit Der TFT-Bildschirm erfüllt die Anforderungen der elektromagnetischen Kompatibilität und elektrischen Sicherheit der folgenden Bestimmungen: EN 55022:2006 Einrichtungen der Informationstechnik Funkstörungen - Grenzwerte und Messverfahren EN 55024:1998 + Einrichtungen der Informationstechnik - Störfestigkeitseigenschaften - Grenzwerte und Prüfverfahren A1:2001 + A2:2003 Elektromagnetische Verträglichkeit (EMV);... -
Page 7: Vorbereitungen An Ihrem Pc
Vorbereitungen an Ihrem PC Wenn Sie an Ihrem Computer bisher einen Röhrenmonitor betrieben haben, müssen Sie ggf. einige Vorbereitungen treffen. Dies ist dann erforderlich, wenn Ihr bisheriger Monitor mit Einstellungen betrieben wurde, die von Ihrem neuen TFT-Bildschirm nicht unterstützt werden. Unterstützte Bildschirmeinstellungen Dieser TFT-Bildschirm unterstützt folgende Modi. -
Page 8: Windows Xp: Eigenschaften Von Anzeige
Windows XP: Eigenschaften von Anzeige Dieses Windows-Programm bietet Ihnen die Möglichkeit, die Darstellung auf Ihrem Bildschirm anzupassen. Dazu gehören z. B. das Hintergrundbild, der Bildschirmschoner, der Active Desktop (Web) sowie weiterführende Einstel- lungen Ihres Bildschirms und der Grafikkarte. Das Programm kann wie folgt gestartet werden: ... -
Page 9: Windows Vista : Anzeigeeinstellungen
® Windows Vista : Anzeigeeinstellungen Unter Windows Vista® nehmen Sie Bildschirmanpassungen in der "Systemsteuerung" unter "Darstellung und Sound" vor. Das Programm kann folgendermaßen gestartet werden: Rechter Mausklick auf die Windowsarbeitsfläche (Desktop) und linker Mausklick auf "Anpassen". oder Über "Start" "Systemsteuerung" "Darstellung und Sound anpassen"... -
Page 10: Audio-Kabel Anschließen
2 Audio-Kabel anschließen Stecken Sie das Audio Kabel in die passenden Audiobuchsen am Computer und am TFT-Bildschirm ein. 3 Stromversorgung anschließen Verbinden Sie nun das eine Ende des mitgelieferten Netzkabels mit dem TFT-Stromversorgungsanschluss und anschließend das andere Ende mit einer passenden Steckdose. Die Netzsteckdose muss sich in der Nähe des TFT-Bildschirms befinden und leicht erreichbar sein. -
Page 11: Bedienelemente Vorderseite
Bedienelemente Vorderseite (Abb.: Vorderseite Bedienelemente) Ref. Taste Beschreibung Mit dieser Taste starten Sie das OSD (On Screen Display). Drücken Sie diese Taste, wenn Sie das OSD verlassen möchten. Power Sperre, bei nicht aktiviertem OSD OSD Sperre, bei nicht aktiviertem OSD Um die Sperrung zu aktivieren/deaktivieren halten Sie die Tastenkombinationen so lange, bis der angezeigte Balken komplett von links nach rechts gewandert ist. -
Page 12: Tft-Bildschirm Einstellen
TFT-Bildschirm einstellen Das On Screen Display (kurz: OSD) ist ein Menü, das über den TFT-Bildschirm kurzzeitig eingeblendet wird. Über das OSD-Menü können Sie bestimmte Parameter des TFT-Bildschirms einstellen. OSD-Menü bedienen Drücken Sie die Taste , um das OSD zu aktivieren. Mit den Funktionswahltasten /... - Page 13 Menüpunkt Funktion / Untermenü Autom. Anpassung (Auto Adjust) : Stellt Horizontal- und Vertikal-Position, Phase (Feineinstellung) und Takt (H-Größe) automatisch ein. Kontrast (Contrast) : Zur Einstellung des Bildkontrastes. Helligkeit (Brightness) : Zum Anpassen der Helligkeit des Bildes. DCR : Hier können Sie die DCR-Funktion (dynamischer Kontrast) ein- und ausschalten. ECO: ECO ein-und ausschalten.
-
Page 14: Stromsparvorrichtungen
Menü Einstellungen (Setup Menu): Sprache, OSD-Position, OSD Einblendzeit ein. Sprache (Language Select): Ermöglicht dem Benutzer, aus vorhandenen Sprachen auszuwählen. OSD Position (OSD Position): Horizontale und vertikale Einstellung der OSD- Position. H.Lage: Zur horizontalen Einstellung der OSD-Position. V.Lage : Zur vertikalen Einstellung der OSD-Position. OSD Einblendzeit (OSD Time Out): Zum automatischen Abschalten des On Screen Displays (OSD) nach Ablauf einer voreingestellten Zeitspanne. -
Page 15: Fehler Und Mögliche Ursachen
Für die Funktion Ihres Monitors ist keine Treiberinstallation erforderlich. Sollte das Betriebssystem Sie dennoch zu einer Eingabe des Monitortreibers auffordern, können Sie die Treiberprogrammdatei von der unten aufgeführten Internetseite herunterladen. Die Treiberinstallation kann sich je nach Betriebssystem unterscheiden. Folgen Sie den spezifischen Anweisungen für ihr Betriebssystem. www.medion.com Deutsch... -
Page 16: Benötigen Sie Weitere Unterstützung
Benötigen Sie weitere Unterstützung? Wenn die Vorschläge in den vorangegangenen Abschnitten ihr Problem nicht behoben haben, nehmen Sie bitte Kontakt mit uns auf. Sie würden uns sehr helfen, wenn Sie uns folgende Informationen zur Verfügung stellen: Wie sieht Ihre Rechnerkonfiguration aus? ... -
Page 17: Technische Daten
Diese waren aber zumeist sehr kompliziert und von Hersteller zu Hersteller völlig unterschiedlich. MEDION folgt daher für alle TFT-Display-Produkte bei der Garantieabwicklung den strengen und transparenten Anforderungen der Norm ISO 13406-2, Klasse II; welche im Folgenden kurz zusammengefasst sind. -
Page 18: Vervielfältigung Dieses Handbuchs
Form ohne die schriftliche Genehmigung des Herstellers ist verboten. Copyright © 2011 Alle Rechte vorbehalten. Dieses Handbuch ist urheberrechtlich geschützt. ® Das Copyright liegt bei der Firma Medion Warenzeichen: ® ® ® MS-DOS und Windows sind eingetragene Warenzeichen der Fa. - Page 19 Deutsch...
- Page 20 Contents Information about these instructions ..................2 Target group ..............................2 Quality ................................2 Service ................................2 Use in accordance with regulations ................... 2 Scope of supply ........................2 Safety information ........................ 3 ...
-
Page 21: Information About These Instructions
We are proud to have produced a TFT monitor that will provide pleasure when used in a business or pleasure application. We would like to thank you for your purchase and look forward to welcoming you again as a Medion customer. Service We are here to support you in your daily use of this monitor. -
Page 22: Safety Information
Safety information Safety in operation Do not allow children to play with electrical devices without supervision. Children can not always recognise possible dangers correctly. Keep the packaging materials, such as plastic film, away from children. The danger of suffocation could arise in the case of misuse. -
Page 23: Repair
Repair Leave the repair of your TFT monitor exclusively to qualified specialist personnel. Please contact our authorised Service Partners exclusively in the case of a necessary repair. Intended environment The TFT monitor can be operated at a surrounding temperature from 0° C to +40° C and at a relative ambient moisture level of <... -
Page 24: Norms / Electromagnetic Compatibility
Norms / Electromagnetic compatibility The TFT monitor fulfils the requirements for electromagnetic compatibility and electrical safety of the following regulations: EN 55022:2006 Information technology equipment, interference – Limiting values and measuring procedure EN 55024:1998 + Information technology equipment – Characteristics resisting interference - Limiting values and test procedure A1:2001 + A2:2003... -
Page 25: Preparation Of Your Pc
Preparation of your PC You will possibly have to make some preparations if you have operated a CRT monitor with your computer in the past. This will be necessary if your current monitor is operated with settings that are not supported by your new TFT monitor. -
Page 26: Windows Xp: Display Characteristics
Windows XP: Display Characteristics This Windows control panel interface offers the ability to adjust the setting of the desktop representation to your monitor and the graphics card. The program can be started as follows: Right mouse-click on the Windows interface (Desktop) and left mouse-click on „Characteristics“. ... -
Page 27: Windows Vista: Display Settings
Windows Vista: Display Settings Make the screen settings under ‘Display and Sound’ in ‘System Control’ under Windows Vista®. The program can be started by means of the following steps: Right mouse click on the Windows interface (Desktop) and left mouse click on "Adjust". ... -
Page 28: Connect The Power Supply
3 Connect the power supply Now connect one end of the mains cable supplied with the device to TFT power supply connection and then the other end to an appropriate socket. The mains socket must be in the vicinity of the TFT monitor and be easily accessible (use the same electricity circuit as for the PC). -
Page 29: Front Operating Elements
Front Operating elements (Ill.: Front operating elements) Ref. Button Description You will start the OSD (On Screen Display) with this button. Press this button again if you wish to leave the OSD. Power block, when the OSD is not activated ... -
Page 30: Operating The Osd Menu
Operating the OSD menu Press the button, in order to activate the OSD. Select the options from the Main Menu with the / function selection buttons. Confirm your selection with the button. Press the button, in order to leave the OSD. Information The OSD will be faded out automatically if you have not operated any button on the TFT monitor for the pre-set time. - Page 31 Menu point Function / sub-menu Automatic adjustment (Auto Adjust): Sets the horizontal and vertical position, phase (fine tune) and clock cycle (H size) automatically. Contrast (Contrast): Sets the white value of the monitor foreground. Brightness (Brightness): To adjust the brightness of the video. DCR: You can switch the DCR function (dynamic contrast) on and off here.
-
Page 32: Energy-Saving Properties
Setup menu (Setup Menu): Set the language, OSD position and OSD time out. Language (Language Select): Enables the user to select between the available languages. OSD position (OSD Position): Horizontal and vertical setting of the OSD position. H. position: For the horizontal setting of the OSD position. V. -
Page 33: Faults And Possible Causes
You will be able to download the driver program file from the internet website listed below if the operating system nevertheless requests the installation of a monitor driver. The installation of a driver can differ according to the operating system. Follow the specific instructions for your operating system. www.medion.com English... -
Page 34: Do You Need Further Support
Do you need further support? Please contact us if the suggestions in the above sections have not solved your problem. It would help us very much if you make the following information available to us: What is your computer's configuration? ... -
Page 35: Technical Data
MEDION follows the strict and transparent requirement of the ISO 13406-2, Class II Norm, which are summarised in brief in the following, in the handling of guarantees for all TFT display products for this reason. - Page 36 Types of pixel error: Type 1: Pixels shining for a long time (bright, white point), although not activated. A white pixel arises because of the illumination of all three sub-pixels. Type 2: Pixels not shining (dark, black point), although activated ...
-
Page 37: Reproduction Of This Handbook
Copyright © 2011 All rights reserved. This Handbook is protected by copyright. ® The copyright is the property of the Medion Company. Trademark: ® ® ®... - Page 38 Sommaire Remarques concernant ce mode d'emploi ................... 2 Notre groupe cible ............................2 La qualité ..............................2 Service ................................2 Usage conforme ........................2 Inventaire de la livraison ......................2 Conseils de sécurité ....................... 3 ...
-
Page 39: Remarques Concernant Ce Mode D'emploi
Remarques concernant ce mode d'emploi Veuillez lire ce chapitre attentivement et respectez toutes les consignes et remarques indiquées. Vous garantissez ainsi un fonctionnement fiable et une longue durée de vie à votre écran à cristaux liquides TFT. Conservez ce mode d'emploi toujours à portée de la main, près de votre écran à cristaux liquides TFT. Conservez ce mode d'emploi afin de pouvoir le remettre, en cas de vente de votre écran à... -
Page 40: Conseils De Sécurité
Conseils de sécurité Sécurité de fonctionnement Ne laissez pas jouer les enfants sans surveillance avec les appareils électriques. Les enfants ne sont pas toujours en mesure de reconnaître un danger éventuel. Conservez les emballages, comme par ex. les plastiques, hors de portée des enfants. Un mauvais usage peut engendrer un risque d’étouffement. -
Page 41: Réparation
Réparation La réparation de votre écran à cristaux liquides TFT doit uniquement être exécutée par du personnel spécialisé et qualifié. Lorsqu'une réparation est nécessaire, veuillez vous adresser exclusivement à nos partenaires de service autorisés. Environnement prévu L'écran à cristaux liquides TFT peut être exploité à une température ambiante de 0° C à +40° C et une humidité... -
Page 42: Normes / Compatibilité Électromagnétique
Normes / compatibilité électromagnétique L'écran à cristaux liquides TFT remplit les exigences de la compatibilité électromagnétique et de la sécurité électrique des prescriptions suivantes : EN 55022:2006 Limites et méthodes de mesure des caractéristiques des interférences radio produites par les équipements informatiques. EN 55024:1998 + Équipement de technologie de l’information –... -
Page 43: Préparatifs Sur Votre Pc
Préparatifs sur votre PC Si jusqu'à présent, vous aviez raccordé à votre ordinateur un écran à tube, vous devez éventuellement faire quelques préparatifs. Ceci est nécessaire lorsque votre ancien moniteur a été exploité avec des réglages qui ne sont pas assistés par votre nouvel écran à cristaux liquides TFT. Réglages d'écran assistés Cet écran à... -
Page 44: Windows Xp: Propriétés De L'affichage
Windows XP: Propriétés de l'affichage Ce programme Windows vous offre la possibilité d'adapter la représentation à votre écran. En font partie p. ex. l'image de fond, l’économiseur d'écran, l'Active Desktop (Web) ainsi que les réglages étendus de votre écran et de la carte graphique. -
Page 45: Windows Vista : Réglages De L'affichage
Windows Vista : réglages de l'affichage Sous Windows Vista®, vous pouvez régler l’affichage dans le Panneau de configuration à partir de la catégorie Apparence et personnalisation. On peut ouvrir le programme de la façon suivante : clic droit sur le Bureau de Windows et clic gauche sur Personnaliser. -
Page 46: Raccordement Du Câble Audio
2 Raccordement du câble audio Branchez le câble audio dans les prises adéquates de l’ordinateur. 3 Raccordement au secteur Branchez le câble d’alimentation électrique dans la prise de l’écran à cristaux liquides et branchez l’autre extrémité à la prise de courant la plus proche. La prise de courant doit se trouver à proximité de votre écran à... -
Page 47: Eléments De Commande
Eléments de commande (Ill.: partie de face : éléments de commande) Réf. Touche Description Cette touche permet d'afficher l'OSD (On Screen Display). Appuyez sur cette touche pour quitter l'OSD. Verrouillage Power, lorsque l'OSD n'est pas activé Verrouillage OSD, lorsque l'OSD n'est pas activé Pour activer/désactiver le verrouillage, maintenez les touches enfoncées jusqu’à... -
Page 48: Réglage De L'écran À Cristaux Liquides Tft
Réglage de l'écran à cristaux liquides TFT Le menu OSD (On Screen Display) vous permet de régler certains paramètres de l'écran à cristaux liquides TFT. Utilisation du menu OSD Appuyez sur la touche , pour activer l’ OSD. Les touches de sélection de fonction / vous permettent de sélectionner les options du menu principal. - Page 49 Option de Fonction / Sous-menu menu Réglage automatique (Auto Adjust) : définit automatiquement le positionnement horizontal et vertical, la phase (ajustement) et la vitesse d'horloge (taille H). Contraste (Contrast) : définit la valeur des blancs de l'avant-plan de l'écran. Luminosité (Brightness) : pour l'adaptation de la luminosité de la vidéo. DCR : vous pouvez ici désactiver / activer la fonction DCR (contraste dynamique).
-
Page 50: Dispositifs D'économie D'énergie
Configuration (Setup Menu) : langue, positionnement de l'OSD, durée d'affichage de l'OSD. Langue (Language Select) : permet à l'utilisateur de sélectionner une des langues disponibles. Position de l'OSD (OSD Position) : appuyez sur la touche 2 pour choisir entre le réglage horizontal et vertical du positionnement de l'OSD. Position H. -
Page 51: Erreurs Et Causes Possibles
Si toutefois le système d’exploitation vous invitait à sélectionner un pilote de moniteur, vous pouvez télécharger le fichier du pilote à partir du site Internet indiqué ci-dessous. L’installation du pilote peut se faire de différentes façons suivant le système d’exploitation. Suivez les instructions correspondant à votre système. www.medion.com Français... -
Page 52: Avez-Vous Besoin D'une Assistance Supplémentaire
Avez-vous besoin d'une assistance supplémentaire ? Lorsque les suggestions des paragraphes ci-dessus n'ont pas permis de résoudre votre problème, veuillez nous contacter. Dans ce cas, nous vous remercions par avance de bien vouloir nous fournir les informations suivantes : Quelle est la configuration de votre ordinateur ? ... -
Page 53: Informations Techniques
étaient généralement très compliquées et variaient fortement d’un fabricant à l’autre. C’est la raison pour laquelle MEDION, en matière de garantie, se conforme aux exigences strictes et transparentes de la norme ISO 13406-2, classe II pour tous les écrans TFT. Ces exigences se résument comme suit: La norme ISO 13406-2 propose entre autres une définition des caractéristiques relatives aux erreurs de... -
Page 54: Reproduction Du Présent Manuel
Types d’erreur de pixels: Type 1: pixel allumé en permanence (point clair, blanc) alors qu’il n’est pas activé. Un pixel devient blanc lorsque les trois sous-pixels sont allumés. Type 2: pixel éteint (point sombre, noir) alors qu’il est activé ... - Page 55 Copyright © 2011 Tous droits réservés. Tous droits d'auteur du présent manuel réservés. Le Copyright est la propriété de la société Medion®. Marques déposées : MS-DOS® et Windows® sont des marques déposées de l'entreprise Microsoft®. Pentium® est une marque déposée de l'entreprise Intel®.
- Page 56 Contenido Notas sobre estas instrucciones ....................2 Grupo al que van dirigidas ..........................2 Calidad ................................. 2 Servicio técnico ............................. 2 Utilización prevista ............................2 Equipo incluido ........................2 Instrucciones de seguridad ...................... 3 ...
-
Page 57: Notas Sobre Estas Instrucciones
Notas sobre estas instrucciones Lea con detenimiento esta sección y siga todas las instrucciones dadas. De esta forma garantizará un funcionamiento fiable y una larga duración a su monitor. Mantenga siempre estas instrucciones a mano y cerca de su monitor. Mantenga este manual de instrucciones y el embalaje en lugar seguro de forma que en caso de que venda su PC pueda entregárselos al nuevo propietario. -
Page 58: Instrucciones De Seguridad
Instrucciones de seguridad Seguridad en el funcionamiento No permita que los niños jueguen sin ser observados con equipos eléctricos. Los niños no siempre reconocen correctamente el peligro. Mantenga el material de embalaje como, por ejemplo, los plásticos fuera del alcance de los niños. Su uso indebido podría causar asfixia. -
Page 59: Reparaciones
Reparaciones Deje todas las reparaciones de este monitor LCD en manos sólo de personal de servicio autorizado y cualificado. En caso de necesitar reparación, consulte únicamente con servicios asociados. Utilización prevista El monitor LCD puede utilizarse a una temperatura ambiente entre 0º C y 40º C y con una humedad relativa de entre el 20% y el 80% (sin condensación). -
Page 60: Estándares/Compatibilidad Electro-Magnética
Estándares/Compatibilidad electro-magnética Su monitor LCD cumple con los requisitos para la compatibilidad electro-magnética y seguridad eléctrica especi- ficados en los siguientes estándares: Equipos de tecnología de la información – Características de las perturbaciones EN 55022:2006 radioeléctricas – Límites y métodos de medida EN 55024:1998 + Equipos de tecnología de la información –... -
Page 61: Preparaciones En Su Ordenador
Preparaciones en su ordenador Si ha utilizado el ordenador con otro monitor, quizá sea necesario realizar algunas preparaciones. Se requiere cuando su monitor anterior funcionaba con una configuración no soportada por este nuevo monitor LCD. Configuraciones soportadas Este monitor LCD soporta los siguientes modos. Resolución Frecuencia horizontal Frecuencia vertical... -
Page 62: Windows Xp: Propiedades De Pantalla
Windows XP: Propiedades de pantalla Este programa de Windows le ofrece la posibilidad de adaptar la pantalla de su monitor. Incluye elementos tales como la imagen de fondo, el salvapantallas, el Escritorio activo (Web) así como otros parámetros para su monitor y su tarjeta de vídeo. -
Page 63: Windows Vista: Configuración De Pantalla
Windows Vista: Configuración de pantalla En Windows Vista®, ajuste la configuración de la pantalla en "Configuración del Sistema" y en "Imagen y Sonido". El programa puede iniciarse de varias formas, como sigue: Haciendo clic con el botón derecho del ratón en el escritorio Windows (Desktop) y haciendo clic con el botón izquierdo del ratón en "Ajustar". -
Page 64: Conexión Del Cable De Audio
2 Conexión del cable de audio Conecte el cable de sonido por medio del correspondiente conector de sonido al ordenador y al monitor LCD. 3 Conexión del cable de suministro de red Enchufe el cable de alimentación de corriente en el enchufe de alimentación de corriente de la pantalla LCD y conéctelo en un enchufe cercano a la pantalla LCD (mismo tipo de corriente). -
Page 65: Vistas Y Elementos De Control
Vistas y Elementos de Control (Fig.: Elementos de control) Ref. Tecla Descripción Con esta tecla, se enciendo el OSD (On Screen Display, Imagen en pantalla). Pulse esta tecla si desea abandonar el modo OSD. Bloqueo de energía, con OSD desactivado ... -
Page 66: Cambio De La Representación En Pantalla
Cambio de la representación en pantalla On Screen Display (acrónimo: OSD) es un menú accesible en la pantalla TFT. Con el menú OSD puede configurar determinados parámetros de la pantalla TFT. Utilizar el OSD Pulse la Tecla , para activar el OSD. Con las Teclas de selección /... - Page 67 Punto del Función / Submenú menú Ajuste automático (Auto Adjust): Ajusta las posiciones horizontal y vertical, la fase (sintonización) y el tacto (Tamaño H) automáticamente. Contraste (Contrast): Ajusta el valor del blanco del fondo de la pantalla. Claridad (Brightness): Para ajustar la claridad de la imagen. DCR: Aquí...
-
Page 68: Ahorro De Energía
Configuración del menú (Setup Menu): idioma, posición OSD, tiempo de desaparición de OSD. Idiomas (Language Select): Permite al usuario seleccionar idiomas preestablecidos. Posición OSD (OSD Position): Ajuste horizontal y vertical de la posición OSD. Posición H: Para ajustar horizontalmente la posición OSD. Posición V: Para ajustar verticalmente la posición OSD. -
Page 69: Errores Y Causas Posibles
Errores y causas posibles No aparece nada en el monitor: Compruebe: Suministro de energía eléctrica: el cable de alimentación tiene que estar fijamente colocado en la hembrilla y el interruptor tiene que estar encendido. Fuente de la señal: asegúrese que la fuente de señal (su ordenador, ...) esté encendida y que el cable de conexión esté... -
Page 70: Información Del Controlador
La instalación del controlador es diferente según el sistema operativo. Siga las indicaciones concretas para su sistema operativo. www.medion.com ¿Necesita más ayuda? Si las sugerencias que le damos en los capítulos anteriores no solucionan su problema, póngase en contacto con nosotros. -
Page 71: Especificación Técnica
En el pasado había muy variadas maneras para definir el error de pixel permitido. Sin embargo, éstos eran generalmente muy complicados y muy diferentes entre los distintos fabricantes. MEDION se ocupa de todos los productos con pantalla TFT con el desarrollo de la garantía de las necesidades estrictas y transparentes de la norma ISO 13406-2, clase II que se resumen brevemente en los siguientes: El estándar ISO 13406-2 define entre otras cosas las guías generalmente válidas en relación con los errores de... - Page 72 Estructura del Pixel: Líneas azul verde rojo Tipos de fallos de Pixel: Tipo 1: pixel luminoso largo tiempo (punto blanco, claro) pero no dirigido. El pixel blanco es el resultado de la luz de tres sub-pixel. Tipo 2: pixel no luminoso (punto negro, oscuro) pero dirigido ...
-
Page 73: Realizar Copias De Este Manual
Copyright © 2011 Reservados todos los derechos. Este manual está protegido por las leyes correspondientes. ® Copyright © de Medion Marcas registradas: ® ® ®... - Page 74 Contenuto Indicazioni relative alle presenti istruzioni .................. 2 Destinatari del prodotto ..........................2 La qualità ..............................2 L’assitenza ..............................2 Utilizzo conforme alle norme ....................2 Contenuto della confezione ..................... 2 Istruzioni per la sicurezza ....................... 3 ...
-
Page 75: Indicazioni Relative Alle Presenti Istruzioni
Indicazioni relative alle presenti istruzioni Leggere attentamente le presenti istruzioni e attenersi a tutte le indicazioni riportate. In questo modo si garantirà un funzionamento affidabile e una lunga durata dello schermo TFT. Tenere le presenti istruzioni sempre a portata di mano vicino allo schermo TFT. Custodire bene le istruzioni per l’uso, in modo da poterle passare al nuovo possessore in caso di vendita dello schermo TFT. -
Page 76: Istruzioni Per La Sicurezza
Istruzioni per la sicurezza Sicurezza di funzionamento Non lasciare giocare i bambini con gli apparecchi elettrici senza la dovuta sorveglianza. I bambini non possono sempre riconoscere correttamente i possibili pericoli. Tenere fuori dalla portata dei bambini il materiale d’imballaggio, come ad es. le pellicole. In caso di manomissione si può... -
Page 77: Riparazione
Riparazione Fare eseguire la riparazione dello schermo TFT solo ed esclusivamente a personale qualificato. In caso sia necessario eseguire una riparazione, rivolgersi solo ed esclusivamente al nostro centro assistenza autorizzato. Ambiente idoneo Lo schermo TFT può funzionare a una temperatura ambiente compresa tra 0° C e +40° C e a un’umidità relativa di <... -
Page 78: Norme / Compatibilità Elettromagnetica
Norme / Compatibilità elettromagnetica Lo schermo TFT soddisfa i requisiti della compatibilità elettromagnetica e della protezione elettrica delle seguenti disposizioni: EN 55022:2006 dispositivi di tecnologia della trasmissione di informazioni - radiodisturbi - valori limite e metodo di misurazione EN 55024:1998 + dispositivi di tecnologia della trasmissione di informazioni –... -
Page 79: Fasi Preliminari Per Il Collegamento Al Pc
Fasi preliminari per il collegamento al PC Se finora è stato fatto funzionare il monitor tubolare collegato al computer, si dovranno allora eseguire alcune operazioni preliminari. Ciò sarà necessario, se il monitor è stato fatto funzionare finora con delle impostazioni che non vengono supportate dal nuovo schermo TFT. -
Page 80: Windows Xp: Proprietà Impostazioni
Windows XP: Proprietà impostazioni Questo programma di Windows offre la possibilità di adattare queste impostazioni al proprio schermo. Tra queste rientrano ad esempio l’immagine di sfondo, lo screen saver, l’active desktop (web), nonché ulteriori impostazioni dello schermo e della scheda grafica. Il programma può... -
Page 81: Windows Vista: Impostazioni Di Visualizzazione
Windows Vista: Impostazioni di visualizzazione Sotto a Windows Vista® eseguire gli adattamenti dello schermo nel "controllo del sistema" sotto a "visualizzazione e suono". Il programma può essere avviato nel modo seguente: Cliccare con il tasto destro del mouse su area di supporto per Windows (desktop) e con il tasto sinistro del mouse su "Adattamento". -
Page 82: Cavo Audio Collegare
2 Cavo audio collegare Inserire il cavo audio nelle prese audio corrispondenti del computer e dello schermo TFT. 3 Collegare l’alimentazione Collegare ora un’estremità del cavo di rete fornito con la presa di alimentazione di TFT e successivamente l’altra estremità... -
Page 83: Elementi Di Regolazione
Elementi di regolazione (Fig: Elementi di regolazione del lato anteriore) Rif. Tasto Descrizione Con questo tasto si avvia OSD (“on screen display”). Premere questo tasto, se si desidera uscire da OSD. Blocco power se OSD non è attivato Blocco OSD se OSD non è... -
Page 84: Schermo Tft Impostare
Schermo TFT impostare “On screen display” (abbreviato: OSD) è un menu che si sovrappone per alcuni instanti allo schermo TFT. Tramite il menu OSD è possibile impostare determinati parametri per lo schermo TFT. Comandi del menu OSD Premere il tasto , per attivare OSD. - Page 85 Punto menu Funzione / Sottomenu Regolazione automatica (Auto Adjust): Regola automaticamente la posizione orizzontale e verticale, la fase (regolazione di precisione) e il clock (formato H). Contrasto (Contrast): Regola il livello del bianco del primo piano dello schermo. Luminosità (Brightness): Per regolare la luminosità del video. DCR: Qui è...
-
Page 86: Dispositivi Per Il Risparmio Di Corrente
Modalità colore ottico (OptiColor Mode): offre un ambiente di visualizzazione ottimale corrispondente al contenuto visualizzato. È possibile selezionare fino a 5 preimpostazioni. Standard è adatto per ambienti Windows e per le impostazioni standard del monitor. Giochi è ottimale per i giochi PC/TV. Video è... -
Page 87: Localizzare La Causa
Localizzare la causa A volte i malfunzionamenti possono avere delle cause banali, ma a volte possono essere anche causati da componenti difettosi. Inoltre è stato messo a disposizione un manuale per risolvere il problema. Se le misure, qui indicate, non danno alcun risultato positivo, restiamo a disposizione per qualsiasi necessità. Contattateci! Verifica dei collegamenti e dei cavi Iniziare con un attento controllo di tutti gli allacciamenti dei cavi. -
Page 88: Informazioni Sul Driver
L’installazione del driver potrà essere diversa a seconda del sistema operativo. Seguire le istruzioni specifiche del sistema operativo. www.medion.com Necessità di ulteriore supporto? Se i consigli riportati nelle sezioni precedenti non hanno consentito di risolvere il problema, ci contatti direttamente. -
Page 89: Dati Tecnici
Dati tecnici Model MD 20120 Dimensione dello schermo 59,9 cm (23,6”), TFT Rapporto tra altezza e larghezza 16:10 Tensione nominale AC 100-240 V ~ 50/60 Hz Corrente nominale 1,8 A Consumo di corrente (stand-by) meno di 1 Watt ... -
Page 90: Pixel Non Conformi Negli Schermi Tft
Pertanto MEDION si attiene per tutti i prodotti con display TFT per la validità della garanzia ai requisiti severi e trasparenti della norma ISO 13406-2, classe II; che viene qui di seguito riassunta brevemente. -
Page 91: Riproduzione Del Presente Manuale
Copyright © 2011 Tutti i diritti riservati. Il presente manuale è tutelato dal diritto d’autore. ® Il Copyright è depositato presso la società Medion Marchi: ® ® ®... - Page 92 Inhoud Aanwijzingen m.b.t. deze handleiding ..................2 Onze doelgroep ............................2 De kwaliteit ..............................2 De service ..............................2 Correct gebruik ........................2 Omvang van de levering ......................2 Veiligheidsadviezen ......................3 Bedrijfszekerheid ............................
-
Page 93: Aanwijzingen M.b.t. Deze Handleiding
Aanwijzingen m.b.t. deze handleiding Lees aandachtig dit hoofdstuk en neem alle aanwijzingen in acht. Op die manier wordt het toestel op de juiste manier gebruikt en zorgt u ervoor dat uw TFT-beeldscherm lang meegaat. Bewaar deze gebruiksaanwijzing in de buurt van uw TFT-beeldscherm. Bewaar de gebruiksaanwijzing zorgvuldig. Als u het TFT-beeldscherm doorverkoopt, dan kunt u de gebruiksaanwijzing erbij leveren. -
Page 94: Veiligheidsadviezen
Veiligheidsadviezen Bedrijfszekerheid Laat kinderen niet zonder toezicht met elektrische toestellen spelen. Kinderen kunnen mogelijke gevaren niet altijd juist inschatten. Houd het verpakkingsmateriaal, bv. foliën, buiten het bereik van kinderen. Bij een verkeerd gebruik bestaat er immers verstikkingsgevaar. Open nooit de behuizing van het TFT-beeldscherm! (elektrische schok, kortsluiting en brandgevaar) ... -
Page 95: Reparatie
Reparatie Laat uw TFT-beeldscherm enkel door gekwalificeerd personeel repareren. Als het toestel gerepareerd moet worden, neem dan enkel contact op met onze geautoriseerde servicepartners. Voorziene omgeving Het TFT-beeldscherm kan bij een omgevingstemperatuur van 0°C tot 40°C en een relatieve luchtvochtigheid van 20% tot 80% (niet condenserend) gebruikt worden. -
Page 96: Normen / Elektromagnetische Compatibiliteit
Normen / elektromagnetische compatibiliteit Het TFT-beeldscherm voldoet aan de vereisten van de elektromagnetische compatibiliteit en de elektrische veiligheid van de volgende normen: EN 55022:2006 Inrichtingen voor informatica, radiostoringen - Grenswaarden en meetprocedure Inrichtingen voor informatica - Eigenschappen op het domein van de storingsvrijheid - EN 55024:1998 + Grenswaarden en meetprocedure A1:2001 +... -
Page 97: Voorbereidingen Op Uw Pc
Voorbereidingen op uw pc Als u totnogtoe met een beeldbuismonitor aan uw computer gewerkt hebt, dan moet u evt. bepaalde voorbereidingen treffen. Dit is nodig als uw oude monitor bepaalde instellingen heeft die door uw nieuw TFT- beeldscherm niet ondersteund worden. Ondersteunde beeldscherminstellingen Deze TFT-beeldscherm ondersteunt volgende modi. -
Page 98: Windows Xp: Eigenschappen Voor Beeldscherm
Windows XP: Eigenschappen voor beeldscherm Met dit Windowsprogramma kunt u de eigenschappen van uw beeldscherm instellen. Het gaat hier b.v. om achtergrond, schermbeveiliging, actieve desktop (web) alsook andere instellingen van uw beeldscherm en de grafische kaart. Het programma kan als volgt gestart worden: ... -
Page 99: Windows Vista: Beeldschermresolutie
Windows Vista: beeldschermresolutie Voor Windows Vista® moet u volgende aanpassingen aan het beeldscherm in de "Configuratiescherm" onder "Vormgeving aan persoonlijke voorkeur aanpassen" uitvoeren. Het programma kan op de volgende wijze worden opgestart: Rechtermuisklik op het Bureaublad van Windows (desktop) en linkermuisklik op "Aan persoonlijke voorkeur aanpassen". -
Page 100: Aansluiten Van De Audio Kabel
2 Aansluiten van de audio kabel Sluit de audiokabel aan de passende aansluitingen aan de computer en aan de TFT-beeldscherm aan. 3 Tot stand brengen van de stroomtoevoer Steek de voedingskabel in de voedingsbus van het TFT-beeldscherm en steek de stekker in een stopcontact in de buurt van het TFT-beeldscherm. -
Page 101: Bedienelementen Op De Voorkant
Bedienelementen op de voorkant (Afb.: Bedienelementen op de voorkant) Ref. Toets Beschrijving Met deze toets roept u het OSD (On Screen Display) op. Druk opnieuw op deze toets, wanneer u het OSD wilt verlaten. Power blokkering, bij niet-geactiveerde OSD ... -
Page 102: Instellen Van Het Tft-Beeldscherm
Instellen van het TFT-beeldscherm Met het OSD-menu (On Screen Display) kunt u bepaalde parameters van het TFT-beeldscherm instellen. Het OSD-menu gebruiken Druk op de toets , om het OSD te activeren. Met de functiekeuzetoetsen / kiest u de opties uit het hoofdmenu. Bevestig uw keuze met toets Druk op toets , om het OSD te verlaten. - Page 103 Menupunt Functie/submenu Autom. aanpassing (Auto Adjust) : Stelt de horizontale en verticale positie, de fase (fine tuning) en de maat (H-grootte) automatisch in. Contrast (Contrast) : stelt de witwaarde van de voorgrond van het beeldscherm in. Helderheid (Brightness) : Om de helderheid van de video aan te passen. DCR : Hier kunt u de DCR-functie instellen(dynamisch contrast) UIT / aan.
-
Page 104: Besparen Van Energie
Menu-instellingen (Setup Menu): stellen Taal, OSD-positie, OSD time out in. Taal (Language Select): laat de gebruiker toe een keuze te maken uit de beschikbare talen. OSD positie (OSD Position): Horizontale en verticale instelling van de OSD- positie. H.ligging: voor de horizontale instelling van de OSD-positie. V.ligging : voor de verticale instelling van de OSD-positie. -
Page 105: Driver Informatie
(vb. Explorer, Word, ...) moeten tonen. Driver informatie Om uw Medion beeldscherm te kunnen gebruiken, hoeft u geen driver te installeren. Als het besturingssysteem toch naar een driver vraagt, dan kunt u dit programma van de Internet site afhalen, die hieronder wordt aangegeven. -
Page 106: Onderhoud
Welke meldingen verschijnen er eventueel op het beeldscherm? Welke software hebt u bij het optreden van de fout gebruikt? Welke stappen hebt u al ondernomen om het probleem op te lossen? Als u al een klantennummer heeft, deel het ons dan mee. Onderhoud De gebruiksduur van het TFT-beeldscherm kunt u met de volgende maatregelen verlengen: Attentie! -
Page 107: Technische Specificaties
In het verleden kenden we verschillende aanleidingen om het toegelaten aantal pixelfouten te definiëren. Meestal waren die zeer moeilijk en sterk producent-afhankelijk en bijgevolg ook compleet verschillend. Bijgevolg volgt MEDION voor alle TFT-Display producten bij de garantievoorwaarden de strenge en duidelijke voorschriften van de ISO 13406-2, Klasse II norm die hieronder kort worden gebundeld. - Page 108 Pixelfouten-Types: Type 1: voortdurend oplichtende pixels (heldere, witte punt), maar niet aangestuurd. Een witte pixel ontstaat door het oplichten van alle drie de sub-pixels. Type 2: niet oplichtende pixel (donkere, zwarte punt), hoewel aangestuurd. Type 3: abnormale of defecte sub-pixel van rode, groene of blauwe kleur. (bvb. voortdurend oplichten aan halve helderheid, niet oplichten van een kleur, flikkerend of knipperend, maar niet van het type 1 of 2) Vervollediging: cluster van type 3 ( = het uitvallen van twee of meer sub-pixels in een blok van 5 x 5 Pixels.
-
Page 109: Kopiëren, Fotokopiëren En Verveelvoudigen Van Dit Handboek
Kopiëren, fotokopiëren en verveelvoudigen van dit handboek Dit document bevat wettelijk beschermde informaties. Alle rechten voorbehouden. Niets uit dit document mag worden gekopieerd, gefotokopieerd, verveelvoudigd, vertaald, verzonden of opgeslagen op een elektronisch leesbaar medium zonder voorafgaande schriftelijke toestemming van de fabrikant. Copyright ©... - Page 110 MTC - Medion Technologie Center Medion Electronics Ltd. D-45467 Mülheim / Ruhr 120 Faraday Park, Faraday Road, Dorcan Deutschland Swindon SN3 5JF, Wiltshire Hotline: 01805 - 633 466 United Kingdom Fax: 01805 - 654 654 (0,14 Euro/Minute aus dem dt. Festnetz, Hotline (UK &...