Chapitres
Table des Matières

Manuels Connexes pour AEG 76301KF-N


Sommaire des Matières pour AEG 76301KF-N
- Page 1 76301KF-N Ceramic glass hob Table de cuisson vitrocéramique Glaskeramische kookplaat Installation and Operating Instructions Instructions de montage et mode d’emploi Montage- en gebruiksaanwijzing...
- Page 2 Dear Customer, Please read these user instructions carefully and keep them to refer to later. Please pass the user instructions on to any future owner of the appli- ance. The following symbols are used in the text: Safety instructions Warning! Information that affects your personal safety. Important! Information that prevents damage to the appliance.
-
Page 3: Table Des Matières
Contents Operating Instructions ........Safety instructions. -
Page 4: Operating Instructions
Operating Instructions 1 Safety instructions Please comply with these instructions. If you do not, any damage re- sulting is not covered by the warranty. This appliance conforms with the following EU Directives: – 73/23/EEC dated 19.02.1973 Low Voltage Directive – 89/336/EEC dated 03.05.1989 EMC Directive inclusive of Amending Directive 92/31/EEC –... -
Page 5: Safety During Use
Safety during use • Remove stickers and film from the glass ceramic. • There is the risk of burns from the appliance if used carelessly. • Cables from electrical appliances must not touch the hot surface of the appliance or hot cookware. •... -
Page 6: Description Of The Appliance
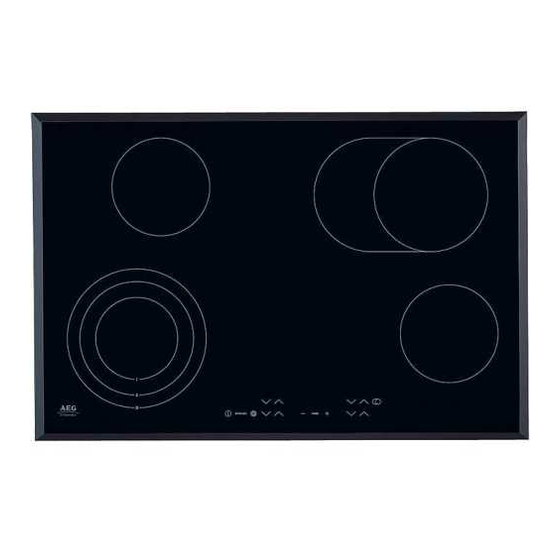
Description of the Appliance Cooking zones and control panel Casserole zone Single ring cooking zone 2400W 1200W Single ring cooking zone Triple ring cooking zone Control panel 1200W 2300W Three-ring sensor panel Casserole zone sensor panel Sensor panel Three-ring control lamps Casserole zone control lamp ”Stop+Go”... -
Page 7: Digital Displays
Digital displays The four display panels that belong to the four cooking zones indicate: – ¾ after having been switched on, – u when a keep warm setting has been selected, – ¿ to Ç, depending on the cooking setting selected, –... -
Page 8: Operating The Hob
Operating the hob Touch control sensor panels To operate the touch control sensor panels, touch the desired panel with the tip of your pointed finger until the relevant displays illuminate or go out, or until the desired function is carried out. Ensure that you are only touching one sensor panel when operating the appliance. -
Page 9: Heat Settings Selecting
Touch the “On/Off” sensor panel for approx. one second. After switching off a single cooking zone or the entire cooking surface, the existing residual warmth will be displayed in the digital displays of the corresponding cooking zones in the form of h (for “hot”). Heat settings selecting For setting and changing the heat setting (u to Ç) for the selected cooking zone. -
Page 10: Switching The Triple Ring Zone On And Off
Switching the triple ring zone on and off According to the size of the saucepan or frying pan, when using the tri- ple ring cooking zone you can switch from a smaller cooking zone to a larger cooking zone using the “triple ring zone” sensor panel. You can only switch to the next size if a heat setting has already been set for the smaller heating ring. -
Page 11: Switching The Casserole Zone On And Off
3. Touch the “triple ring” sensor panel to activate the outer heating ring. The upper control lamp will illuminate. 4. To switch off the outer heating ring, touch the “triple ring” sensor pan- el, and the heating ring that is outermost at the time will switch off. Switching the casserole zone on and off 1. -
Page 12: Stop+Go Function
STOP+GO function When the “Stop+Go” sensor panel is actuated all cooking zones that are switched on are simultaneously switched to the keep warm setting. The control light for the “Stop+Go” sensor panel will illuminate. The keep warm setting will be indicated in the display with u. When the “Stop+Go”... -
Page 13: Residual Heat Indicator
Residual Heat Indicator When an individual cooking zone or the entire hob is switched off, any residual heat is shown with an h (for “Hot”) in the digital display for the appropriate cooking zones. Even after the cooking zone has been switched off, the residual heat indicator only goes out when the cooking zone is cold. -
Page 14: Cooking Using The Automatic Warm Up Function
Cooking using the automatic warm up function All of the cooking surface’s four cooking zones can be adjusted to any of nine settings, and are equipped with an automatic warm up func- tion: – ¿, lowest heat setting – Ç, highest heat setting –... -
Page 15: Cooking Without The Automatic Warm Up Function
Cooking without the automatic warm up function If you wish to use the cooking zones without the automatic warm up function, select the desired heat setting using the heat setting selector sensor panel 1. Touch the heat setting selector sensor panel in order to set the de- sired heat setting from Ç... - Page 16 2. Touch any heat setting sensor field l will appear in the displays, and the child safety lock is activated. The appliance will switch itself off automatically after a few seconds. Overriding the child safety lock The child safety lock can be overridden in order to use the appliance (until the appliance is switched off again).
- Page 17 An acoustic signal will sound as confirmation. The child safety device has been overridden until the appliance is switched off, and the cook- ing surface can be used as normal. Switching off the child safety lock 1. Switch on the appliance. When the child safety device has been activated, l will be displayed.
-
Page 18: Timer
Timer There are two ways to use the timer: – as a safety cut-out function. Set a cooking period for a cooking zone, and after this time has elapsed the cooking zone will automati- cally switch itself off. This function can be used for more than one cooking zone simultaneously. - Page 19 2. While the control lamp is flashing rapidly, use the + or - timersetting sensor panels to set the desired period of time for this cooking zone up until the point where it automatically switches itself off (e.g. 15 minutes). The safety cut-out function will be activated after several minutes The control lamp will now flash more slowly and the remaining cooking time will be shown in the display as it elapses.
-
Page 20: Countdown Timer
Switching off the safety cut-out function before it has come to an end There are two ways to switch off the safety cut-out function before it has come to an end. Switch off the cooking zone and timer simultaneously 1. Using the heat setting selector sensor panel, reset the desired cook- ing zone to zero: the cooking zone and timer will switch themselves off. -
Page 21: Uses, Tables And Tips
Uses, Tables and Tips Pans • You can recognise good pans by their bases. The base should be as thick and flat as possible. • Pay particular attention when buying new pans to the diameter of the base. Manufacturers often give only the diameter of the upper rim. -
Page 22: Advice On Cooking With And Without Automatic Warm Up
Advice on Cooking with and without Automatic Warm up The automatic warm up function is suitable for: • dishes that start off cold, are heated up at high power and do not need to be continually watched when cooking on the selected heat setting, •... -
Page 23: Settings For Cooking On The Zones
Settings for Cooking on the Zones The figures in the following table are benchmark figures. The switch setting required for a certain cooking method depends on the quality of the pans and the type and amount of food. Automatic Switch warm up func- Cooking Examples for use... -
Page 24: Cleaning And Care
Cleaning and Care Take care! Risk of burns from residual heat. Let the appliance cool down. Warning! Sharp objects and abrasive cleaning materials will damage the appliance. Clean with water and washing up liquid. Warning! Residues from cleaning agents will damage the appliance. Remove residues with water and washing up liquid. -
Page 25: What To Do If
What to do if … Rectifying faults It is possible that faults have been caused by a minor error, which you can correct yourself with the help of the following instructions. Do not attempt any further repairs if the following instructions do not help in each specific case. -
Page 26: Disposal
… after having switched off the cooking zones, no h for residual warmth is indicated in the display. Check whether – the cooking zone was only briefly used and therefore did not become hot enough. If the cooking zone is hot, please call customer service. …... -
Page 27: Installation Instructions
Installation Instructions Safety instructions The laws, ordinances, directives and standards in force in the country of use are to be followed (safety regulations, proper recycling in accord- ance with the regulations, etc.) Installation may only be carried out by a qualified electrician. The minimum distances to other appliances are to be observed. -
Page 28: Installation Proud Of The Work Surface
A device must be provided in the electrical installation which allows the appliance to be disconnected from the mains at all poles with a contact opening width of at least 3 mm. Suitable isolation devices include line protecting cut-outs, fuses (screw type fuses are to be removed from the holder), earth leakage trips and contactors. -
Page 29: Service
Service In the event of technical faults, please first check whether you can remedy the problem yourself with the help of the operating instruc- tions (section “What to do if…”). If you were not able to remedy the problem yourself, please contact the Customer Care Department or one of our service partners. - Page 30 Chère cliente, cher client, Veuillez lire attentivement la notice d’utilisation dans son intégralité et la conserver pour pouvoir la consulter ultérieurement. Veuillez la transmettre à l’éventuel propriétaire ultérieur de l’appareil. Les symboles suivants sont utilisés dans ce document : Consignes de sécurité Avertissement : conseils pour votre sécurité...
- Page 31 Sommaire Notice d'utilisation ......... 32 Sécurité...
-
Page 32: Notice D'utilisation
Notice d'utilisation 1 Sécurité Pour ne pas perdre le bénéfice de la garantie en cas de panne, veuillez observer ces recommandations. Cet appareil est conforme aux directives CE suivantes : – directive 73/23/CEE du 19.02.1973 basse tension – directive 89/336/CEE du 03.05.1989 relative à la compatibilité élec- tromagnétique (CEM) y compris la directive de révision 92/31/CEE –... -
Page 33: Précautions De Nettoyage
• Le montage et le branchement de l’appareil sont du ressort exclusif de spécialistes agréés. Précautions d’utilisation. • Retirer les étiquettes et les films protecteurs de la vitrocéramique. • Attention aux risques de brûlures lors de l’utilisation de l’appareil. • S’assurer que les câbles d’appareils électriques n’entrent pas en con- tact avec les surfaces brûlantes de l’appareil ou les récipients brû- lants. -
Page 34: Description De L'appareil
Description de l'appareil Equipement de la table de cuisson et de commande Zone de cuisson Zone de extensible 1200W 2400W Foyer à triple zone Bandeau de commande Zone de cuisson 2300W 1200W Touche triple zone Touche zone extensible Voyants triple Voyant zone Touche zone... -
Page 35: Affichages Numériques
Affichages numériques Les quatre affichages numériques dont sont pourvus les zones de cuis- son indiquent : – ¾ Après la mise en marche, – u Lors de la sélection de la fonction de maintien au chaud, – ¿ à Ç, Selon le niveau de cuisson sélectionné, –... -
Page 36: Utilisation De La Table De Cuisson
Utilisation de la table de cuisson Touches sensitives Pour activer les touches sensitives, appuyez sur la touche désirée jus- qu'à ce que l'indicateur correspondant s'allume ou s'éteigne ou que la fonction désirée soit activée. Assurez-vous lors de cette action que vous ne touchez qu’une seule touche sensitive. -
Page 37: Sélection De La Puissance De Chauffe
Appuyez sur la touche « Marche/Arrêt » pendant environ une seconde. Lorsqu'une seule zone ou l'intégralité de la table de cuisson est mis hors service, la présence de chaleur résiduelle est signalée par l'indicateur h dans les écrans d'affichage des zones de cuisson correspondantes. Sélection de la puissance de chauffe Sélectionnez ou modifiez la puissance de chauffe (u à... -
Page 38: Mettre En Fonctionnement Et À L'arrêt Le Foyer À Triple Zone
Mettre en fonctionnement et à l'arrêt le foyer à triple zone Il est possible, selon la taille du récipient, de sélectionner une zone dif- férente sur ce foyer. Les zones intermédiaire et extérieure ne peuvent être activées que si un niveau de cuisson a préalablement été... -
Page 39: Mettre En Fonctionnement Et À L'arrêt La Zone De Cuisson Extensible
3. Appuyez de nouveau sur la touche « foyer à triple zone » pour activer la zone extérieure. Le voyant de contrôle supérieur s'allume. 4. Pour éteindre la zone extérieure, appuyez sur la touche « foyer à triple zone » " et la zone extérieure correspondante s'éteint. Mettre en fonctionnement et à... -
Page 40: Fonction Stop+Go
Fonction Stop+Go Lorsque l’on actionne la touche « Stop+Go », ", toutes les zones de cuis- son actives basculent simultanément sur la position de maintien au chaud. Le voyant de contrôle de la touche « Stop+Go » s'allume. La po- sition de maintien au chaud s'affiche sur le bandeau de commande u. -
Page 41: Indicateur De Chaleur Restante
Indicateur de chaleur restante Après avoir mis à l'arrêt une zone de cuisson ou l'ensem- ble de la table de cuisson, la présence de chaleur rési- duelle est signalée par un h dans l'écran d'affichage lorsque la surface de la zone de cuisson respective est assez chaude pour constituer un danger de brûlure.. -
Page 42: Cuisson Avec La Fonction De Saisie Automatique
Cuisson avec la fonction de saisie automatique Les zones de cuisson de la table sont réglables sur neuf niveaux de cuis- son et sont équipées d'une fonction de saisie automatique. : – ¿, niveau de cuisson minimum – Ç, niveau de cuisson maximum –... -
Page 43: Cuisson Sans La Fonction De Saisie Automatique
Cuisson sans la fonction de saisie automatique Pour utiliser une zone de cuisson sans la fonction de saisie automati- que, sélectionnez le niveau de cuisson désiré à l'aide de la touche de sé- lection 1. Après avoir mis l'appareil en fonctionnement et sélectionné la zone de cuisson souhaitée avec les touches de sélection des zones de cuisson, appuyez sur la touche de sélection pour sélectionner un niveau de... - Page 44 2. Appuyez sur la touche d'une zone de cuisson . Le symbole l s’affiche, la sécurité enfants est activée. L’appareil se dé- connecte automatiquement au bout de quelques secondes. Brider la sécurité enfants Pour une unique utilisation de l’appareil (jusqu’à la désactivation), il est possible de brider la sécurité...
- Page 45 Un signal sonore confirme la manipulation. La sécurité enfants est bri- dée jusqu’à ce que l’appareil soit désactivé et la plaque de cuisson peut être utilisée normalement. Désactiver la sécurité enfants 1. Mettez l'appareil en fonctionnement. Le symbole l s’affiche si la sécurité enfants est active. 2.
-
Page 46: Minuteur
Minuteur Le minuteur est doté de deux fonctions : : – une fonction de déconnexion automatique Lorsque la durée de cuisson sélectionnée pour une zone de cuisson est écoulée, celle-ci s’éteint automatiquement. Cette fonction peut s’appliquer simultané- ment à plusieurs zones de cuisson. –... - Page 47 2. Tandis que le voyant de contrôle clignote rapidement, appuyez sur les touches de réglage Minuteur + et - pour sélectionner la durée après laquelle cette zone de cuisson se déconnectera automatiquement (par exemple 15 minutes).. Au bout de quelques secondes, la déconnexion automatique est activée Le voyant de contrôle clignote maintenant plus lentement et le temps de cuisson restant s'affiche sur le bandeau de commande.
-
Page 48: Anticiper La Désactivation De La Déconnexion Automatique
Anticiper la désactivation de la déconnexion auto- matique Il existe deux manières d’anticiper la déconnexion automatique : En déconnectant simultanément la zone de cuisson et le minuteur 1. A l'aide des touches de réglage du niveau de cuisson , affichez 0 pour la zone de cuisson souhaitée: la zone de cuisson et le minuteur se déconnectent. -
Page 49: Application, Tableaux, Conseils
Application, tableaux, conseils Récipients de cuisson • Vous reconnaissez les bonnes batteries de cuisine au fond des casse- roles. Le fond doit être aussi épais et aussi plan que possible. • Faites attention au diamètre du fond du récipient lors de l'achat de nouvelles casseroles et poêles. -
Page 50: Cuisson Pour Cuire Avec Et Sans La Fonction De Saisie Automatique
Cuisson pour cuire avec et sans la fonction de saisie automatique La fonction de saisie automatique de la cuisson convient pour: • les aliments froids qui sont chauffés à forte puissance et qui n'ont pas besoin d'être surveillés pendant qu'ils mijotent, •... -
Page 51: Valeurs Indicatives De Cuisson
Valeurs indicatives de cuisson Les valeurs indiquées dans le tableau suivant sont indicatives. Les puis- sances recommandées dans ce tableau pour la cuisson dépendent de la nature du récipient et, du type et du volume des aliments à cuire Durée de cuisson en Type de cuis- Puissance... -
Page 52: Nettoyage Et Entretien
Nettoyage et entretien Attention ! Risque de brûlure dû à la chaleur résiduelle. Laissez refroidir l’appareil. Attention ! Les produits de nettoyage agressifs ou abrasifs endomma- gent l’appareil. Nettoyez l’appareil avec de l’eau et de la lessive. Attention ! Les restes de produits de nettoyage endommagent l’appa- reil. -
Page 53: Que Faire Si
Même s’il n’est plus possible de faire disparaître les égratignures ou les taches sombres sur la vitrocéramique, cela n’a aucune influence sur le fonctionnement de l’appareil. Que faire si … En cas d'anomalie de fonctionnement En cas de dysfonctionnement, il se peut que l'anomalie constatée ne soit pas grave et que vous puissiez y remédier vous-même à... - Page 54 ... l’indicateur de chaleur résiduelle h s'affiche soudainement Vérifier si – la touche Marche/Arrêt n’a pas été actionnée par mégarde. – les zones de commande ne sont pas partiellement recouvertes par un chiffon humide, par du liquide ou par autre chose. –...
-
Page 55: Protection De L'environnement
Si vous faites appel au service après vente en cas d'erreurs de manipu- lation, le déplacement du technicien peut être facturé même pendant la période de garantie. Protection de l’environnement Elimination du matériel d’emballage Les matériaux d’emballage sont écologiques et recyclables. Les matières plastiques portent un signe distinctif, par ex. -
Page 56: Instructions D'installation
Instructions d'installation Sécurité L’utilisateur est tenu de respecter la législation, la réglementation, les lignes directrices et les normes en vigueur dans son pays de résidence (dispositions relatives à la sécurité, recylage conforme et réglementaire, etc.). Le montage relève de la compétence exclusive de spécialistes. Respectez l’espacement minimal requis par rapport aux autres appa- reils. - Page 57 Au niveau de l'installation électrique, prévoir un dispositif qui permette de couper cet appareil du secteur sur tous les pôles avec une ouverture des contacts d'au moins 3 mm. Des dispositifs de protection appropriés sont par exemple les disjonc- teurs, les fusibles (les fusibles vissés doivent être retirés de leur socle), les disjoncteurs différentiels et les contacteurs.
-
Page 58: Montage Par Applique
Montage par applique • Nettoyez le plan de travail dans la zone de coupe. • Coller immédiatement le joint d’étanchéité autocollant d’un côté li- vré sur la partie inférieure du plan de travail, le long du bord exté- rieur de la vitrocéramique. Ne pas l’étirer. Le point de jonction doit se trouver au milieu d'un côté. -
Page 59: Service Après-Vente
Service après-vente En cas de problèmes techniques, vérifiez d’abord s’il ne vous est pas possible de réparer vous-même le dysfonctionnement à l’aide de la no- tice d’utilisation (chapitre „Que faire, si...“). Si vous ne parvenez pas à réparer le dysfonctionnement, veuillez con- tacter notre Consumer Services. - Page 60 Geachte klant, Lees deze gebruiksaanwijzing zorgvuldig door en bewaar de gebruiks- aanwijzing zodat deze later kan worden geraadpleegd. Geef deze gebruiksaanwijzing door aan een eventuele volgende eige- naar van het apparaat. De volgende symbolen worden in de tekst gebruikt: Veiligheidsvoorschriften Waarschuwing! Aanwijzingen ten behoeve van uw persoonlijke veilig- heid.
- Page 61 Inhoud Gebruiksaanwijzing ........62 Veiligheidsvoorschriften .
-
Page 62: Gebruiksaanwijzing
Gebruiksaanwijzing 1 Veiligheidsvoorschriften Neem deze aanwijzingen in acht, omdat anders bij eventuele schade het recht op garantie vervalt. Dit apparaat is in overeenstemming met de volgende EG-richtlijnen: – 73/23/EEG van 19.02.1973 Laagspanningsrichtlijn – 89/336/EEG van 03.05.1989 EMC-richtlijn inclusief aangepaste richt- lijn 92/31/EEG –... -
Page 63: Veiligheid Tijdens Het Gebruik
Veiligheid tijdens het gebruik • Verwijder stickers en folies van het glaskeramiek. • Wanneer u onoplettend bent tijdens het werken met het apparaat, bestaat er risico op verbranding. • De snoeren van elektrische apparaten mogen niet tegen het hete ap- paraatoppervlak resp. -
Page 64: Beschrijving Van Het Apparaat
Beschrijving van het apparaat Uitvoering kookplaat en bedieningsveld Eénkringskookzone Braadzone 1200W 2400W Driekringskookzone Bedieningsveld Eénkringskookzone 2300W 1200W Sensorveld driekring Sensorveld braadzone Sensorveld Controlelampjes driekring Controlelampje braadzone stop+go Timer met Sensorveld Kookstandselectie Kookstandselectie controle-indicaties “aan/uit” Indicatie voor kookstand/restwarmte... -
Page 65: Digitale Indicaties
Digitale indicaties De vier indicatievelden die aan de vier kookzones toebehoren, geven het volgende aan: – ¾ na het inschakelen, – u bij het kiezen van de warmhoudstand, – ¿ tot Ç, afhankelijk van de gekozen kookstand, – 2 tot 6 (met punt) voor tussenkookstanden, –... -
Page 66: Bediening Van De Kookplaat
Bediening van de kookplaat Touch-control-sensorvelden Om de touch-control-sensorvelden te bedienen, drukt u met de punt van uw vingertop op het gewenste veld tot de betreffende indicaties gaan branden of uitgaan of tot de gewenste functie wordt uitgevoerd. Raak niet meer dan één sensorveld tegelijk aan bij het bedienen. Als u uw vinger te vlak op het veld legt, dan kan eventueel het sensorveld daaronder ook worden aangeraakt. -
Page 67: Apparaat Uitschakelen
Apparaat uitschakelen U kunt het complete apparaat uitschakelen door op het sensorveld “aan/uit” I te drukken. Raak het sensorveld “aan/uit” ca. één seconde aan. Na het uitschakelen van een enkele kookzone of van de gehele kook- plaat wordt de aanwezige restwarmte met h (zoals in “heet”) in de di- gitale indicaties van de betreffende kookzones aangegeven. -
Page 68: Driekrings-Kookzone In- En Uitschakelen
Driekrings-kookzone in- en uitschakelen Afhankelijk van de afmetingen van een pan kan bij de driekrings-kook- zone met het sensorveld “driekrings-zone” naast de kleinere kookzone ook nog de bijbehorende grotere verwarmingskring worden ingescha- keld. U kunt deze grotere verwarmingskringen alleen inschakelen wanneer u voor de kleinere verwarmingskring al een kookstand hebt ingesteld. -
Page 69: Braadzone In- En Uitschakelen
3. Door het sensorveld “driekring” opnieuw aan te raken, wordt de buiten- ste verwarmingskring geactiveerd. Het bovenste controlelampje gaat aan. 4. Om de buitenste verwarmingskring uit te schakelen, raakt u het sensor- veld “driekring” aan. De bijbehorende buitenste verwarmingskring wordt uitgeschakeld. Braadzone in- en uitschakelen 1. -
Page 70: Stop+Go-Functie
Stop+go-functie Wanneer u op het sensorveld “stop+go” drukt, wordt voor alle inge- schakelde kookzones tegelijkertijd de warmhoudstand ingesteld. Het controlelampje van het sensorveld “stop+go” gaat aan. De warmhoud- stand wordt op het display met u aangegeven. Wanneer u opnieuw op het sensorveld “stop+go” drukt, worden de eer- der gekozen kookstanden weer ingesteld en gaat het controlelampje uit. -
Page 71: Restwarmte-Indicatie
Restwarmte-indicatie Na het uitschakelen van een kookzone of van de gehele kookplaat wordt nog aanwezige restwarmte met h (van ”heet”) in de digitale indicaties van de betreffende kookzones aangegeven. Ook na het uitschakelen van de kookzone gaat de rest- warmte-indicatie pas uit als de kookzone is afgekoeld. U kunt de restwarmte gebruiken voor het smelten en warmhouden van gerechten. -
Page 72: Koken Met De Kookautomatiek
Koken met de kookautomatiek Alle vier kookzones van de kookplaat hebben negen kookstanden en zijn uitgerust met een kookautomatiek: – ¿, laagste kookstand – Ç, hoogste kookstand – a, aan de kook brengen. Wanneer u de door u gewenste kookstand met het sensorveld kook- standselectie kiest, werkt de kookzone gedurende een bepaalde tijd op vol vermogen en schakelt automatisch terug naar de ingestelde... -
Page 73: Koken Zonder Kookautomatiek
Koken zonder kookautomatiek Wanneer u de kookzone wilt gebruiken zonder kookautomatiek, kiest u de gewenste kookstand met het sensorveld kookstandselectie 1. Raak het sensorveld kookstandselectie aan om de gewenste kook- stand Ç tot ¿ in te stellen. U kunt de kookstand met de sensorvelden kookstandselectie op elk moment wijzigen. -
Page 74: Kinderbeveiliging
Kinderbeveiliging Met de kinderbeveiliging kunt u de kookplaat tegen ongewenst gebruik beveiligen. Kinderbeveiliging inschakelen Om de kinderbeveiliging in te schakelen moet het apparaat zijn inge- schakeld. Er mag echter geen kookzone zijn ingeschakeld. 1. Raak het sensorveld ca. drie seconden aan. Er klinkt een signaaltoon ter bevestiging. - Page 75 Kinderbeveiliging tijdelijk uitschakelen U kunt de kinderbeveiliging voor éénmalig gebruik van het apparaat (tot u het apparaat uitschakelt) tijdelijk uitschakelen. Wanneer u het apparaat weer inschakelt wordt de kinderbeveiliging weer automatisch geactiveerd. 1. Schakel het apparaat in. Wanneer de kinderbeveiliging is geactiveerd, wordt l aangegeven. 2.
- Page 76 Kinderbeveiliging uitschakelen 1. Schakel het apparaat in. Wanneer de kinderbeveiliging is geactiveerd, wordt l aangegeven. 2. Raak het sensorveld ca. drie seconden aan. Er klinkt een signaaltoon ter bevestiging. 3. Raak een willekeurig sensorveld kookstandselectie aan. De indicaties worden donker. De kinderbeveiliging is uitgeschakeld. Het apparaat wordt na enkele seconden automatisch uitgeschakeld.
-
Page 77: Timer
Timer U kunt de timer op twee manieren gebruiken: – als automatische uitschakeling. U stelt voor een kookzone een kooktijd in. Na het verstrijken van de kooktijd wordt de kookzone au- tomatisch uitgeschakeld. U kunt deze functie voor meerdere kookzo- nes tegelijk gebruiken. - Page 78 2. Stel de gewenste tijdsduur tot de automatische uitschakeling (bijvoor- beeld 15 minuten) voor deze kookzone in met de sensorvelden timer- instelling + of - terwijl het controlelampje snel knippert. Na enkele seconden wordt de automatische uitschakeling geactiveerd. Het controlelampje knippert nu langzamer en de resterende kooktijd wordt tijdens het verloop in het display aangegeven.
- Page 79 Automatische uitschakeling voortijdig beëindigen U kunt de automatische uitschakeling op twee manieren voortijdig uit- schakelen: Kookzone en timer gelijktijdig uitschakelen 1. Stel de gewenste kookzone met het sensorveld kookstandselectie op nul: Kookzone en timer worden uitgeschakeld. Timer uitschakelen - kookzone blijft actief 1.
-
Page 80: Toepassingen, Tabellen, Tips
Toepassingen, tabellen, tips Pannen • Goede pannen herkent u aan de bodem. De bodem moet zo dik en vlak mogelijk zijn. • Let bij het kopen van pannen op de diameter van de bodem. Fabri- kanten geven vaak de diameter van de bovenste rand van de pan aan. •... -
Page 81: Tips Voor Het Koken Met En Zonder Kookautomatiek
Tips voor het koken met en zonder kookautomatiek De automatische aankookfunctie is geschikt voor: • gerechten die koud worden opgezet, op hoog vermogen verhit en op de doorkookstand niet voortdurend in de gaten hoeven te worden gehouden. • gerechten, die in een hete pan worden gebraden gedaan. De automatische aankookfunctie is niet geschikt voor: •... -
Page 82: Richttijden Bij Het Koken
Richttijden bij het koken De gegevens in de volgende tabel dienen slechts als richtlijnen. De kwa- liteit van de pannen en de soort en hoeveelheid voedingsmiddelen be- palen welke schakelstand u moet gebruiken. Tijd die nodig is Schakel- voor het aan de Kookproces Voorbeelden voor het gebruik stand... -
Page 83: Reiniging En Onderhoud
Reiniging en onderhoud Voorzichtig! Verbrandingsgevaar door restwarmte. Laat het apparaat afkoelen. Let op! Bijtende en schurende schoonmaakmiddelen beschadigen het apparaat. Schoonmaken met water en handafwasmiddel. Let op! Resten van schoonmaakmiddelen beschadigen het apparaat. Verwijder resten met water en handafwasmiddel. Reinig het apparaat na ieder gebruik 1. -
Page 84: Wat Is Er Aan De Hand Als
Hardnekkige verontreinigingen verwijderen met een speciaal schoon- maakmiddel voor glaskeramiek of roestvrij staal. Krassen of donkere vlekken in het glaskeramiek kunnen niet meer wor- den verwijderd, zij hebben echter geen invloed op het functioneren van het apparaat. Wat is er aan de hand als … Hulp bij storingen Misschien gaat het om een kleine storing die u aan de hand van de vol- gende aanwijzingen zelf kunt oplossen. - Page 85 … de indicatie op h voor restwarmte na plotseling uitvalt? Controleer of – u per ongeluk op de aan-/uit-toets hebt gedrukt. – er een vochtige doek, vloeistof of iets dergelijks ligt op een gedeelte van de sensorvelden. – de veiligheidsuitschakeling is geactiveerd. …...
-
Page 86: Afvalverwerking
Afvalverwerking Verpakkingsmateriaal De verpakkingsmaterialen zijn niet schadelijk voor het milieu en her- bruikbaar. De kunststoffen hebben de volgende aanduidingen, bijv. >PE<, >PS<, enz. Verwijder de verpakkingsmaterialen in overeenstem- ming met de aanduiding bij de gemeentelijke inzamelplaatsen in de daarvoor bestemde containers. Oud apparaat verwijderen Verwijder afgedankte apparatuur conform de in uw woonplaats gel- dende richtlijnen. -
Page 87: Montageaanwijzing
Montageaanwijzing Veiligheidsvoorschriften De in het land van gebruik geldende wetten, verordeningen, richtlijnen en normen moeten in acht worden genomen (veiligheidsvoorschriften, vakkundige recycling volgens de voorschriften, enzovoort). De montage mag alleen worden uitgevoerd door een vakman. De minimale afstanden tot andere apparaten moeten worden aange- houden. -
Page 88: Montage Gelijk/Vlak Naast Elkaar
In de elektrische installatie moet een inrichting worden aangebracht, die het mogelijk maakt het apparaat met een contactopeningswijdte van min. 3 mm met alle polen van het net te scheiden. Geschikte scheidingsinrichtingen zijn bijv. automatische zekeringen (schroefzekeringen moeten uit de fitting geschroefd worden), aardlek- schakelaar en veiligheidsschakelaars. -
Page 89: Service
Service Controleer bij technische storingen eerst of u met behulp van de ge- bruiksaanwijzing (hoofdstuk ”Wat u moet doen als…“) het probleem zelf kunt oplossen. Wanneer u het probleem niet kunt oplossen, neemt u contact op met onze klantenservice of met een van onze servicepartners. Om u snel te kunnen helpen, hebben wij de volgende gegevens nodig: –... - Page 90 Assembly / Montage...
- Page 93 Rating Plate / Plaque signalétique / Typeplaatje...
- Page 96 USD 14 billion in more than 150 countries around the world. AEG Hausgeräte GmbH Postfach 1036 D-90327 Nürnberg http://www.aeg.hausgeraete.de © Copyright by AEG Subject to change without notice Sous réserve de modifications 822 925 130-A-261004-01 Wijzigingen voorbehouden...