Table des Matières
Publicité
Les langues disponibles
Les langues disponibles
Liens rapides
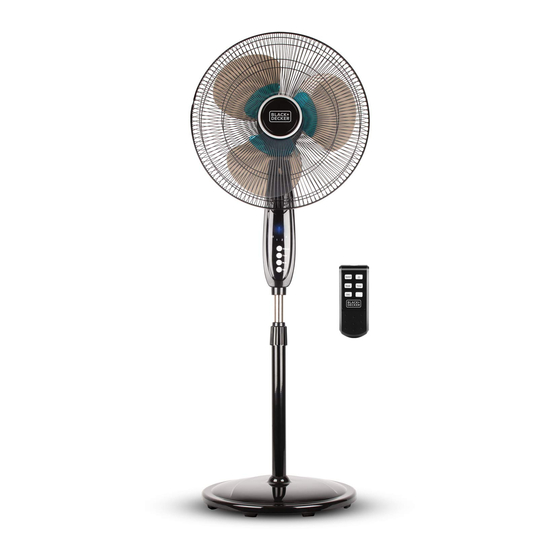
DUAL BLADE
STAND FAN
VENTILATEUR SUR PIED
À PALE DOUBLE
VENTILADOR DE PIE
DE ASPAS DOBLES
INSTRUCTION MANUAL
MANUEL D'INSTRUCTIONS
MANUAL DE INSTRUCCIONES
CATALOG NUMBERS
NUMÉRO DE CATALOGUE
NÚMEROS DE CATÁLOGO
BFSD116B
Thank you for choosing BLACK+DECKER!
Merci d'avoir choisi BLACK+DECKER!
¡Gracias por elegir BLACK+DECKER!
PLEASE READ BEFORE RETURNING
THIS PRODUCT FOR ANY REASON.
VEUILLEZ LIRE AVANT DE RETOURNER
CE PRODUIT POUR QUELQUE RAISON.
POR FAVOR, LEA ESTE MANUAL ANTES
DE DEVOLVER EL PRODUCTO POR
CUALQUIER RAZÓN.
If you have a question or experience a problem with your BLACK+DECKER purchase, go to www.blackanddecker.com/
instantanswers If you can't find the answer or do not have access to the Internet, call 844-299-0879 from 10:30 a.m. to 6:30
p.m. EST Mon. - Fri. to speak with an agent. Please have the catalog number available when you call.
Si vous avez une question ou rencontrez un problème avec votre achat Black+Decker, allez sur
www.blackanddecker.com/instantanswers Si vous ne trouvez pas la réponse ou n'avez pas accès à l'Internet, appelez au 844-
299-0879 de 10h30 à 18h30 HNE du lun. au ven. pour parler avec un agent. Veuillez avoir le numéro de catalogue disponible
lorsque vous appelez.
Si tiene una pregunta o experimenta un problema con tu compra de BLACK+DECKER, vaya a
www.blackanddecker.com/instantanswers Si no puede encontrar las respuestas que necesita o no tiene acceso a Internet, llame
al 844-299-0879 desde las 10:30 a.m. a las 6:30 p.m. EST de lunes a viernes para hablar con un agente. Por favor, tenga el
número de catálogo a mano cuando llame.
SAVE THIS MANUAL FOR FUTURE REFERENCE.
CONSERVEZ CE MANUEL POUR TOUTE CONSULTATION ULTÉRIEURE.
GUARDE ESTE MANUAL PARA SU REFERENCIA FUTURA.
Publicité
Chapitres
Table des Matières
Dépannage

Manuels Connexes pour Black & Decker BFSD116B


Sommaire des Matières pour Black & Decker BFSD116B
- Page 1 INSTRUCTION MANUAL MANUEL D’INSTRUCTIONS MANUAL DE INSTRUCCIONES CATALOG NUMBERS NUMÉRO DE CATALOGUE NÚMEROS DE CATÁLOGO BFSD116B Thank you for choosing BLACK+DECKER! Merci d’avoir choisi BLACK+DECKER! ¡Gracias por elegir BLACK+DECKER! PLEASE READ BEFORE RETURNING THIS PRODUCT FOR ANY REASON. VEUILLEZ LIRE AVANT DE RETOURNER CE PRODUIT POUR QUELQUE RAISON.
-
Page 2: Table Des Matières
ENGLISH CONTENTS SAFETY INFORMATION Important Safety Instructions ............................3-4 Electrical Requirements ...............................4 SET UP & USE Parts & Features ..................................6 Operation & Use ..............................7-10 Replacing the Fuse ..............................11 CLEANING & CARE ...............................11 TROUBLE SHOOTING & WARRANTY Before You Call For Service ..........................12 Customer Service ..............................12 Troubleshooting ..............................12 Limited Warranty ..................................13... -
Page 3: Safety Information
ENGLISH SAFETY INFORMATION DANGER WARNING CAUTION DANGER - Immediate hazards WARNING - Hazards or unsafe CAUTION - Hazards or unsafe which WILL result in severe practices which COULD result in practices which COULD result in personal injury or death severe personal injury or death minor personal injury IMPORTANT SAFETY INSTRUCTIONS WARNING... -
Page 4: Electrical Requirements
ENGLISH SAFETY INFORMATION SAVE THESE INSTRUCTIONS HOUSEHOLD USE ONLY ELECTRICAL REQUIREMENTS This appliance has a polarized plug (one blade is wider than the other). To reduce the risk of electric shock, this plug is intended to fit into a polarized outlet only one way. If the plug does not fit into the outlet, reverse the plug. - Page 5 ENGLISH SAFETY INFORMATION HANDLING ALKALINE BATTERIES WARNING When handling alkaline batteries, basic safety precautions should be followed, including the following 1. Should fluid from the battery accidentally get into your eyes, there is a threat of loss of eyesight, do not rub them. Immediately rinse your eyes with clean tap water and then consult a physician immediately.
-
Page 6: Set Up & Use
ENGLISH SET UP & USE PARTS & FEATURES Tighten Loosen Spinner Front Grill 12. Control Panel 2. Plastic Ring with Buckle 13. Thumb Screw 3. Spinner 14. Adjustable Pole 4. Small Blade 15. Height Adjustment Ring 5. Large Blade 16. Extension Pole 6. - Page 7 ENGLISH SET UP & USE ASSEMBLY ASSEMBLING THE BASE, EXTENSION POLE, ADJUSTABLE POLE, AND MANUAL CONTROL PANEL 1. Unscrew the 7-shaped Bolt to remove the bolt and washer from the Extension Pole (see Fig. 1). 2. Align the extension pole over the base, making sure that the hole in the extension pole align with the hole in the base.
-
Page 8: Grill & Fan Blade Assembly
ENGLISH SET UP & USE GRILL & FAN BLADE ASSEMBLY WARNING: Never attempt to run the fan without the grill in place and properly secured. Failure to have the grill in place can result in serious injury. 1. Remove the spinner and the plastic nut from the front of the motor shaft by turning the spinner clockwise and the plastic nut counterclockwise. - Page 9 ENGLISH SET UP & USE OPERATION INSTRUCTIONS The fan may be operated by the remote control (as shown in FIGURE 8) or by manual controls located (shown in FIGURE 9). Place the FAN on a stable flat surface. Plug the cord into a 120V A.C. electrical outlet. TILT ADJUSTING To adjust the air flow upward or downward, push the grill section lightly to the desired direction.
-
Page 10: Control Panel
ENGLISH SET UP & USE CONTROL PANEL (Fig. 9) /SPEED: The key serves two purposes. To turn fan ON and OFF and to set desired speed. Press key to turn fan ON for LOW speed. Continue to press the key to scroll through the SPEED settings. -
Page 11: Replacing The Fuse
ENGLISH SET UP & USE REPLACING THE FUSE • Disconnect fan from power outlet by grabbing the plug at the end of the cord. Do not unplug by pulling the cord itself • Open fuse cover located in the side of the power cord plug by sliding it toward the plug blades •... -
Page 12: Troubleshooting & Warranty
ENGLISH TROUBLESHOOTING & WARRANTY BEFORE YOU CALL FOR SERVICE IF THE APPLIANCE FAILS TO OPERATE: A) Check to make sure that the appliance is plugged in securely. If it is not, remove the plug from the outlet, wait 10 seconds and plug it in again securely. B) Check for a blown circuit fuse or a tripped main circuit breaker. -
Page 13: Limited Warranty
ENGLISH TROUBLESHOOTING & WARRANTY LIMITED WARRANTY Any repair, replacement, or warranty service, REPAIR OR REPLACEMENT AS PROVIDED UNDER THIS WARRANTY IS THE EXCLUSIVE REMEDY OF and all questions about this product should be THE CUSTOMER; W Appliance Co. SHALL NOT BE directed to W Appliance Co. - Page 14 ENGLISH TROUBLESHOOTING & WARRANTY This device complies with part 15 of the FCC rules. Operation is subject to the following two conditions: 1) This device may not cause harmful interference, and 2) This device must accept any interference received, including interference that may cause undesired operation.
- Page 15 ENGLISH MEMO PURCHASE DATE: PLACE OF PURCHASE: Page 15...
-
Page 16: Enregistrement Du Produit
FRANÇAIS TABLE DES MATIÈRES INFORMATIONS DE SÉCURITÉ Instructions De Sécurité Importantes ........................17-8 Exigences Électriques................................18 CONFIGURATION ET UTILISATION Pièces Et Caractéristiques ..............................20 Opération Et Utilisation ..........................21-24 Remplacer le Fusible ............................25 NETTOYAGE ET SOINS ..........................25 DÉPANNAGE ET GARANTIE Avant d’Appeler Pour Le Service ........................26 Service Clients ................................26 Dépannage ................................26 Garantie limitée ..................................27... -
Page 17: Informations De Sécurité
FRANÇAIS INFORMATIONS DE SÉCURITÉ AVERTISSEMENT DANGER ATTENTION DANGER - Risques ATTENTION - Risques ou AVERTISSEMENT - Risques ou pratiques immédiats qui VONT pratiques dangereuses qui dangereuses qui POURRAIENT entraîner des POURRAIENTentraîner des entraîner des blessures blessures graves ou la mort graves ou la mort blessures mineures CONSIGNES DE SÉCURITÉ... -
Page 18: Exigences Électriques
FRANÇAIS INFORMATIONS DE SÉCURITÉ 12. Ne pas passer le cordon sous un tapis. Ne pas couvrir le cordon avec des carpettes, des tapis de couloir ou des revêtements similaires. Ne pas faire passer le cordon sous des meubles ou des appareils. Disposez le cordon loin de la zone de circulation pour empêcher un trébuchement. -
Page 19: Manipulation Des Piles Alcalines
FRANÇAIS INFORMATIONS DE SÉCURITÉ MANIPULATION DES PILES ALCALINES AVERTISSEMENT Lors de la manipulation de piles alcalines, des précautions de sécurité de base doivent être suivies, y compris les suivantes 1. Si du liquide provenant de la pile entre accidentellement dans vos yeux, il y a une menace de perte de la vue, ne pas les frotter. -
Page 20: Configuration Et Utilisation
FRANÇAIS CONFIGURATION ET UTILISATION PIÈCES & CARACTÉRISTIQUES Serrer Desserrer Roulette Grille Avant 12. Panneau De Commande 2. Bague En Plastique Avec Boucle 13. Vis Papillon 3. Roulette 14. Poteau Réglable 4. Petite Pale 15. Bague De Réglage De La Hauteur 5. -
Page 21: Assemblage
FRANÇAIS CONFIGURATION ET UTILISATION ASSEMBLAGE ASSEMBLAGE DE LA BASE, DU POTEAU D’EXTENSION, DU POTEAU AJUSTABLE ET DU PANNEAU DE COMMANDE MANUEL 1. Dévissez le Boulon à 7 formes pour retirer le boulon et la rondelle du Poteau d’Extension (voir Fig. 1). 2. -
Page 22: Assemblage De La Grille Et La Pale Du Ventilateur
FRANÇAIS CONFIGURATION ET UTILISATION ASSEMBLAGE DE LA GRILLE ET LA PALE DU VENTILATEUR AVERTISSEMENT: N’essayez jamais de faire fonctionner le ventilateur sans que la grille soit en place et correctement fixée. Ne pas mettre le gril en place peut entraîner des blessures graves. 1. -
Page 23: Réglage De L'inclinaison
FRANÇAIS CONFIGURATION ET UTILISATION INSTRUCTIONS D’UTILISATION Le ventilateur peut être actionné par la télécommande (comme illustré à la FIGURE 8) ou par des commandes manuelles situées (illustrées à la FIGURE 9). Placez le VENTILATEUR sur une surface plane et stable. Branchez le cordon dans une prise de courant CA 120V. -
Page 24: Panneau De Commande
FRANÇAIS CONFIGURATION ET UTILISATION PANNEAU DE COMMANDE (Fig. 9) /VITESSE: La touche sert à deux fins. Pour ALLUMER et ÉTEINDRE le ventilateur et régler la vitesse désirée. Appuyez sur la touche pour ALLUMER le ventilateur à BASSE vitesse. Continuez à appuyer sur la touche pour faire défiler les réglages VITESSE. -
Page 25: Remplacement Du Fusible
FRANÇAIS CONFIGURATION ET UTILISATION REMPLACEMENT DU FUSIBLE • Débranchez le ventilateur de la prise de courant en saisissant la fiche à l’extrémité du cordon. Ne débranchez pas en tirant le cordon lui-même • Ouvrez le couvercle du fusible situé sur le côté de la fiche du cordon d’alimentation en le faisant glisser vers les lames de la fiche •... -
Page 26: Dépannage Et Garantie
FRANÇAIS DÉPANNAGE ET GARANTIE AVANT D’APPELER POUR LE SERVICE SI L’APPAREIL NE FONCTIONNE PAS: A) Assurez-vous que l’appareil est branché solidement. Si ce n’est pas le cas, retirez la fiche de la prise, attendez 10 secondes et branchez-le à nouveau sécuritairement. -
Page 27: Garantie Limitée
FRANÇAIS DÉPANNAGE ET GARANTIE GARANTIE LIMITÉE Toute réparation, remplacement ou réparation 12. Appels de service pour vous expliquer comment utiliser votre produit. sous garantie, et toutes les questions sur ce produit doivent être adressées à W Appliance 13. Les appels de service pour réparer ou remplacer le fusible de la maison, Co. - Page 28 FRANÇAIS DÉPANNAGE ET GARANTIE Cet appareil respecte la section 15 des directives FCC. Son utilisation est soumise aux deux conditions suivantes: 1) cet appareil ne doit pas causer aucune interférence nuisible; et 2) cet appareil doit accepter toute interférence reçue, y compris les interférences susceptibles de provoquer un fonctionnement indésirable.
-
Page 29: Date D'achat
FRANÇAIS MEMO DATE D’ACHAT: LIEU D’ACHAT: Page 29... - Page 30 ESPAÑOL CONTENIDO INFORMACIÓN DE SEGURIDAD Instrucciones Importantes de Seguridad.......................31-32 Requerimientos Eléctricos ..............................32 CONFIGURACIÓN Y USO Partes y Funcionalidades ..............................34 Operación y Uso .............................. 35-38 Remplazar el Fusible ............................39 LIMPIEZA Y CUIDADO ..........................39 SOLUCIÓN DE PROBLEMAS Y GARANTÍA Antes de llamar al Servicio Técnico ......................40 Atención al Cliente ..............................
-
Page 31: Información De Seguridad
ESPAÑOL INFORMACIÓN DE SEGURIDAD PELIGRO ADVERTENCIA PRECAUCIÓN PELIGRO - Riesgos inmediatos ADVERTENCIA - Riesgos o PRECAUCIÓN - Riesgos o que RESULTARÁN en lesiones prácticas peligrosas que PODRÍAN prácticas peligrosas que PODRÍAN personales severas o la muerte RESULTAR en lesiones personales RESULTAR en lesiones personales severas o la muerte severas o la muerte... -
Page 32: Requerimientos Eléctricos
ESPAÑOL INFORMACIÓN DE SEGURIDAD 13. Para reducir el riesgo de descarga eléctrica o incendio, NO use este ventilador con ningún dispositivo de control de velocidad de estado sólido. 14. No usar en el exterior. 15. Asegúrese de que el ventilador esté desconectado de la corriente eléctrica antes de remover la rejilla. - Page 33 ESPAÑOL INFORMACIÓN DE SEGURIDAD MANIPULACIÓN DE PILAS ALCALINAS ADVERTENCIA Cuando se manipulen pilas alcalinas, se deben tomar precauciones de seguridad básicas, incluyendo las siguientes 1. Si el fluido de las pilas entrara en contacto con sus ojos accidentalmente, existe el riesgo de pérdida de la visión, no los frote. Lave inmediatamente sus ojos con agua limpia del grifo y consulte inmediatamente a un médico.
-
Page 34: Configuración Y Uso
ESPAÑOL CONFIGURACIÓN Y USO PARTS & FEATURES Apretar Aflojar Pomo giratorio Rejilla frontal 12. Panel de Control 2. Anillo de plástico con hebilla 13. Tornillo manual 3. Pomo giratorio 14. Poste ajustable 4. Aspas pequeñas 15. Anillo de ajuste de altura 5. - Page 35 ESPAÑOL CONFIGURACIÓN Y USO MONTAJE ENSAMBLAJE DE LA BASE, POSTE EXTENSIBLE, POSTE AJUSTABLE, Y PANEL DE CONTROLES MANUALES 1. Desenrosque el perno en forma de “L” para quitar el perno y la arandela del poste extensible. (vea la Fig. 1). 2.
-
Page 36: Instalación De Las Pilas Del Control Remoto
ESPAÑOL CONFIGURACIÓN Y USO ENSAMBLAJE DE LA REJILLA Y LAS ASPAS ADVERTENCIA: Nunca intente hacer funcionar el ventilador sin la rejilla en su lugar y debidamente asegurada. No tener la rejilla colocada puede resultar en lesiones graves. 1. 1. Quite el pomo giratorio y la tuerca de plástico del frente del eje del motor girando el pomo giratorio en el sentido de las agujas del reloj y la tuerca de plástico en el sentido contrario a las agujas del reloj. -
Page 37: Ajuste De Inclinación
ESPAÑOL CONFIGURACIÓN Y USO INSTRUCCIONES DE OPERACIÓN El VENTILADOR puede ser operado con su control remoto (Como se muestra en la Fig. 8) o con los controles manuales ubicados en el VENTILADOR (mostrado en la Fig. 9). Coloque el VENTILADOR en una superficie plana y estable. Conecte el cable de alimentación a una toma de corriente de 120 V CA (Corriente Alterna). -
Page 38: Panel De Control
ESPAÑOL CONFIGURACIÓN Y USO PANEL DE CONTROL (Fig. 9) VELOCIDAD: El botón cumple con dos funciones. Para ENCENDER y APAGAR el ventilador y para elegir la velocidad deseada . Presione el botón para ENCENDER el ventilador en la velocidad BAJA. Presione nuevamente para circular a través de los ajustes de VELOCIDAD. -
Page 39: Remplazar El Fusible
ESPAÑOL CONFIGURACIÓN Y USO REMPLAZAR EL FUSIBLE • Desconecte el ventilador de la toma de corriente tomando el enchufe al final del cable.No lo desenchufe tirando del cable. • Abra la cubierta del fusible ubicada en el lado del enchufe del cable de alimentación deslizándola hacia las clavijas del enchufe •... -
Page 40: Solución De Problemas Y Garantía
ESPAÑOL SOLUCIÓN DE PROBLEMAS Y GARANTÍA ANTES DE LLAMAR AL SERVICIO TÉCNICO SI EL APARATO NO FUNCIONA: A) Asegúrese de que el aparato está enchufado firmemente.De lo contrario, retire el enchufe de la toma, espere 10 segundos y conéctelo nuevamente de forma segura. -
Page 41: Garantía Limitada
ESPAÑOL SOLUCIÓN DE PROBLEMAS Y GARANTÍA GARANTÍA LIMITADA Cualquier reparación, recambio, o servicio LA REPARACIÓN O EL REMPLAZO COMO SE ESTABLECE EN ESTA GARANTÍA SON LA de garantía, y todas las preguntas sobre este SOLUCIÓN EXCLUSIVA DEL CLIENTE; W Appliance producto deben ser dirigidas a W Appliance Co. - Page 42 ESPAÑOL SOLUCIÓN DE PROBLEMAS Y GARANTÍA Este dispositivo cumple con la parte 15 de las reglas de la FCC. Su operación está sujeta a las siguientes dos condiciones:1) Este dispositivo no deberá causar interferencias perjudiciales, y 2) Este dispositivo debe aceptar cualquier interferencia recibida, incluyendo interferencia que pueda causar un funcionamiento no deseado.
- Page 43 ESPAÑOL NOTA FECHA DE COMPRA: LUGAR DE COMPRA: Página 43...
- Page 44 BLACK & DECKER, BLACK+DECKER, the BLACK & DECKER and BLACK+DECKER logos and product names and the orange and black color scheme are trademarks of The Black & Decker Corporation, used under license. All rights reserved. BLACK & DECKER, BLACK+DECKER, y los logos y nombres de productos de BLACK & DECKER y BLACK+DECKER y el esquema de colores naranja y rojo son marcas registradas de The Black &...