
Manuels Connexes pour Pioneer ELITE SC-91


Sommaire des Matières pour Pioneer ELITE SC-91
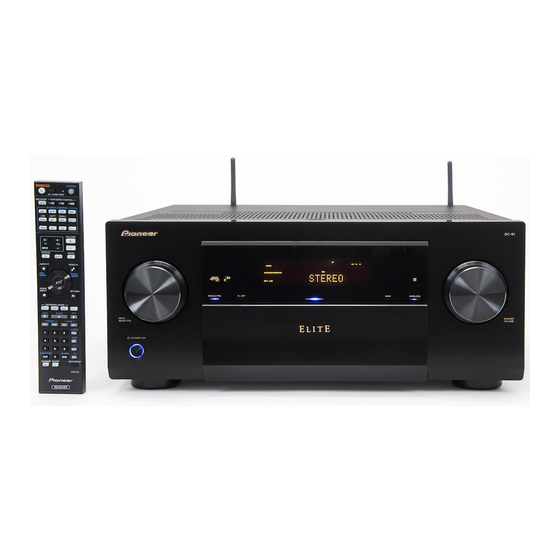
- Page 1 Quick Start Guide Guide rapide Register your product at http://www.pioneerelectronics.com (US) http://www.pioneerelectronics.ca (Canada) AV Receiver Récepteur AV...
-
Page 2: What's In The Box
English VENTILATION CAUTION Thank you for buying this Pioneer product. This Quick Start Guide includes instructions for basic connections and operations to When installing this unit, make sure to leave space allow simple use of the receiver. For detailed descriptions of the receiver, see the “Operating Instructions” provided on the... - Page 3 Connection and initial setup Perform connection and initial settings in any of the ways listed below. Follow the guidance of the built-in Follow the instructions in the Use “Start-up Navi” app to perform AVNavigator to perform connection booklet to perform connection connection and initial settings and initial settings and initial settings...
-
Page 4: Connecting To The Network Through Lan Interface
If you have a Mac/PC Connecting to the network through LAN interface Plugging in the receiver After connecting to a LAN, connect the power cord of the Internet receiver to a power outlet. Modem Plug the supplied power cord into the AC IN socket on the Router back of the receiver. -
Page 5: Operating Environment
Enter number in 2 above in the field in Operating environment Launching the built-in AVNavigator Internet Explorer shown below and then press • AVNavigator can be used in the following environments. Operate AVNavigator by following the screen prompts of your the ENTER key. -
Page 6: Placing The Speakers
Follow the booklet instructions to perform connection and initial settings Connecting up Placing the Speakers L – Front Left C – Center TMdL TMdR R – Front Right SL – Surround Left SR – Surround Right SBL – Surround back Left SBR –... -
Page 7: Connecting The Speakers
Connecting up Connecting the speakers Center Front Right Subwoofer Front Left (SW) • You can use speakers with a nominal impedance between 4 Ω and 16 Ω. Bare wire connections LINE LEVEL INPUT Twist exposed wire strands together. Loosen terminal and insert exposed wire. Tighten terminal. -
Page 8: Connecting A Tv And Playback Components
12 V TRIGGER you an electrical shock. Check the power cord once in a (OUTPUT 12 V while. When you find it damaged, ask your nearest Pioneer SPEAKERS CONTROL TOTAL 150 mA MAX) authorized service center or your dealer for a replacement. -
Page 9: Initial Setup
Initial Setup Before you start Automatically setting up for surround sound (MCACC) Press MAIN RECEIVER on the remote control, Put the batteries in the remote control. The Auto Multi-Channel ACoustic Calibration (MCACC) setup uses the supplied setup microphone to measure and analyze then press the ENTER button. -
Page 10: Basic Playback
Basic playback Switch on the playback component. Multichannel playback To enjoy the many functions of the E.g.) Turn the Blu-ray Disc player connected to the HDMI BD IN terminal on. unit to the fullest extent STANDBY/ON SOURCE Switch the input of the receiver. ALL ZONE STBY E.g.) Press BD to select the BD input. -
Page 11: Frequently Asked Questions
(The power turns off in 5 seconds after the power is turned on. devices are unresponsive. The receiver’s setting will be maintained.) Also try replugging the power cord of the connecting devices. © 2015 PIONEER HOME ELECTRONICS CORPORATION. All rights reserved. -
Page 12: Contenu Du Carton D'emballage
Français PRÉCAUTION DE VENTILATION Merci pour l’achat de ce produit Pioneer. Ce guide rapide contient les instructions relatives aux raccordements et opérations de Lors de l’installation de l’appareil, veillez à laisser un base permettant une utilisation simple de ce récepteur. Pour des descriptions plus détaillées du récepteur, référez-vous au espace suffisant autour de ses parois de manière à... -
Page 13: Raccordement Et Configuration Initiale
Raccordement et configuration initiale Procédez à la connexion et aux réglages initiaux selon l’une des méthodes énumérées ci-dessous. Utilisez l’application “Start-up Navi” Suivez les directives du AVNavigator Suivez les instructions dans le livret pour effectuer la connexion et les intégré pour procéder à la connexion et pour procéder à... -
Page 14: Si Vous Avez Un Mac Ou Un Pc
Si vous avez un Mac ou un PC Raccordement au réseau par l’interface LAN Branchement du récepteur Après la connexion à un réseau LAN, branchez le cordon Internet d’alimentation du récepteur à une prise électrique. Modem Branchez le cordon d’alimentation fourni à la prise AC IN Routeur située à... -
Page 15: Lancement De L'avnavigator Intégré
Saisissez le numéro de l’étape 2 ci-dessus Environnement d’exploitation Lancement de l’AVNavigator intégré dans le champ d’Internet Explorer indiqué ci- • L’AVNavigator peut être utilisé dans les environnements Utilisez AVNavigator en suivant les invites sur l’écran de votre dessous, puis appuyez sur la touche ENTER. suivants. -
Page 16: Installation Des Enceintes
Suivez les instructions dans le livret pour procéder à la connexion et aux réglages initiaux Raccordement Installation des enceintes L – Avant Gauche C – Centre TMdL TMdR R – Avant Droite SL – Surround Gauche SR – Surround Droite SBL –... -
Page 17: Raccordement Des Enceintes
Raccordement Raccordement des enceintes Centre Avant Droite Caisson de grave Avant Gauche (SW) • Vous pouvez utiliser des enceintes ayant une impédance nominale comprise entre 4 Ω et 16 Ω. Raccordement des fils dénudés LINE LEVEL INPUT Torsadez les fils ensemble. Dévissez la borne et insérez la partie dénudée des fils. -
Page 18: Raccordement D'un Téléviseur Et De Périphériques De Lecture
SPEAKERS CONTROL TOTAL 150 mA MAX) choc électrique. Vérifier le câble d’alimentation de temps en temps. Contacter le service après-vente Pioneer le plus ll est nécessaire proche ou le revendeur pour un remplacement. de connecter ce • Lorsque le récepteur n’est pas utilisé régulièrement câble pour pouvoir... -
Page 19: Configuration Initiale
Configuration initiale Préparatifs Configuration automatique du son surround (MCACC) Appuyez sur MAIN RECEIVER de la télécommande, Insérez les piles dans la télécommande. Le système de calibrage acoustique multicanaux (Multi- Channel ACoustic Calibration, MCACC) utilise le microphone puis appuyez sur la touche ENTER. de configuration fourni pour mesurer et analyser la tonalité... -
Page 20: Lecture De Base
Lecture de base Allumez le lecteur. Lecture multicanaux Pour profiter au maximum des Ex.) Allumez le lecteur de disque Blu-ray raccordé à la prise HDMI BD IN. nombreuses fonctions de l’appareil STANDBY/ON SOURCE Sélectionnez l’entrée du récepteur. ALL ZONE STBY Ex.) Appuyez sur BD pour sélectionner l’entrée BD. -
Page 21: Foire Aux Questions
5 secondes ou plus. (L’alimentation s’interrompt plus. 5 secondes après la mise sous tension. Les réglages du récepteur seront conservés.) Essayez également de rebrancher le cordon d’alimentation des appareils connectés. © 2015 PIONEER HOME ELECTRONICS CORPORATION. Tous droits de reproduction et de traduction réservés. - Page 24 (Canada) PIONEER ELECTRONICS AUSTRALIA PTY. LTD. 5 Arco Lane, Heatherton, Victoria, 3202, Australia, TEL: (03) 9586-6300 PIONEER ELECTRONICS DE MEXICO S.A. DE C.V. Blvd.Manuel Avila Camacho 138 10 piso Col.Lomas de Chapultepec, Mexico, D.F. 11000 TEL: 55-9178-4270 K002_B3_En © 2015 PIONEER HOME ELECTRONICS CORPORATION.