Table des Matières
Publicité
Les langues disponibles
Les langues disponibles
Liens rapides
Cat. No. / No de cat.
3000
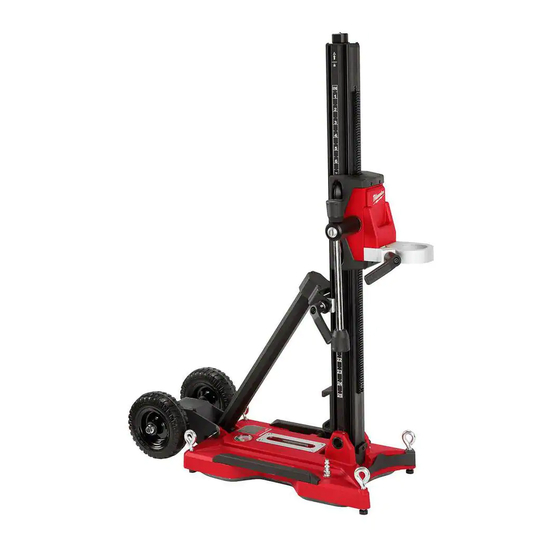
COMPACT CORE DRILL STAND
SUPPORT DE FORET DE NOYAU COMPACT
SOPORTE DE TALADRO DE NÚCLEO COMPACTO
WARNING
AVERTISSEMENT
comprendre le manuel.
ADVERTENCIA
To reduce the risk of injury, user must read and understand operator's manual.
Afin de réduire le risque de blessures, l'utilisateur doit lire et bien
Para reducir el riesgo de lesiones, el usuario debe leer y entender el manual.
OPERATOR'S MANUAL
MANUEL de L'UTILISATEUR
MANUAL del OPERADOR
Publicité
Table des Matières

Manuels Connexes pour Milwaukee 3000

Sommaire des Matières pour Milwaukee 3000
- Page 1 OPERATOR'S MANUAL MANUEL de L'UTILISATEUR MANUAL del OPERADOR Cat. No. / No de cat. 3000 COMPACT CORE DRILL STAND SUPPORT DE FORET DE NOYAU COMPACT SOPORTE DE TALADRO DE NÚCLEO COMPACTO WARNING To reduce the risk of injury, user must read and understand operator's manual.
-
Page 2: General Power Tool Safety Warnings
GENERAL POWER TOOL • Dress properly. Do not wear loose clothing or jewelry. Keep your hair and clothing away from SAFETY WARNINGS moving parts. Loose clothes, jewelry or long hair can Read all safety warnings, instruc- WARNING be caught in moving parts. tions, illustrations and specifica- •... -
Page 3: Functional Description
• Follow all charging instructions and do not charge your capability; contact Milwaukee Tool or a trained the battery pack or tool outside the temperature professional for additional information or training. - Page 4 WARNING unplug drill or remove battery be- respirator protection fore installing the drill. Use a MILWAUKEE MX FUEL ™ Core Drill with UL Listing for Canada and U.S. this stand. 1. To mount the drill, loosen the mount plate handle.
- Page 5 1. Loosen the (4) eye bolts until the ends are above Some building materials contain steel reinforce- the bottom surface of the base. ments. MILWAUKEE core drill bits can cut through 2. Extend the center pointer and align it with the embedded steel, but are not recommended for coring center of the hole to be drilled.
-
Page 6: Accessories
Lubricating Rack bit may extend through the hole or the core may Maintain a light coat of MILWAUKEE Type "P" or "J" fall out on the other side from falling debris/cores. Grease on the rack to reduce friction and wear when 1. -
Page 7: Sécurité Du Lieu De Travail
This warranty does not apply to damage that et instructions peut entraîner une électrocution, un MILWAUKEE determines to be from repairs made or attempted by anyone other than MILWAUKEE authorized personnel, misuse, alterations, abuse, incendie ou des blessures graves. Conserver les normal wear and tear, lack of maintenance, or accidents. -
Page 8: Sécurité Individuelle
SÉCURITÉ INDIVIDUELLE correctement entretenus et dont les tranchants sont bien affûtés risquent moins de se bloquer et sont plus • Rester attentif, prêter attention au travail et faire faciles à contrôler. preuve de bon sens lors de l'utilisation de tout outil •... -
Page 9: Description Fonctionnelle
14. Niveau de 360° vous pensez que le travail dépasse votre capacité ; 5. Ensemble de porteur 15. Pointeau central veuillez contacter Milwaukee Tool ou un professionnel 16. Boulons à œil (4) 6. Emplacement de levier formé pour recevoir plus d’information ou formation. -
Page 10: Montage De L'outil
4. Glisser l’ensemble de la perceuse. porteur sur le mât, en faisant que les roulettes Utiliser un foret aléseur MX FUEL™ de Milwaukee du porteur correspondre avec ce stand. aux rainures sur le mât. 1. Pour monter le foret, desserrer la poigné de la R E M A R Q U E plaque de montage. -
Page 11: Utilisation De Chevilles Expansibles
• Toujours vérifier les joints qui se trouvent par le bas renforts en acier. Les trépans de forets aléseurs de la base pour confirmer s’ils ont d’usure, des fis- de MILWAUKEE peuvent couper l’acier incorporé, sures ou des déchirures. Immédiatement remplacer mais ils ne sont pas recommandés pour carotter les les joints usés ou endommagés. -
Page 12: Utilisation De L'épingle D'étayage
à des fins de fixation. tionnement des outils. Retourner les outils au centre 2. Utiliser tous les (4) boulons à œil pour niveler de service de MILWAUKEE aux fins de réparation. le stand. Ajustage de l’ensemble de porteur 3. -
Page 13: Accesoires
Veuillez consulter la rubrique « Centre SAV Milwaukee », dans la section détériorer le plastique et les autres pièces isolées. En « Pièces et service » du site web de MILWAUKEE, à l’adresse http://www. milwaukeetool.com ou composer le 1.800.SAWDUST (1.800.729.3878) afin voici quelques exemples : l’essence, la térébenthine,... -
Page 14: Advertencias De Seguridad Generales Para La Herramienta Eléctrica
por falla de conexión a tierra (GFCI). El uso de un IMPORTÉ ET COMMERCIALISÉ PAR TECHTRONIC INDUSTRIES, MEXIQUE, S.A. DE C.V . GFCI reduce el riesgo de descarga eléctrica. Miguel de Cervantes Saavedra No.301 Piso 5, Torre Norte SEGURIDAD PERSONAL 11520 Colonia Ampliación Granada Miguel Hidalgo, Ciudad de Mexico, Mexico •... - Page 15 REGLAS ESPECIFICAS DE con Milwaukee Tool o con un profesional capacitado SEGURIDAD PARA SOPORTE DE para recibir capacitación o información adicional. TALADRO DE NÚCLEO COMPACTO •...
-
Page 16: Descripcion Funcional
ESPECIFICACIONES la frecuencia con que realice este tipo de trabajo. Para reducir su exposición a estos químicos: trabaje en un área Cat. No............3000 bien ventilada y trabaje con equipo de seguridad apro- Bomba de vacío ........49-50-0200 bado, como mascarillas protectoras contra polvo espe- Kit de empaquetaduras ...... - Page 17 Nunca dependa únicamente del soporte de apun- ta o quite la batería antes de instalar el taladro. talamiento para fijar. Utilice una perforadora de cilindros MILWAUKEE MX Siempre asegúrese de que el soporte esté montado FUEL™ con este soporte. rígidamente con un anclaje expansor o sistema de 1.
- Page 18 Los anclajes expansores son el método más rígido 7. Siga vigilando el sello y pueden utilizarse para perforaciones verticales de vacío. El vacu- (pared) y horizontales (piso). Utilice un anclaje de ómetro se utiliza 16 mm o 19 mm (5/8"o 3/4") con una varilla roscada para asegurarse de integral, arandela y tuerca (no incluidas).
- Page 19 Mantenga una capa ligera de grasa tipo “P” o “J” de 5. Ajuste el soporte al ángulo deseado. MILWAUKEE en la rejilla para reducir la fricción y el 6. Asegúrese de que todos los ajustes estén fijos y desgaste cuando la transportadora se mueva hacia el indicador del centro esté...
- Page 20 ACCESORIOS PODRÍA NO APLICARSE A SU CASO. ESTA GARANTÍA ES EXCLUSIVA Y REEMPLAZA TODAS LAS DEMÁS GARANTÍAS EXPRESAS, ESCRITAS U ORALES. EN LA MEDIDA EN QUE LO PERMITA LA LEY, MILWAUKEE Utilice sólo los accesorios ADVERTENCIA DESCONOCE CUALQUIER GARANTÍA IMPLÍCITA, INCLUYENDO, EN- específicamente recomenda-...