Publicité
Liens rapides
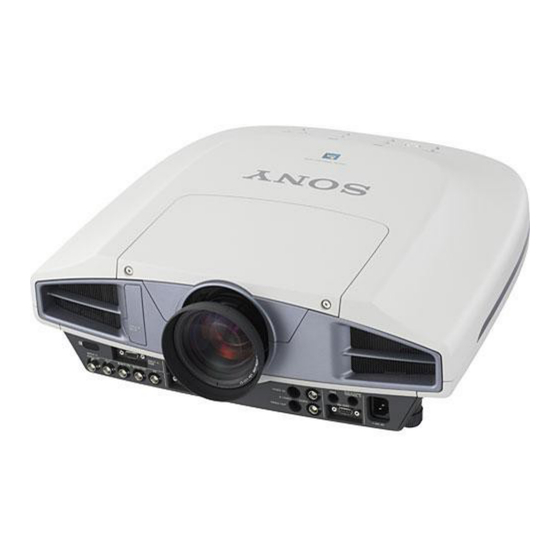
Data Projector
特約店様用設置説明書 3
〜
この特約店様用設置説明書には、 レンズの交換方法、 別売りのレンズ使用時や天井吊りの場合の設置寸法な
ど、製品の設置時に必要な情報を記載しています。
電気製品は、 安全のための注意事項を守らないと、 火災や人身事故になる こ とが
あ り ます。
この特約店様用設置説明書には、 事故を防ぐための重要な注意事項を示しています。 この設置説明書をよ く
お読みのう え、 製品を安全にお使いく ださい。 お読みになったあとは、 いつでも見られる と ころに必ず保管して
く ださい。
Installation Manual for Dealers
This installation Manual for Dealers explains how to install the projector. For example, it explains
lens replacement, installation measurements when using the optional lens and hanging the projector
from the ceiling.
Manuel d'installation pour les revendeurs
couverture dos
Le manuel d'installation pour les revendeurs explique comment installer le projecteur. Par
exemple, il explique la procédure de remplacement de l'objectif, les dimensions d'installation
lorsque vous employez l'objectif en option et comment suspendre le projecteur au plafond.
Manual de instalación para proveedores
cubierta posterior
En este manual de instalación para proveedores se describe cómo instalar el proyector. Por
ejemplo, se describe cómo sustituir el objetivo, las medidas de instalación cuando se utiliza el
objetivo opcional y cómo colgar el proyector en el techo.
Installationsanleitung für Händler
Umschlagseite
In dieser Installationsanleitung für Händler wird erläutert, wie Sie den Projektor installieren.
Beispielsweise werden das Austauschen des Objektivs, die Installationsabmessungen beim
Verwenden des gesondert erhältlichen Objektivs und das Installieren des Projektors an der Decke
beschrieben.
Manuale d'installazione per i rivenditori
posteriore
Il presente manuale contiene le istruzioni relative all'installazione del proiettore. Vengono riportate
ad esempio le istruzioni su come sostituire l'obiettivo, le misure di installazione quando si utilizza
l'obiettivo opzionale e le procedure dell'installazione al soffitto.
经销商用安装说明书 第 3、25 至 27、28 至 47 页和封底
本说明书为经销商讲解投影机的安装方法。例如,更换透镜的方法、使用选购透镜和悬吊
安装时的安装尺寸。
VPL-FX51
2002 Sony Corporation
8
、
28
〜
47
ページ、裏表紙
Pages 3, 9 to 11, 28 to 47, and back cover
Pages 3, 12 à 14, 28 à 47, et
Páginas 3, 15 a 17, 28 a 47, y
Seite 3, 18 bis 21, 28 bis 47, und Hintere
Pagine 3, 22 a 24, 28 a 47, e piatto
4-089-636-01 (1)
1
Publicité

Manuels Connexes pour Sony VPL-FX51


Sommaire des Matières pour Sony VPL-FX51
- Page 1 Il presente manuale contiene le istruzioni relative all’installazione del proiettore. Vengono riportate ad esempio le istruzioni su come sostituire l’obiettivo, le misure di installazione quando si utilizza l’obiettivo opzionale e le procedure dell’installazione al soffitto. 经销商用安装说明书 第 3、25 至 27、28 至 47 页和封底 本说明书为经销商讲解投影机的安装方法。例如,更换透镜的方法、使用选购透镜和悬吊 安装时的安装尺寸。 VPL-FX51 2002 Sony Corporation...
- Page 2 安全のために ソニー製品は安全に充分配慮して設計されています。しかし、電気製品は、 警告表示の意味 まちがった使いかたをすると、 火災や感電などにより死亡や大けがなど人身 取扱説明書および製品では、次 事故につながることがあり、危険です。 のような表示をしています。表 事故を防ぐために次のことを必ずお守りください。 示の内容をよく理解してから本 文をお読みください。 安全のための注意事項を守る 4 〜 5 ページの注意事項をよくお読みください。 定期点検をする この表示の注意事項を守らない 5 年に 1 度は、内部の点検を、お買い上げ店またはテクニカルインフォメー と、火災や感電などにより死亡 ションセンターにご依頼ください(有料) 。 や大けがなど人身事故につなが ることがあります。 故障したら使わない すぐに、 お買い上げ店またはテクニカルインフォメーションセンターにご連 絡ください。 この表示の注意事項を守らない と、感電やその他の事故により 万一、異常が起きたら けがをしたり周辺の物品に損害 を与えたりすることがありま ・煙が出たら 1 電源を切る。 す。 ・異常な音、におい...
- Page 3 Diagrama de instalación ..........28 日本語 Instalación en el suelo ............28 Instalación en el techo ............32 目次 Instalación del soporte de suspensión del proyector PSS-620 ................36 Instalación en el suelo para apilamiento doble ..... 38 警告 ................Dimensiones ...............
- Page 4 容量の低い電源延長コードを使用しない 容量の低い延長コードを使うと、 ショートし たり火災や感電の原因となることがありま 下記の注意を守らないと、 す。 火災 感電 死亡 大けが や により や に つながることがあります。 電源コードのプラグおよびコネクターは突き あたるまで差し込む 通風孔をふさぐような場所に設置しない まっすぐに突きあたるまで差し込まないと、 通風孔をふさぐと内部に熱がこもり、 火災や 火災や感電の原因となります。 故障の原因となることがあります。 風通しを よくするために次の項目をお守りください。 • 壁から 50cm 以上離して設置する。 • 密閉された狭い場所に押し込めない。 • 毛足の長い敷物(じゅうたんや布団など) の上に設置しない。 • 布などで包まない。 天井への取り付けには細心の注意をはらう 下記の注意を守らないと、 • 天井への取り付け強度が不十分だと、落下 けが...
- Page 5 アジャスター調整時、手を挟まないよう注意 電池についての安全上の する ご注意 アジャスターを回しすぎるとアジャスターが はずれ、 手を挟むことがありますのでご注意 ここでは、本機での使用が可能なソニー製乾電池についての ください。 注意事項を記載しています。 コード類は正しく配置する 万一、異常が起きたら 電源コードや接続コードを足に引っかけると すぐにきれいな水で洗い、 ただ 電池の液が目に入っ 転倒したり、 プロジェクターの落下によりけ ちに医師の治療を受ける。 たら がの原因となることがあります。 十分注意し て接続・配置してください。 お買い上げ店またはテクニカ 煙が出たら ルインフォメーションセン 低い天井に天吊りしない ターに連絡する。 頭などをぶつけてけがをすることがありま 電池の液が皮膚や すぐにきれいな水で洗い流す。 す。 衣服に付いたら バッテリ ー収納部内 よく ふき取ってから、新しい電 キャビネットのカバー類はしっかり固定する で液が漏れたら 池を入れる。 天吊りの場合、...
- Page 6 日本語 本機の性能を保持するた 概要 めに この説明書は、 ソニーデータプロジェク ターVPL-FX51の設置に関 する説明書です。 レンズ交換のしかたや設置寸法等が記されて 設置場所について います。 レンズ交換をする場合は、取扱説明書もあわせてよく お • 底面の吸気口および前面の排気口は、 内部の温度上昇を防ぐ 読みく ださい。 ためのものです。 風通しの悪い場所を避け、 吸気口および排気 口をふさがないよう に設置してく ださい。 • 温度・湿度が非常に高い場所や温度が著しく 低い場所、 ほこ り の多い場所での使用は避けてく ださい。 • 床置きおよび天井つり以外の設置でお使いになる と、 色むらや ラ ンプ寿命の劣化などの問題が起こ る こ とがあ り ますので避けて...
- Page 7 本体と レンズのコネクター (2か所) をはずす。 レンズ交換のしかた 次の種類の別売りのレンズを取り付ける こ とができます。 • 長焦点ズームレンズ VPLL-ZM101 • 短焦点ズームレンズ VPLL-ZM31 • 短焦点固定レンズ VPLL-FM21 ご注意 別売りアクセサリ ーの短焦点固定レンズ VPLL-FM21をご使用に なる場合は、製品コー ドをご確認のう えお使いく ださい。 レンズを固定している 4本(M4×12, ワ ッシャー付)のネジをプ • 製 品 の入っている箱 の右 上 部 のシールに製 品コード「 P- ラス ドライ バーではずす。 93817601」...
- Page 8 4本のネジをしめ、交換レンズをしっかり と固定する。 コネクターを交換レンズに接続する。 標準レンズ以外のレンズを取り付ける と きは、 この手順と手 順 11は必要あ り ません。 手順 4 ではずしたコネク タ−ケ−ブルをケーブル留めで固 定する。 レンズカバーを前側から奥へ、ス ライ ド させて閉める。 レンズカバー 2 本のネジをしめ、 レンズカバーを固定する。 レンズ交換の際のご注意 • 取りはずしたレンズまたは取り付ける レンズを置く と きは、 しっか り した水平な台の上に静かに置いてく ださい。 レンズ面は傷つき やすいので取り扱いには充分注意してく ださい。 • レンズ面には手を触れないよ う にしてく ださい。...
- Page 9 (intake) at the bottom and ventilation holes (exhaust) • When the projector is mounted on the ceiling, the at the front. Do not block or place anything near these Sony PSS-620 Projector Suspension Support must be holes, or internal heat build-up may occur, causing used for installation.
- Page 10 Lens cover Overview This manual describes how to install the Sony Data Projector VPL-FX51, how to replace the lens and installation diagrams. When you replace the lens, also Release the connector cables from the cable binder refer to the Operating Instructions.
- Page 11 Tighten the four screws to secure the replacement Disconnect the two connectors on the lens from lens firmly. those on the projector. Connect the two connectors. Skip this step and the next when installing a lens other than the standard one. Remove the four screws (M4×12, with washers) locking the lens by using a Phillips screwdriver.
- Page 12 N’oubliez pas que la chaleur dans un personnel Sony qualifié avant de le remettre en une pièce monte; vérifiez donc si la température au service. niveau du lieu d’installation n’est pas excessive.
- Page 13 été emballé à l’origine en usine. Aperçu Le présent mode d’emploi décrit comment installer le projecteur de données Sony VPL-FX51, comment (à suivre) remplacer l’objectif et comporte également des plans d’installation. Lors du remplacement de l’objectif, reportez-vous également au mode d’emploi.
- Page 14 Retirez les câbles des connecteurs de la bride Butée (Projecteur) d’attache en ouvrant celle-ci. Passez directement à l’étape 6 si vous installez un objectif qui n’est pas standard. Butée (Objectif) Bride d’attache Remarques • Prenez garde de ne pas coincer les connecteurs en installant l’objectif.
- Page 15 Deje un espacio superior a 50 cm unidad, desenchúfela y haga que sea examinada por pulgadas) entre la pared y el proyector. Tenga personal Sony especializado antes de volver a en cuenta que el calor del ambiente se eleva hacia el utilizarla.
- Page 16 Cubierta del objetivo Introducción En este manual se describen los procedimientos para instalar el proyector de datos de Sony, modelo VPL- FX51, sustituir el objetivo y se ofrecen diagramas de instalación. Al sustituir el objetivo, consulte las instrucciones de uso.
- Page 17 Tope (Proyector) Libere los cables de los conectores de la abrazadera de cables abriéndola. Omita este paso y el siguiente cuando instale un objetivo diferente al estándar. Tope (Objetivo) Abrazadera de Notas cables • Asegúrese de que los conectores no quedan atrapados cuando instale el objetivo.
- Page 18 Deutsch Aufstellung Sicherheitsmaßnahmen • Mit Hilfe der Projektoraufhängung PSS-620 von Sony können Sie den Projektor an der Decke Sicherheit installieren. • Achten Sie auf ausreichende Luftzufuhr, damit sich • Achten Sie darauf, daß die Betriebsspannung des im Gerät kein Wärmestau bildet. Stellen Sie das Geräts der lokalen Stromversorgung entspricht.
- Page 19 Bedienfeld oder mit der Fernbedienung ausgeschaltet In dieser Anleitung wird beschrieben, wie Sie den haben, trennen Sie es nicht von der Netzsteckdose, Datenprojektor VPL-FX51 von Sony installieren und solange der Ventilator noch läuft. das Objektiv austauschen. Außerdem sind • Lösen Sie nicht das Netzkabel von der Installationsdiagramme abgebildet.
- Page 20 Lösen Sie die Verbindungskabel aus dem Austauschen des Kabelband, indem Sie es öffnen. Objektivs Lassen Sie diesen und den nächsten Schritt aus, wenn Sie nicht das Standardobjektiv, sondern ein anderes Objektiv installieren. Die folgenden drei Objektivtypen können im Projektor installiert werden: •...
- Page 21 Weiten Sie das Objektivpolster, und bringen Sie Bringen Sie die Objektivabdeckung wieder an, das Objektiv so an, daß die Kanten des Stoppers indem Sie sie von vorn nach hinten schieben. am Objektiv und am Projektor aufeinandertreffen. Objektiv- abdeckung Stopper (Projektor) Stopper (Objektiv) Ziehen Sie die beiden Schrauben an, um die Objektivabdeckung sicher zu befestigen.
- Page 22 Italiano Installazione Precauzioni • Se il proiettore viene installato al soffitto, è necessario utilizzare il supporto di sospensione Sony Sicurezza PSS-620. • Consentire una buona circolazione d’aria all’interno • Verificare che la tensione operativa dell’apparecchio dell’apparecchio per evitarne il surriscaldamento.
- Page 23 Rimuovere il copriobiettivo facendolo scorrere in avanti, quindi sollevandolo. Copriobiettivo Nel presente manuale vengono descritte le modalità di installazione del proiettore di dati Sony VPL-FX51, di sostituzione dell’obiettivo, nonché i diagrammi di installazione. Per sostituire l’obiettivo, fare riferimento alle istruzioni per l’uso.
- Page 24 Rilasciare i cavi del connettore aprendo il Fermo (Proiettore) fermacavo. Saltare questo punto e quello successivo se si sostituisce un obiettivo diverso da quello standard. Fermo (Obiettivo) Fermacavo Note • Assicurarsi che i connettori non rimangano incastrati durante l’installazione dell’obiettivo. Scollegare i due connettori dell’obiettivo da quelli •...
- Page 25 中文 •请将投影机安装在地板或天花板上。任何其他安装 使用前须知 方式将引起诸如色彩紊乱或灯泡寿命缩短等故障。 •请勿将本机安装在靠近取暖器或暖气管等热源之 处,也勿将本机安装在受阳光直射、多尘、潮湿或 安全须知 有机械振动或冲击之处。 •请核查本机的工作电压是否与当地的供电电压一 •为避免湿气凝结,请勿将本机安装在温度可能急剧 致。若需进行电压适配,请向 Sony 公司的专业技 升高的地方。 术人员咨询。 •悬吊安装时,一定要装严机壳盖板。 •万一有液体或固体落入机壳内,请拔下本机的电源 插头,并请 Sony 公司的专业技术人员检查后再使 照明须知 用。 •数日不使用本机时,请将本机的电源插头从墙上电 •为获得最佳图像,不可使屏幕正面暴露在直射光线 源插座拔出。 或阳光之下。 •拔取电源线时,请手持插头将其拔出,切勿拉扯电 •推荐使用吊装聚光灯。请用灯罩遮住荧光灯以免降 线本身。 低对比度。 •本机应靠近墙上电源插座以便接线。 •用不透光的帷幕遮住面对屏幕的所有窗户。 •即使本机的电源已关闭,只要其电源插头还连接在 •最好将投影机安装在地板和墙壁都不是反光材料制 墙上电源插座上,本机便未脱离交流电源。 成的房间内。如果地板和墙壁是反光材料制成的, •投影灯点亮时,请勿直视透镜。 最好将地毯和壁纸改为暗色的。 •请勿将手或物体放在通风孔附近—因排出的空气很 热。...
- Page 26 的污迹可用稍沾中性洗涤剂的布擦除。切勿使用稀 释剂、汽油或抛光剂等强性溶剂,否则会损坏机 关闭电源,拔出交流电源线。 壳。 用菲利浦螺丝刀卸下透镜保护罩上的两颗螺 •请勿触摸透镜。透镜上的灰尘请用柔软的干布擦 钉。 除。请勿使用湿布、洗涤剂或稀释剂。 •请定期清洁滤网。 重新包装须知 请保存原有的包装箱和包装材料;当您要运送 本机时,它们会给您带来方便。为尽量保护好机 体,请按照出厂时的包装方法重新包装本机。 向前推动并提起透镜保护罩以将其打开。 概要 透镜保护罩 本手册说明安装 Sony 数据投影机 VPL-FX51 和更换透镜的方法,并介绍安装图。当更换透镜 时,请同时参照使用说明书。 打开电缆扣带松开连接器电缆。 更换透镜 更换非标准透镜时请跳过此步骤和下一个步 骤。 可将下列三种类型的透镜安装在投影机上。 •VPLL-ZM101 长焦距变焦透镜 •VPLL-ZM31 短焦距变焦透镜 •VPLL-FM21 固定式短焦距透镜 注意 电缆扣带 要使用选购的 VPLL-FM21 固定短焦距镜头 时,请确认: •包装箱右上角的封条上所标注的产品号码是“P- 93817601”。...
- Page 27 拧紧四颗螺钉,固定换上的透镜。 拔下投影机透镜上的两个连接器。 连接两个插头。 安装非标准透镜时请跳过此步骤和下一个步 骤。 用菲立浦螺丝刀卸下固定透镜的四颗螺钉(M4 × 12,带垫圈)。 将在步骤 4 中松开的连接器电缆用电缆扣带固 定。 安装透镜保护罩,将其从前向后推动,直到其 嵌入固定位置。 轻轻抬起透镜,拉长透镜衬垫并向前推动取出 透镜。 透镜保护罩 拉长透镜衬垫并安装透镜,使透镜挡块的边缘 与投影机挡块的边缘相接触。 拧紧两颗螺钉,牢牢固定透镜保护罩。 注意 挡块(投影机) •透镜易刮伤,因此在使用时一定要将其轻轻放在平 稳的水平面上。 •请勿触摸透镜表面。 挡块(透镜) 注意 •在安装透镜时,切勿夹住连接器。 •为了在安装透镜时易于识别,务必使透镜上的 标记朝上。...
- Page 28 ;;;;;;;;; ;;;;;;;;; 壁 キャビネットの前面からレンズ中心までの距離 Wall Distance between the front of the cabinet and ;;;;;;;;; the center of the lens Pared Distance entre l’avant du châssis et le centre Wand de l’objectif Parete Distancia entre la parte frontal de la unidad y 墙壁...
- Page 29 Die Buchstaben in der Abbildung beziehen sich auf die Français unten beschriebenen Abstände. a : Abstand zwischen dem Projektionsschirm und der Mitte Schéma d’installation des Objektivs b : Abstand zwischen dem Boden und der Mitte des Installation au sol Objektivs c : Abstand zwischen dem Boden und der Unterseite der Cette section décrit des exemples d’installation du projecteur Ausgleichsfüße des Projektors...
- Page 30 / Unit: mm (inches) / Unité: mm (pouces) / Unidad: mm (pulgadas) / 単位: (インチ) VPLL-ZM101 ■ Einheit: mm (Zoll) / Unità: mm (pollici) / 单位:mm(英寸) 2600 4000 5410 6810 8220 10330 12430 13840 17350 20870 (102 (157 (213 (268 (323 (406 (489...
- Page 31 a : Abstand zwischen dem Projektionsschirm und der Français Mitte des Objektivs b : Abstand zwischen dem Boden und der Mitte des Schéma d’installation Objektivs Installation au sol c : Abstand zwischen dem Boden und der Unterseite der Ausgleichsfüße des Projektors Les mesures de l'installation et leur méthode de calcul pour x : frei chaque objectif sont indiquées sur la page de gauche.
- Page 32 When installing the projector on the ceiling, use the PSS- 天井つりの場合は、 プロジェク ターサスペンシ ョ ンサポー トPSS-620をご 620 Projector Suspension Support. 使用く ださい。 For ceiling installation, ask for qualified Sony personnel 設置は、代理店またはソニーサービスにおまかせく ださい。 only. 設置寸法については、 34 ページの表をご覧く ださい。 See the charts on page 34 concerning the installation measurements.
- Page 33 Para realizar la instalación en el techo, solicite asistencia x : distanza tra il soffitto e il centro dello schermo técnica únicamente a personal especializado de Sony. Consulte las tablas de la página 34 en relación con las 中文...
- Page 34 単位: (インチ) / Unit: mm (inches) / Unité: mm (pouces) / Unidad: mm (pulgadas) / Einheit: mm (Zoll) / Unità: mm (pollici) / 单位:mm (英寸) / Standard lens / Objectif standard / Objetivo estándar / Standardobjektiv / Uso ■ 標準レンズ Obiettivo standard /标准透镜...
- Page 35 Français Italiano Installation au plafond Installazione sul soffitto Les mesures de l'installation et leur méthode de calcul pour Le misure di installazione e il loro metodo di calcolo per chaque objectif sont indiquées sur la page de gauche. ogni obiettivo sono riportate nella pagina a sinistra. Le lettere nei diagrammi e i metodi di calcolo indicano Les caractères alphabétiques dans l’illustration et leurs quanto segue.
- Page 36 Installation mit dem Standardobjektiv des VPL-FX51 Unité: mm (pouces) / Unidad: mm Al emplear el objetivo estándar equipado con el VPL-FX51 (pulgadas) / Einheit: mm (Zoll) / Quando si utilizza l’obiettivo standard in dotazione con il VPL-FX51 Unità: mm (pollici)/ 单位:mm(英寸) 使用 VPL-FX51 配备的标准镜头时...
- Page 37 Draufsicht C Français Richten Sie die Mitte des Objektivs an der Mitte des Projektionsschirms aus. Fixation du support de suspension Vorderansicht D de projecteur PSS-620 Seitenansicht E a : Abstand zwischen dem Projektionsschirm und der Mitte des Pour plus de détails sur l’installation au plafond, reportez-vous au Objektivs manuel d'installation pour les revendeurs du PSS-620.
- Page 38 日本語 Français 床置き、 ツインスタック Installation au sol en double empilage スタックが可能なスクリーンサイズ 80インチから300インチのスクリーンがご使用になれます。 Format d’écran disponible pour la superposition ご注意 安全にお使いになるため、またメンテナンスのために、設置する Des écrans de 80 à 300 pouces sont disponibles pour une 際は壁からの距離を左右後方各50 cm以上離して設置してくださ installation en double superposition. い。 Remarque スタックをする際のご注意 Pour des raisons de sécurité...
- Page 39 Deutsch 中文 Installation am Boden für die 两台叠装的落地安装 Doppelprojektion 可以进行叠装的屏幕尺寸 Geeignete Projektionsschirmgrößen beim 80 至 300 英寸屏幕可用于两台叠装。 Stapeln von Projektoren 注意 80- bis 300-Zoll-Projektionsschirme stehen für eine 为安全和维修着想,将投影机离开墙壁安装。两侧和 Installation für Doppelprojektion zur Verfügung. 后面至少留出 50 cm 的空间。 Hinweis Aus Sicherheitsgründen und zu Wartungszwecken 关于叠装...
- Page 40 スクリーンの中心 Center of the screen ;;;;;;;;; Centre de l’écran Centro de la pantalla Mitte des Projektionsschirms Centro dello schermo 壁 ;;;;;;;;; 屏幕的中心 Wall 台目のプロジェクター Pared 2nd projector Wand 2e projecteur ;;;;;;;;; Parete Segundo proyector 墙壁 2. Projektor Secondo proiettore 第二台投影机 ;;;;;;;;;...
- Page 41 c: Abstand zwischen dem Boden und den Ausgleichsfüßen Français des ersten Projektors c’: Abstand zwischen dem Boden und den Ausgleichsfüßen Installation au sol en double empilage des zweiten Projektors Cette section décrit des exemples d’installation de deux x : frei projecteurs sur un bureau en double superposition.
- Page 42 / Unit: mm (inches) / Unité: mm (pouces) / Unidad: mm (pulgadas) / 単位: (インチ) Einheit: mm (Zoll) / Unità: mm (pollici) / 单位:mm (英寸) / Standard lens / Objectif standard / Objetivo estándar / Standardobjektiv / Uso ■ 標準レンズ Obiettivo standard / 标准透镜...
- Page 43 Español English Instalación en el suelo para apilamiento doble Floor installation for twin-stacking Las medidas de instalación y su método de cálculo para cada The installation measurements and their calculation method objetivo se muestran en la página izquierda. for each lens are shown on the left page. The alphabetical letters in the charts and calculation Las letras alfabéticas de las tablas y los métodos de cálculo methods indicate the following.
- Page 44 中文 Italiano 两台叠装的落地安装 Installazione al pavimento per impilazione Le misure di installazione e il loro metodo di calcolo per 各透镜的安装尺寸及其安装方法在 42 页表示。 ogni obiettivo sono riportate nella pagina 42. 图表和计算方法中的字母表示以下含义。 Le lettere nei diagrammi e i metodi di calcolo indicano SS : 屏幕对角尺寸(英寸)...
- Page 45 / Dimensions / Dimensions / Dimensiones / 寸法図 Abmessungen / Dimensioni / 尺寸 前面 / Front / Avant / Parte frontal / Vorderseite / Vista anteriore / 前视 169.3 (6 131.3 (5 88.4 (3 21 ( 219.7 (8 358 (14 本体中心...
- Page 46 / Dimensions / Dimensions / Dimensiones / Abmessungen / 寸法図 Dimensioni / 尺寸 上面 / Top / Dessus / Parte superior / Draufsicht / Vista dall’alto / 俯视 キャビネッ ト前面 Front of the cabinet Avant du châssis Vorderseite des Gehäuses Parte frontal del exterior レンズ中心...
- Page 47 底面 / Bottom / Dessous / Parte inferior / Unterseite / Vista dal basso / 底面 358 (14 70 (2 104 (4 242.2 (9 88.6 (3 89.8 (3 74.3 (3) ø28 (1 85.5 (3 55.5 55.5 136.5 (5 145 (5 304 (12) / Center of the projector / Centre de l’appareil / Centro de la unidad / Mitte des 本体中心...
- Page 48 寸法図 / Dimensions / Dimensions / Dimensiones / Abmessungen / Dimensioni / 尺寸 底面 / Bottom / Dessous / Parte inferior / Unterseite / Vista dal basso / 底面 200 (7 / Unit: mm (inches) / Unité: mm 単位: mm(インチ) (pouces) / Unidad: mm (pulgadas) / Einheit: mm (Zoll) / 19.2 ( 122.8 (4...