Publicité
Les langues disponibles
Les langues disponibles
Liens rapides
bladehelis.com
Created 03/10
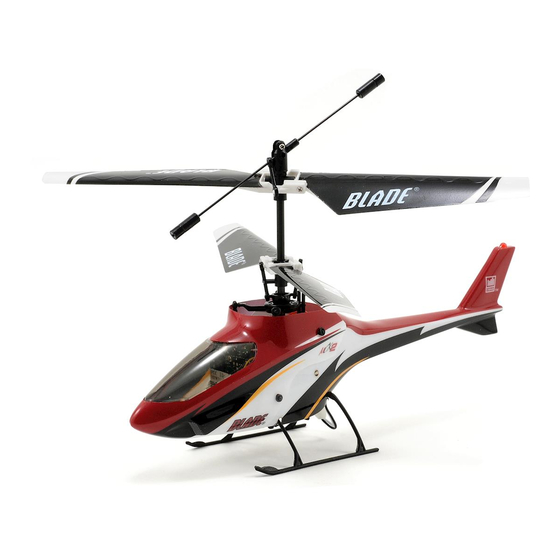
Instruction Manual | Bedienungsanleitung
Manuel d'utilisation | Manuale di istruzioni
Note: Attempting to fly the helicopter without completely reading the manual may cause injury to yourself and people in the
vicinity, as well as damage to the helicopter.
Hinweis: Der Versuch, den Helikopter zu fliegen, ohne das Handbuch vollständig zu lesen, kann Verletzungen an Ihnen selbst und
Menschen in der Nähe, wie auch Schäden am Helikopter verursachen.
A noter: tenter de faire voler l'hélicoptère sans avoir lu l'intégralité du manuel peut provoquer des blessures (à vous-même et
aux personnes alentour) ainsi que des dégâts à l'hélicoptère.
Nota: Un tentativo di far volare l'elicottero senza aver letto completamente il manuale può avere come risultato una lesione del
16634.i
manovratore e delle persone circostanti, nonchè danni all'elicottero stesso.
Publicité
Chapitres
Dépannage

Manuels Connexes pour Blade MCX2 RTF


Sommaire des Matières pour Blade MCX2 RTF
- Page 1 Instruction Manual | Bedienungsanleitung Manuel d’utilisation | Manuale di istruzioni Note: Attempting to fly the helicopter without completely reading the manual may cause injury to yourself and people in the vicinity, as well as damage to the helicopter. Hinweis: Der Versuch, den Helikopter zu fliegen, ohne das Handbuch vollständig zu lesen, kann Verletzungen an Ihnen selbst und Menschen in der Nähe, wie auch Schäden am Helikopter verursachen.
-
Page 2: Table Des Matières
RTF Contents ........ -
Page 3: Blade Mcx2 Bnf Contents
Not Available Separately ..Blade mCX2 RTF Airframe batteries. If you do not agree with these conditions, return your complete Blade mCX2 model in new, EFLB1201S ....120mAh 1-Cell 3.7V Li-Po unused condition to the place of purchase immediately. -
Page 4: Battery Charging
Unique Identifier) code of a single specific transmitter. You need to ‘bind’ your chosen Spektrum DSM2 Note: The Li-Po battery included with your Blade mCX2 will arrive partially charged. For this reason the initial technology equipped aircraft transmitter to the receiver for proper operation. -
Page 5: Additional Binding Information
After approximately 5–10 seconds the receiver/5-in-1 should be bound to the transmitter and you should Transmitter Control Identification now have full control and function. LP5DSM Mode 2 If you decide to use an E-flite LP5DSM transmitter, please position your channel reversal dip switches as follows. -
Page 6: Control Test
With the stick pulled back, the right-hand servo should push the swashplate upward. Although each Blade mCX2 model is test flown at the factory, you should test the controls prior to the first flight to ensure none of the servos, linkages or parts were damaged during shipping and handling. -
Page 7: Channel 5 Information
When the status LED becomes solid BLUE, the control unit is initialized and ready for flight. Also, as ❏ The unique Control Unit installed on your Blade mCX2 is a lightweight combination of main motor elec- long as you set the throttle stick and trim to the correct positions during the initialization process, tronic speed controls, mixer, gyro, servos and Spektrum DSM2 compatible receiver. -
Page 8: Understanding The Primary Flight Controls
Next, move the rudder stick all the way to the left. This should cause the speed of the lower main rotor blade to increase and the speed of the upper main rotor blade to decrease. If both rotor blades are not responding properly to rudder input, simply reverse the locations of their motor plugs on the 5-in-1 unit. -
Page 9: Dual Rates
The MLP4DSM transmitter included with your Blade mCX2 RTF is equipped with a dual rate feature. This and directional control input. If the Blade mCX2 is your first helicopter model, it may be best to have feature allows the pilot the toggle between the high and low control rates available for the aileron, elevator the help of an experienced helicopter pilot to trim the model for you before making your first flight. -
Page 10: Advanced Swashplate Settings
Note: Crash damage is not covered under warranty. Aircraft will not “throttle up” but all other • L ower throttle stick and throttle trim to their lowest settings. Once you have gained experience and confidence in hovering the Blade mCX2, you can attempt more controls seem to function. • R everse throttle channel on specific transmitter if advanced maneuvers including: applicable. -
Page 11: Exploded View Parts Listing
EFLH2412 ... . Inner Shaft with Head/Hub EFLH2421 ... . Upper Main Blade Set (1 pr) EFLH2421 ... . Upper Main Blade Set (1 pr) EFLH2225 . -
Page 12: Replacement Parts List
EFLH2418 ....Servo Pushrod Set EFLH2420 ....Lower Main Blade Set (1 pr) ST1.2 x 5 (1) -
Page 13: Warranty And Repair Policy
Warranty and Repair Policy name, street address, email address and phone number where you can be reached during business days, your RMA number, a list of the included items, method of payment for any non-warranty expenses and a brief summary of the problem. Your original sales receipt must also be included for warranty consideration. Warranty Period Be sure your name, address, and RMA number are clearly written on the outside of the shipping carton. -
Page 14: Compliance Information For The European Union
Lieferumfang des Blade mCX2 RTF Sets ........ -
Page 15: Eflh1064B
Gegenstand ....Beschreibung Ein RC-Helikopter ist kein Spielzeug! Falsch verwendet kann er schwere Körper- sowie Sachwertschäden Getrennt nicht erhältlich ..Blade mCX2 RTF Helikopter verursachen. Fliegen Sie nur auf Freiflächen, möglichst zugelassenen Flugplätzen, und befolgen Sie alle EFLB1201S . -
Page 16: Aufladen Des Akkus
Hinweis: Der bei Ihrem Blade mCX2 inbegriffene Li-Po-Akku kommt teilaufgeladen aus dem Werk. Aus Li-Po Akkus sollten nicht bei Last unter 3V entladen werden. Im Fall des 1 S Li-Po Akkus für die Blade diesem Grund kann die Erstaufladung nur ungefähr 15 bis 20 Minuten dauern. -
Page 17: Einsetzen Des Flugakkus
DX5e und DX6i 1. Bewegen Sie die Knüppel und Schalter auf dem Sender in die gewünschten ausfallsicheren Positionen Der Blade mCX2 RTF ist bereits an den Sender MLP4DSM gebunden. (geringe Gas- und Neutralsteuerungsstellungen). 2. Für die DX5e: Ziehen und halten Sie den Trainer-Schalter auf dem Sender beim Einschalten des Send- Bei der BNF Version müssen Sie das Binden noch vornehmen. -
Page 18: Die Steuerung
Die Steuerung Testen der Steuerung Obwohl jedes Blade mCX2-Modell in der Fabrik testgeflogen wird, sollten Sie Steuerung vor dem ersten Flug testen, um sicherzustellen, dass kein Servo, Gestänge oder Bauteil während Versand oder Handhabung beschädigt wurde. Modus 2 Schalten Sie zuerst den Sender ein und bringen den Gasstick auf Motor Aus Position. Stecken Sie dann den Akku in das Akkuanschlusskabel des 5-in-1 Geräts. -
Page 19: Hinweise Zu Kanal 5
Beschreibungdes 5-in-1 Controlboard, Scharfschaltung und Motorsteuerungstest Das in Ihrem Blade mCX2 eingebaute einzigartige Controlboard ist eine leichtgewichtige Kombination aus den elektronischen Reglern , Mischer, Kreisel, Servos und einem Spektrum DSM2-kompatiblem Empfänger. Das 5-in-1 Controlboard ist auch mit einer LED-Statusanzeige ausgestattet. -
Page 20: Einführung In Die Hauptsteuerfunktion
Steuerrudereingaben korrekt ist, befindet sich Ihr Blade mCX2 in einem flugbereiten Zustand. Trotzdem sollten Sie sich VOR dem ersten Flug noch einmal die folgenden Kapitel des Handbuchs durchlesen. Einführung in die Hauptsteuerfunktion Wenn Sie mit der Steuerung Ihres Blade mCX2 nicht vertraut sind, nehmen Sie sich bitte ein paar Minuten Seitenrudertrimm Rolltrimmung... -
Page 21: Dual Rates
Sobald Sie mit der Steuerung des Helikopters vertraut sind, sind Sie fast flugbereit. Dual Rates Der zur Ausstattung des Blade mCX2 RTF gehörende MLP4DSM Sender ist mit einer Dual Rate Funktion ausgestattet. Diese Funktion erlaubt es dem Piloten zwischen hohen oder niedrigen Steuerraten zu wählen und ist verfügbar für die Kanäle der Roll-, der Nickfunktion und des Seitenruders. -
Page 22: Auswahl Der Flugumgebung
Mode. Das ermöglicht im niedrigen Mode eine viel weichere und einfachere Bedienung des Gashebels. Wenn Sie mit dem Schwebeflug des Blade mCX2 in wenigen Zentimetern über Grund vertraut sind, können Sie den Übergang in Flughöhen von ca. 1 Meter wagen. In dieser Höhe können Sie ein Gefühl für die Flugeigenschaften des Blade mCX2 außerhalb des “Ground Effect‘s”... -
Page 23: Explosionsdarstellung/Teileauflistung
Hinweise zur Problemlösung Explosionsdarstellung/Teileauflistung Teilenummer Beschreibung Problem Ursache Lösung EFLH2219B ... Paddelstange Set Helikopter nimmt kein Gas an, andere • B ringen Sie den Gasknüppel in die unterste mögliche EFLH2412 ... . Innere Welle mit Schaft / Kopf Funktionen laufen einwandfrei. -
Page 24: Explosionsdarstellung
EFLC1000 ....1-Akkuzelle 3,7 V 0,3 A DC Li-Po-Ladegerät EFLH1064B....Blade MLP4DSM 4-Kanal-Sender, 2,4 GHz EFLH1066 . -
Page 25: Garantie Und Anwenderinformationen
Garantie und Anwenderinformationen Exklusive Garantie – Horizon Hobby Inc (Horizon) garantiert, dass das gekaufte Produkt (Produkt) frei von Material- und Montagefehlern ist. Der Garantiezeitraum entspricht den gesetzlichen Bestimmungen des Landes, in dem das Produkt erworben wurde. In Deutschland beträgt der Garantiezeitraum 6 Monate und der Gewährleistungszeitraum 18 Monate nach dem Garantiezeitraum. -
Page 26: Wartung Und Reparatur
Declaration of conformity in accordance with the Radio and Telecommunications Terminal Equipment Act (FETG) and directive 1999/5/EG D-25337 Elmshorn (R&TTE) Garantie und Reparaturen erklärt das Produkt: E-flite Blade mCX2 RTF (EFLH2400M1, EFLH2400M2) Garantieanfragen werden nur bearbeitet, wenn ein Originalkaufbeleg von einem autorisierten Fachhändler Horizon Hobby Deutschland GmbH declares the product E-flite Blade mCX2 BNF (EFLH2480) Hamburger Straße 10... -
Page 27: Précautions Et Avertissements Supplémentaires Liés À La Sécurité
RTF - Contenu ........ -
Page 28: Blade Mcx2 Bnf - Contenu
Les éléments Li-Po ne doivent pas être déchargés en dessous de 3 V. En ce qui concerne de la batterie • Installez la batterie de vol dans l'hélicoptère (une fois qu'elle est complètement chargée) Li-Po utilisée pour le Blade mCX2, ne laissez pas la batterie passer en dessous de 3 V pendant le vol. • Testez les commandes •... -
Page 29: Charge De La Batterie
L'affectation est le processus qui programme le récepteur pour qu'il reconnaisse le code (appelé GUID A noter: la batterie Li-Po battery fournie avec votre Blade mCX2 est livrée partiellement chargée. Pour cette - Globally Unique Identifier) d'un émetteur spécifique. Il vous faut affecter l'émetteur e votre choix pour raison, la charge peut ne prendre que 15 à... -
Page 30: Contrôle Et Identification Du Type D'émetteur
Après 5 à 10 secondes environ, le récepteur/l'unité 5 en 1 devrait être affecté à l'émetteur et vous devriez Contrôle et identification du type d’émetteur disposer des commandes et des fonctions dans leur intégralité. LP5DSM Si vous décidez d'utiliser un émetteur E-flite LP5DSM, positionnez vos interrupteurs d'inversion de canal Mode 2 comme suit. -
Page 31: Test Des Commandes
Lorsque la manette est poussée vers l'arrière, le servo droit doit pousser le plateau cyclique vers le haut. Bien que chaque Blade mCX2 soit testé en vol en usine, il vous faut tester les commandes avant le premier vol afin de vous assurer que les servos, les liaisons et les pièces n'ont pas été endommagés pendant le transport et la manipulation. -
Page 32: Informations Pour La Voie 5
L'unité de contrôle d’un seul bloc installée dans votre Blade mCX2 est une combinaison compacte associant les ESC/les moteurs sont maintenant armés. Faites attention: les pales de rotor peuvent maintenant une commande électronique de vitesse principale du moteur, des mixer, un gyro, des servos et un récepteur... -
Page 33: Compréhension Des Commandes De Vol De Base
5 en 1. Lorsque les pales de rotor tournent dans la bonne direction et répondent correctement aux commandes du gouvernail, votre Blade mCX2 est prêt à voler. Mais il vous faudra parcourir les sections suivantes du manuel Lacets du nez à gauche AVANT de poursuivre avec le premier vol. -
Page 34: Doubles Débattements
Bien qu'il soit possible à des pilotes expérimentés de faire voler le Blade mCX2 avec succès dans des espaces en intérieur relativement petits, nous recommandons fortement d'utiliser Déplacez la manette d'aileron vers la gauche pour faire voler l'hélicoptère vers la gauche. -
Page 35: Réglages Avancés Du Plateau Cyclique
à l'exception de celle des gaz. Vous aurez besoin des gaz pour maintenir de l'altitude mais, en raison applicable. de la stabilité inhérente à la conception coaxiale et des pales tournant en sens inverse, le Blade mCX2 reviendra de lui-même à un vol stable si l'espace le permet. -
Page 36: Vue Éclatée/Liste Des Pièces
Vue éclatée/liste des pièces Vue éclatée Numéro d'article Description EFLH2219B ... Barre de Stabilisation EFLH2412 ... . Arbre intérieur avec tête/moyeu EFLH2421 . -
Page 37: Liste Des Pièces De Rechange
EFLC1000 ....Chargeur Li-Po DC 1 élément 3,7 V - 0,3 A EFLH1064B....Emetteur MLP4DSM Blade 4 voies 2,4 GHz EFLH1066 . -
Page 38: Durée De La Garantie
Questions, assistance et réparations Durée de la garantie Votre revendeur spécialisé local et le point de vente ne peuvent effectuer une estimation d’éligibilité à l’ap- Garantie exclusive - Horizon Hobby, Inc. (Horizon) garantit que le Produit acheté (le «Produit») sera exempt plication de la garantie sans avoir consulté... -
Page 39: Risoluzione Dei Problemi
Contenuti di Blade mCX2 RTF ........ -
Page 40: Eflh1064B
❏ Avvertenze e istruzioni per la batteria Il caricabatteria ai litio polimeri 1S 3.7V CC (PKZ3240) incluso nella confezione del Blade mCX2 è stato concepito per caricare in sicurezza la batteria 150mAh 3.7V 14C Li-Po in dotazione. È possibile utilizzare anche E-flite Celectra Caricabatteria a 4 porte (EFLC1004). -
Page 41: Carica Della Batteria
30-40 minuti. Quando la carica è quasi completata, il LED lampeggerà. Quando la carica della batteria L'unità di controllo 5-in-1 del Blade mCX2 è dotata di un circuito di taglio morbido a bassa tensione è completa, il LED lampeggia per circa 20 secondi o si spegne. -
Page 42: Installare Le Batterie Per Il Volo
1. Muovere le barre e gli interruttori sul trasmettitore alle posizioni desiderate di fail-safe, ossia prova di guasto (throttle basso e posizioni di controllo neutre). Blade mCX2 RTF viene fornito già collegato al trasmettitore MLP4DSM incluso. 2. Per il DX5e: Tirare e tenere l'interruttore trainer sul trasmettitore mentre lo si accende. Rilasciare La versione BNF richiede un collegamento al proprio trasmettitore per aerei compatibile DSM2. -
Page 43: Identificazione Di Controllo Del Trasmettitore
Identificazione di controllo del trasmettitore Test di prova Anche se ogni modello Blade mCX2 è testato dalla fabbrica, bisogna testare tutti i controlli prima di volare e assicurarsi che nessun servo, collegamento o altre parti siano state danneggiate durante il trasporto e la Modalità... -
Page 44: Informazioni Canale 5
Descrizione dell'unità di controllo 5-in-1, test di controllo del motore e del funzionamento L'unica unità di controllo installata sul vostro Blade mCX2 è una combinazione leggera di controlli elettronici della velocità,mixer, gyro, servo e il ricevitore compatibile Spektrum DSM2. L’unità ricevente 5-in-1 è anche dotata di un LED indicatore di stato. -
Page 45: Comprendere I Controlli Di Volo Primari
Con entrambe le pale del rotore nella direzione corretta e con una giusta risposta ai comandi del timone, il vostro Blade mCX2 è pronto a spiccare il volo. Ma bisogna rivedere le seguenti sezioni del manuale PRIMA di procedere col primo volo. -
Page 46: Dual Rate
Dual Rate Il trasmettitore MLP4DSM incluso nel vostro Blade mCX2 RTF è dotato di una caratteristica dual rate. Questa caratteristica consente al pilota di passare da un controllo "high rate" e "low rate" per i canali dell'alettone, dell'elevatore e del timone. Per passare fra "high rate" e "low rate" bisogna premere la barra di destra sul trasmettitore (mentre il trasmettitore è... -
Page 47: Scelta Del Posto Per Volare
Mentre si tenta di stabilire una stabilità ad un livello basso, si può anche controllare per vedere se sono necessarie delle regolazioni del trim per evitare che il Blade mCX2 sbandi in varie direzioni. Se si Per raggiungere un'impostazione più aggressiva bisogna eliminare i collegamenti della testa del rotore e vede che l'elicottero sbanda continuamente senza ricevere nessun controllo di direzione, bisogna farlo spostarli nel set più... -
Page 48: Guida Alla Soluzione Dei Problemi
Guida alla Soluzione dei Problemi Visuale ampliata / elenco pezzi Numero(i) articolo Descrizione Problema Soluzione EFLH2219B ... Set barra stabilizzatrice Il comando del gas non funziona ma tutti • M ettere lo stick ed il trim del gas al minimo. EFLH2412 . -
Page 49: Visuale Ampliata
EFLC1000 ....Caricabatterie per batteria monocella 3.7V 0.3A CC Li-Po EFLH1064B....MLP4DSM Blade trasmettitore a 4 canali, 2.4GHz EFLH1066 . -
Page 50: Periodo Di Garanzia
Periodo di garanzia Garanzia esclusiva - Horizon Hobby, Inc., (Horizon) garantisce che i prodotti acquistati (il “Prodotto”) sono privi di difetti relativi ai materiali e di eventuali errori di montaggio. Il periodo di garanzia è conforme alle disposizioni legali del paese nel quale il prodotto è stato acquistato. In Germania, tale periodo di garanzia ammonta a 6 mesi e si estende ad altri 18 mesi dopo tale termine. - Page 51 N. HH2010021401 interpellare un rivenditore, che si metterà in contatto subito con Horizon per prendere una decisione che vi possa aiutare nel più breve tempo possibile. Prodotto(i): mCX2 RTF Numero(i) articolo: EFLH2400 Manutenzione e riparazione Se il prodotto deve essere ispezionato o riparato, si prega di rivolgersi ad un rivenditore specializzato L’oggetto presentato nella dichiarazione sopra citata è...