Table des Matières
Publicité
Les langues disponibles
Les langues disponibles
Liens rapides
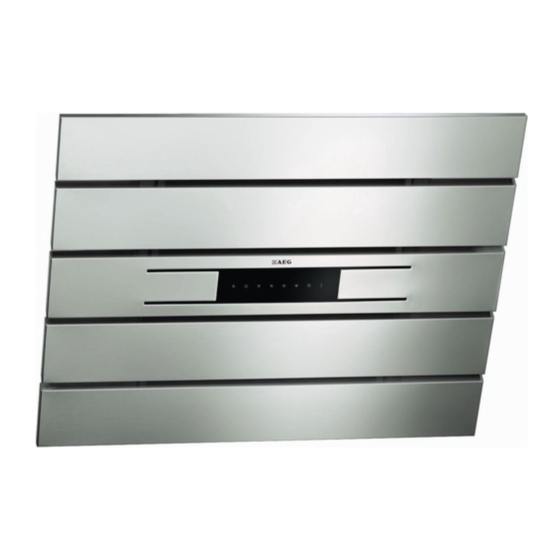
X66453MVO
X69453MVO
X66453BVO
X69453BVO
IT
CAPPA
EN
COOKER HOOD
FR
HOTTE DE CUISINE
DE
DUNSTABZUGSHAUBE
NL
AFZUIGKAP
ES
CAMPANA
PT
EXAUSTOR
TR
OCAK DAVLUMBAZ
Libretto Istruzioni
User Manual
Mode D'emploi
Bedienungsanleitung
Gebruiksaanwijzing
Manual De Instrucciones
Manual De Instruções
Kullanim Kilavuzu
3
10
17
24
31
38
45
52
Publicité
Table des Matières

Manuels Connexes pour AEG X66453MVO

Sommaire des Matières pour AEG X66453MVO
- Page 1 X66453MVO CAPPA Libretto Istruzioni X69453MVO COOKER HOOD User Manual X66453BVO HOTTE DE CUISINE Mode D'emploi X69453BVO DUNSTABZUGSHAUBE Bedienungsanleitung AFZUIGKAP Gebruiksaanwijzing CAMPANA Manual De Instrucciones EXAUSTOR Manual De Instruções OCAK DAVLUMBAZ Kullanim Kilavuzu...
- Page 3 ACCESSORI E PRODOTTI DI CONSUMO All'interno del webshop AEG troverete tutto ciò che vi ser- ve per fare in modo che i vostri elettrodomestici AEG siano sempre perfettamente puliti e funzionanti. Non mancano inoltre una vasta gamma di accessori studiati e realizzati...
- Page 4 IT - CONSIGLI E SUGGERIMENTI/CARATTERISTICHE T - CONSIGLI E SUGGERIMENTI - Questo libretto di istruzioni per l'uso è previsto per più versioni dell' apparecchio. É possibile che siano descritti singoli particolari della dotazione, che non riguardano il Vostro apparecchio. Il produttore declina qualsiasi responsabilità per danni dovuti ad installazione non corretta o non conforme alle regole dell’arte.
- Page 5 IT - CONSIGLI E SUGGERIMENTI/CARATTERISTICHE Componenti Rif. Q.tà Componenti di Prodotto Corpo Cappa completo di: Comandi, Luce, Gruppo Ventilatore, Filtri Griglia direzionata Uscita Aria Flangia di Riduzione ø 150-120 mm 10 1 Flangia ø 150 con valvola di non ri- torno 16 1 Coperchio filtrante...
- Page 6 IT - INSTALLAZIONE INSTALLAZIONE Foratura Parete e Fissaggio Staffe 1÷2 7.2.1 247 247 Tracciare sulla Parete: • una linea Verticale fino al soffitto o al limite superiore, al centro della zona prevista per il montaggio della Cappa; • una linea Orizzontale a 1004 mm min. sopra il Piano di Cottura. •...
- Page 7 IT - INSTALLAZIONE MONTAGGIO CORPO CAPPA • Aprire il pannello aspirante superiore e bloccarlo sulla sinistra con l’astina al corpo Cappa affinché non si richiuda. • Sbloccare togliendo il perno di fissaggio sulla sinistra il pannello aspirante inferiore ed aprirlo. •...
-
Page 8: Connessione Elettrica
IT - INSTALLAZIONE CONNESSIONE ELETTRICA • Collegare la Cappa all’Alimentazione di Rete interponendo un Interruttore bipolare con apertura dei contatti di almeno 3 mm. • Rimuovere i Filtri antigrasso (vedi par. “Ma- nutenzione”) e assicurarsi che il connettore del Cavo di alimentazione sia correttamente inserito nella presa dell’Aspiratore... - Page 9 IT - USO Tasto Funzione Accende e spegne l’impianto di illuminazione. Acceso o Spento. Premuto per 5 Secondi a Cappa spenta e senza allarmi filtri in corso effettua: Attivazione dell’allarme saturazione Filtri al Carbone Attivo. 2 Lampeggi Led tasto H. Disattivazione dell’allarme saturazione Filtri al Carbone Attivo.
-
Page 10: Accessories And Consumables
ACCESSORIES AND CONSUMABLES In the AEG webshop, you’ll find everything you need to keep all your AEG appliances looking spotless and working per- fectly. Along with a wide range of accessories designed and... -
Page 11: Dimensions
EN - RECOMMENDATIONS AND SUGGESTIONS/CHARACTERISTICS EN - RECOMMENDATIONS AND SUGGESTIONS - The Instructions for Use apply to several versions of this appliance. Accordingly, you may fi nd descrip- tions of individual features that do not apply to your specifi c appliance. The manufacturer will not be held liable for any damages resulting from incorrect or improper installation. - Page 12 EN - RECOMMENDATIONS AND SUGGESTIONS/CHARACTERISTICS Components Ref. Q.ty Product Components Hood Body, complete with: Controls, Light, Blower, Filters Directional Air Outlet grille Reducer Flange ø 150-120 mm 10 1 Dumper 16 1 Filter cover Ref. Q.ty Installation Components 11 2 Wall Plugs 11a 2 Wall Plugs SB 12/10...
- Page 13 EN - INSTALLATION INSTALLATION Wall drilling and bracket fixing 1÷2 7.2.1 247 247 As a first step, proceed with the following drawings: • a vertical line up to the ceiling or up to the upper limit, at the centre of the area in which the hood is to be fitted;...
- Page 14 EN - INSTALLATION FITTING THE HOOD BODY • Open the top suction panel and fasten it to the hood body on the left using the pin, so that it does not close again. • Unlock the lower suction panel by removing the fixing pin on the left, and open it.
-
Page 15: Electrical Connection
EN - INSTALLATION ELECTRICAL CONNECTION • Connect the hood to the mains through a two-pole switch having a contact gap of at least 3 mm. • Remove the grease filters (see paragraph Maintenance) being sure that the connector of the feeding cable is correctly inserted in the socket placed on the side of the fan. -
Page 16: Button Function
EN - USE Button Function Turns the Lighting System on and off. On or Off If pressed and held for 5 seconds with the hood turned off and no alarm, do: Enables the Activated Charcoal Filter Alarm. 2 Flashes Led buttom H Disables the Activated Charcoal Filter Alarm. -
Page 17: Pour Des Résultats Parfaits
Veuillez prendre quelques instants pour lire cette notice afin d'utiliser au mieux votre appareil. ACCESSOIRES ET CONSOMMABLES Dans la boutique en ligne d'AEG, vous trouverez tout ce qu'il vous faut pour que vos appareils AEG fonctionnent parfaitement. Sans oublier une vaste gamme d'accessoi- res conçus et fabriqués selon les critères de qualité... -
Page 18: Caracteristiques
FR - CONSEILS ET SUGGESTIONS/CARACTERISTIQUES FR - CONSEILS ET SUGGESTIONS - La présente notice d’emploi vaut pour plusieurs versions de l’appareil. Elle peut contenir des descriptions d’accessoires ne fi gurant pas dans votre appareil. Le fabricant décline toute responsabilité en cas de dommage dû à une installation non correcte ou non conforme aux règles de l’art. - Page 19 FR - CONSEILS ET SUGGESTIONS/CARACTERISTIQUES Composants Réf. Q.té Composants de Produit Corps Hotte équipé de:Comandes, Lu- mière, Groupe Ventilateur, Filtres Grille orientée Sortie de l’Air Flasque de Réduction ø 150-120 mm 10 1 Buse avec clapet ø150 16 1 Couvercle filtrant Réf.
- Page 20 FR - INSTALLATION INSTALLATION Perçage de la paroi et fixation des supports 1÷2 7.2.1 247 247 Tracer sur la paroi : • une ligne verticale jusqu’au plafond ou à la limite supérieure, au centre de la zone prévue pour le montage de la hotte ; •...
- Page 21 FR - INSTALLATION MONTAGE DU CORPS DE HOTTE • Ouvrir le panneau aspirant supérieur et le bloquer sur la gauche, à l’aide de la tige, au corps de hotte jusqu’à ce qu’il se referme. • En retirant le pivot de fixation sur la gauche, dé- bloquer le panneau aspirant inférieur et l’ouvrir.
-
Page 22: Branchement Electrique
FR - INSTALLATION BRANCHEMENT ELECTRIQUE • Brancher la hotte sur le secteur en interpo- sant un interrupteur bipolaire avec ouver- ture des contacts d’au moins 3 mm. • Enlever les filtres à graisse (voir § "Entre- tien") et s'assurer que le connecteur du câble d'alimentation soit bien branché... -
Page 23: Utilisation
FR - UTILISATION UTILISATION Touche Fonction Allume et éteint le système d’éclairage. Allumée ou éteinte. Appuyée pendant 5 secondes, lorsque la hotte est éteinte et sans alarmes filtres en cours, elle effectue: Activation de l’alarme de saturation filtres à charbon actif. 2 clignotements led touche H. -
Page 24: Zubehör Und Verbrauchsmaterialien
Minuten Zeit zum Lesen, um seine Vorzüge kennen zu lernen. ZUBEHÖR UND VERBRAUCHSMATERIALIEN Im AEG Webshop finden Sie alles, was Sie für ein makello- ses Aussehen und perfektes Funktionieren Ihrer AEG Geräte benötigen. Wir bieten auch ein umfangreiches Zubehörsor- timent, das Ihre höchsten Qualitätsansprüche erfüllt, vom... - Page 25 DE - EMPFEHLUNGEN UND HINWEISE/CHARAKTERISTIKEN DE - EMPFEHLUNGEN UND HINWEISE - Diese Gebrauchsanleitung gilt für mehrere Geräte-Ausführungen. Es ist möglich, dass einzelne Ausstattungs- merkmale beschrieben sind, die nicht auf Ihr Gerät zu-treffen. Der Hersteller haftet nicht für Schäden, die auf eine fehlerhafte und unsachgemäße Montage zurückzuführen sind.
- Page 26 DE - EMPFEHLUNGEN UND HINWEISE/CHARAKTERISTIKEN Komponenten Pos. St. Produktkomponenten Haubenkörper mit Schaltern, Beleuchtung, Gebläse-gruppe, Filter Luftleitgitter Luftaustritt Reduzierflansch ø 150-120 mm 10 1 Flansch mit Ruckstauklappe ø150 16 1 Filterdeckel Pos. St. Montagekomponenten 11 2 Dübel 1 1a 2 Dübel SB 12/10 12a 2 Schrauben 4,2 x 44,4 12c 4...
-
Page 27: Montage
DE - MONTAGE MONTAGE Bohren der Befestigungslöcher und Fixieren der Befestigungsbügel 1÷2 7.2.1 247 247 An der Wand anzeichnen: • eine senkrechte Linie bis zur Decke oder zum oberen Rand in der Mitte des Installationsbereichs der Haube, • eine waagrechte Linie mindestens 1004 mm oberhalb der Kochmulde. •... -
Page 28: Montage Des Haubenkörpers
DE - MONTAGE MONTAGE DES HAUBENKÖRPERS • Das obere Saugpaneel öffnen und an der linken Seite mit der Stange am Haubenkörper fixieren, damit es nicht wieder zuklappt. • Den Befestigungszapfen an der linken Seite des unteren Saugpaneels entfernen und das Paneel öffnen. -
Page 29: Elektroanschluss
DE - MONTAGE ELEKTROANSCHLUSS • Bei Anschluss der Haube an das Stromnetz muss ein zweipoliger Schalter mit einem Öffnungsweg von mindestens 3 mm zwi- schengeschaltet werden. • Entfernen Sie die Fettfilter (s. Abschnitt „Wartung“) und versichern Sie sich, daß die Kabelverbindung in die Steckdose des Gebläses einwandfrei eingesteckt wird. -
Page 30: Bedienung
DE - BEDIENUNG BEDIENUNG Taste Funktion Schaltet die Beleuchtung ein oder aus. Ein- oder ausgeschalte Durch 5 Sekunden langes Drücken bei abgestellter Abzugshau- be und ohne Sättigungsalarm des Aktivkohlefil-ters erfolgt: Aktivierung des Sättigungsalarms des Aktivkohlefilters. 2 Mal Blinken taste H. Deaktivierung des Sättigungsalarms des Aktivkohlefilters. -
Page 31: Accessoires En Verbruiksartikelen
ACCESSOIRES EN VERBRUIKSARTIKELEN In de AEG webshop vindt u alles wat u nodig heeft om al uw apparaten van AEG mooi te houden en perfect te laten functioneren. Ook vindt u hier een groot aantal ac-... - Page 32 NL - ADVIEZEN EN SUGGESTIES/EIGENSCHAPPEN NL - ADVIEZEN EN SUGGESTIES - Deze gebruiksaanwijzing geldt voor verschillende uitvoeringen van het apparaat. Het is mogelijk dat er een aantal kenmerken worden beschreven die niet van toe-passing zijn op uw apparaat. De fabrikant aanvaardt geen enkele aansprakelijkheid voor schade die voortkomt uit onjuiste of niet overeenkomstig de regels der kunst uitgevoerde installaties.
- Page 33 NL - ADVIEZEN EN SUGGESTIES/EIGENSCHAPPEN Onderdelen Ref. Productonderdelen Wasemkap compleet met: Bedieningen, Licht, Ventilatorgroep, Filters Richtingrooster luchtuitlaat Reductieflens ø 150-120 mm 10 1 Toom met Klep ø 150 16 1 Filterdeksel Ref. Installatieonderdelen 11 2 Pluggen 11a 2 Pluggen SB 12/10 12a 2 Schroeven 4,2 x 44,4 12c 4...
-
Page 34: Installatie
NL - INSTALLATIE INSTALLATIE Boren in de wand en bevestigen van de beugels 1÷2 7.2.1 247 247 Teken op de wand: • Een verticale lijn tot het plafond of tot de bovenste grens in het midden van de zone waar de afzuigkap moet worden gemonteerd;... -
Page 35: Montage Van De Afzuigkap
NL - INSTALLATIE MONTAGE VAN DE AFZUIGKAP • Open het bovenste afzuigpaneel en vergrendel het aan de linkerzijde aan de afzuigkap met de stang, zodat hij niet dicht gaat. • Ontgrendel het onderste afzuigpaneel door de beves- tigingspen aan de linkerkant te verwijderen en open het. -
Page 36: Elektrische Aansluiting
NL - INSTALLATIE ELEKTRISCHE AANSLUITING • Sluit de wasemkap aan op de netspanning met een tweepolige schakelaar ertussen met een opening tussen de contacten van tenminste 3 mm. • Verwijder de vetfilters (zie par. "Onderhoud") en ver- zeker u ervan dat de stekker van de voedingskabel goed in de contactdoos van de afzuigkap is gesto- ken. - Page 37 NL - GEBRUIK GEBRUIK Toets Functie Schakelt de verlichtingsinstallatie in en uit. Aan of uit. Als deze toets bij uitgeschakelde afzuigkap en zonder actieve filteralarmen gedurende 5 seconden wordt ingedrukt, gebeurt het volgende: inschakeling van het alarm verzadiging actieve koolstoffilters. 2 maal knipperen led toets H.
-
Page 38: Accesorios Y Consumibles
ACCESORIOS Y CONSUMIBLES En la página web de AEG, encontrará todo lo necesario para la perfecta limpieza y funcionamiento de todos sus electro- domésticos AEG. Junto con una amplia gama de accesorios diseñados y fabricados conforme a los elevados estándares... -
Page 39: Características
ES - CONSEJOS Y SUGERENCIAS/CARACTERÍSTICAS ES - CONSEJOS Y SUGERENCIAS - Las presentes instrucciones de servicio son válidas para diferentes modelos de aparato; por ello puede ser posible que se describan detalles y características de equipamiento que no concuerden íntegramente con las de su aparato concreto. El fabricante declina cualquier responsabilidad debida a los daños provocados por una instalación incorrecta o no conforme con las reglas. - Page 40 ES - CONSEJOS Y SUGERENCIAS/CARACTERÍSTICAS Componentes Ref. Cant. Componentes del producto Cuerpo campana dotado con: man- dos, luz, grupo de ventilación, filtros. Rejilla de dirección de salida del aire Brida de reducción ø 150-120 mm 10 1 Arandela con válvula ø 150 16 1 Tapa filtrante Ref.
- Page 41 ES - INSTALACIÓN INSTALACIÓN Perforación pared y Fijación bridas 1÷2 7.2.1 247 247 Trazar en la pared:. • una línea Vertical hasta el techo o al límite superior, al centro de la zona prevista para el montaje de la campana; •...
- Page 42 ES - INSTALACIÓN MONTAJE CUERPO CAMPANA • Abrir el panel aspirante superior y bloquearlo en la izquierda con la barra al cuerpo de la campana para que no se cierre. • Desbloquear quitando el perno de fijación en la iz-quierda el panel aspirante inferior y abrirlo. •...
-
Page 43: Conexión Eléctrica
ES - INSTALACIÓN CONEXIÓN ELÉCTRICA • Conectar la campana a la red de alimentación eléc- trica instalando un interruptor bipolar con apertura de los contactos de 3 mm como mínimo. • Quitar los Filtros antigrasa y asegurase de que el co- nector del Cable de acometida esté... - Page 44 ES - USO Tecla Función Enciende y apaga la instalación de iluminación. Encendido o Apagado. Presionada por 5 segundos con la campana apagada y sin alarmas filtros en curso efectúa: Activación de la alarma de saturación filtros al carbono activo. 2 parpadeos Led tecla H Desactivación de la alarma de saturación filtros al carbono activo.
-
Page 45: Acessórios E Consumíveis
ACESSÓRIOS E CONSUMÍVEIS Na loja web AEG, encontrará tudo aquilo de que neces- sita para manter os seus aparelhos AEG imaculados e a funcionarem na perfeição. A par de uma vasta gama de acessórios projectados e concebidos de acordo com os pa-... - Page 46 PT - CONSELHOS E SUGESTÕES/CARACTERÍSTICAS PT - CONSELHOS E SUGESTÕES - Estas instruções de serviço aplicam-se a vários modelos de aparelhos. É por isso, possível que se encontrem descritas várias características de equi-pamento que não dizem respeito ao seu aparelho. O fabricante declina toda e qualquer responsabilidade pelos danos decorrentes de uma instalação não correcta ou feita não em conformidade com as normas da boa técnica.
- Page 47 PT - CONSELHOS E SUGESTÕES/CARACTERÍSTICAS Componentes Ref. Qtd. Componentes do produto Corpo do exaustor equipado com: comandos, iluminação, grupo ventilador e filtros Grade direccionada de saída do ar Flange de redução ø 150-120 mm 10 1 Flange ø 150 cm válvula de não retorno 16 1 Tampa filtrante...
-
Page 48: Instalação
PT - INSTALAÇÃO INSTALAÇÃO Perfuração da parede e fixação dos suportes 1÷2 7.2.1 247 247 Marque na parede: • Uma linha vertical até ao tecto ou ao limite superior, a meio da zona prevista para a montagem do exaustor; • Uma linha horizontal, pelo menos, 1004 mm acima da placa do fogão. •... - Page 49 PT - INSTALAÇÃO MONTAGEM DO CORPO DO EXAUSTOR • Abra o painel de aspiração superior e, com a haste, bloqueie-o do lado esquerdo ao corpo do exaustor de modo que não se feche. • Desbloqueie o painel de aspiração inferior, remo- vendo o perno de fixação do lado esquerdo, e abra-o.
-
Page 50: Ligação Eléctrica
PT - INSTALAÇÃO LIGAÇÃO ELÉCTRICA • Ligue o extractor à alimentação utilizando um inter- ruptor de dois pólos com uma folga de contacto de pelo menos 3 mm. • Retire os filtros contra gordura (ver parágrafo da Manutenção) certificando-se de que o conector do cabo de alimentação está... - Page 51 PT - UTILIZAÇÃO UTILIZAÇÃO Tecla Função Liga e desliga o sistema de iluminação. Aceso ou apagado. Se for pressionado durante 5 segundos com o exaustor desligado e sem os alarmes dos filtros activos, provocará: Activação do alarme de saturação dos filtros de carvão activo. 2 piscadelas do Led da tecla H.
- Page 52 MÜKEMMEL SONUÇLAR İÇİN Bu AEG ürününü seçtiğiniz için teşekkür ederiz. Bu ürünü, sıradan cihazlarda bulamayacağınız hayatı kolaylaştıran özel- likler ve yenilikçi teknolojiler kullanarak, size uzun yıllar üstün performans vermesi için tasarladık. Lütfen, cihazınızdan en iyi şekilde yararlanabilmek için birkaç dakikanızı ayırarak bu belgeyi okuyun.
- Page 53 TR - TAVSIYELER VE ÖNERILER/ÖZELLIKLER TR - TAVSIYELER VE ÖNERILER - Bu kullanma talimatι birden fazla cihaz modeli için geçerlidir. Cihazιnιza uymayan bazι donanιm özellikleri tarif edilmiş olabilir. Yalnιş veya eksik montajdan doğan herhangi bir zararιn sorumluluğu üreticiye ait değildir. Davlumbaz ile pişirici cihazιn ocak kιsmι arasιndaki minimum güvenlik mesafesi 650 mm.dir.
- Page 54 TR - TAVSIYELER VE ÖNERILER/ÖZELLIKLER Parçalar Ref. Miktar Ürün Aksamı Davlumbaz gövdesi bütünü: Kumandalar, Işık, Vantilatör Grubu, Filtreler Hava Çıkışına Yönlendirilmiş Izgara Redüksiyon fl anşı ø 150-120 mm 10 1 ø 150 fl anşlı çek vana 16 1 Filtre edici kapak Ref.
- Page 55 TR - MONTAJ MONTAJ Kenarların Delinmesi ve Askıların Sabitlenmesi 1÷2 7.2.1 247 247 Kenar üzerinde çizin: • Davlumbazın montajı için öngörülen bölgenin ortasında, tavan veya en uç yüksekliğe kadar dikey bir çizgi; • Pişirme düzleminin min. 1.004 mm üstünde yatay bir çizgi. •...
- Page 56 TR - MONTAJ DAVLUMBAZ GÖVDESİNİN MONTAJI • Davlumbazın emme panelini açın ve tekrar kapanma- ması için sol ön taraftaki kolu gövdeye sabitleyin. • Emme panelinin sol altındaki sabitleme pimini çıkar- tarak kilidini sökün ve açın. • Yağ önleyici Filtreleri uygun kulpları tutarak çıkartın. •...
-
Page 57: Elektri̇k Bağlantisi
TR - MONTAJ ELEKTRİK BAĞLANTISI • Davlumbazı şebeke cereyanına bağlarken aray temas aralığı en az 3 mm olan çift kutuplu bir elektrik anahtarı koyunuz. • Yağ tutucu fi ltreleri çıkarınız (bakınız "Bakım" paragrafı) ve besleme kablosu soketinin as- piratör prizine iyice takılmış olduğundan emin olunuz. - Page 58 TR - KULLANIM KULLANIM Tuş İşlev Işığı açar ve kapatır. Açık ya da Kapalı Davlumbaz kapalı durumdayken ve fi ltre alarmı etkin değilken 5 H tuşu 2 kez yanıp söner saniye kadar basılı tutulduğunda:Aktif Karbon Filtresinin doygunluk alarmını etkinleştirir. Aktif Karbon Filtresinin doygunluk alarmını devre dışı bırakır. H tuşu 1 kez yanıp söner Motoru durdurur.
- Page 60 436005002_08 - 110404...