Table des Matières
Publicité
Liens rapides
M o n t a g e a n l e i t u n g
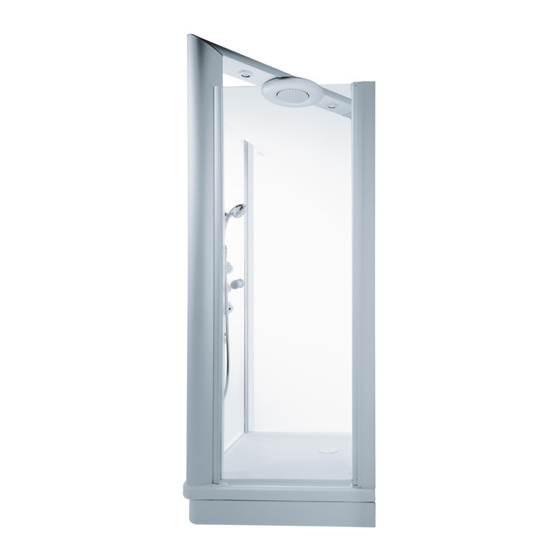
Duschtempel
ML40L 29 36x xxx (Tür Rechtsanschlag)
ML40R 29 38x xxx (Tür Linksanschlag)
M40L
29 42x xxx (Tür Rechtsanschlag)
M40R 29 43x xxx (Tür Linksanschlag)
Installation Instructions
Instructions de montage
100 Quadra
®
(Door with Right Hinge)
(Door with Left Hinge)
(Door with Right Hinge)
(Door with Left Hinge)
(Porte, butée à droite)
(Porte, butée à gauche)
(Porte, butée à droite)
(Porte, butée à gauche)
1
Publicité
Table des Matières

Manuels Connexes pour Hansgrohe PHARO Duschtempel 100 Quadra ML40L 29 36 Série


Sommaire des Matières pour Hansgrohe PHARO Duschtempel 100 Quadra ML40L 29 36 Série
- Page 1 M o n t a g e a n l e i t u n g Installation Instructions Instructions de montage Duschtempel 100 Quadra ® ML40L 29 36x xxx (Tür Rechtsanschlag) (Door with Right Hinge) (Porte, butée à droite) ML40R 29 38x xxx (Tür Linksanschlag) (Door with Left Hinge) (Porte, butée à...
-
Page 2: Table Des Matières
Inhaltsverzeichnis Contents Sommaire Deutsch Ausstattung Ansichten vermaßt Technische Daten, Sicherheitshinweis Maßbild mit Schürze Maßbild ohne Schürze Verpackungsinhalt/Varianten Benötigte Werkzeuge Anschluss Wasser Vorbereitung Wannenfüße Montage Wannenfüße, Einstellung Magnethalter Einstellung Wannenfüße/Ausrichtung und Positionierung Duschwanne Vorbereitung Ablauf–Anschluss Platzierung Duschwanne, Erdungsmaßnahmen Vorbereitung Montage Klemmleiste/Wandausgleichsprofi l/Haltewinkel Vorbereitung Stromversorgung, Montage Haltewinkel Vorbereitung und Montage Funktionssäule, Anschluss Wasserversorgung Vorbereitung und Montage Traverse... - Page 3 Inhaltsverzeichnis Contents Sommaire Preparation for Installation of Bracket/Wall Levelling Section/Angle Bracket Power Supply Preparation, Angle Bracket Installation Function Column Preparation and Installation, Connection Water Supply Tie-Bar Preparation and Installation Left Side Panel Installation Door Installation with Right Hinge Cover/Cover Strip Installation Sealing Hose/Hand Shower Fitting Adjustment and servicing Thermostat...
-
Page 4: Ausstattung
Ausstattung Equipment Équipement ACHTUNG: Im Bereich der Duschwanne darf noch nicht gefl iest werden, da der Duschwannenrand min. 5 bis max. 10 mm unter die Fliesen ragen muss! IMPORTANT: In the area for the tray to be installed do not tile.The shower tray must be installed fi rst and then tiled,so the tiles overlap the tray between 5mm min. -
Page 5: Ansichten Vermaßt
Ansichten vermaßt Dimensional Views Vues cotées Innenansicht, Funktionssäule 1:20 Seitenansicht 1:20 Inside view, Function column 1:20 Side view 1:20 Vue de face, Colonne de commandes 1:20 Vue latérale 1:20 Grundriss 1:20/Ground plan 1:20 Vue de dessus 1:20... -
Page 6: Technische Daten, Sicherheitshinweis
Technische Angaben, Sicherheitshinweis Technical Information, Safety Instructions Caractéristiques techniques, consignes de sécurité Deutsch English Technische Daten Technical Data Mindestfl ießdruck: 2 bar Minimum fl ow pressure: 2 bar Betriebsdruck: max. 10 bar Operating pressure: max. 10 bar Empfohlener Betriebsdruck: 2 – 5 bar Recommended operating pressure: 2 –... -
Page 7: Chauffe-Eau Instantané
Technische Angaben, Sicherheitshinweis Technical Information, Safety Instructions Caractéristiques techniques, consignes de sécurité Français Caractéristiques techniques Pression minimale d’écoulement: 2 bars Pression de service: max. 10 bars Pression de service recommandée: 2 – 5 bars Pression d’essai: 16 bars Température eau chaude: max. -
Page 8: Maßbild Mit Schürze
Maßbild mit Schürze Dimensional Illustration with Plinth Plan latérale, avec jupe Maßbild mit Schürze Maßbild mit Schürze Dimensional Illustration with Plinth Dimensional Illustration with Plinth Plan latérale, avec jupe Plan latérale, avec jupe Leerrohr für Stromversorgung Beleuchtung, lichter Innen-Ø 25 mm * Wiring conduit for current supply il lu mi na tion, clear inner-Ø... -
Page 9: Dimensional Illustration Without Plinth
Maßbild ohne Schürze Dimensional Illustration without Plinth Plan latérale, sans jupe Maßbild ohne Schürze Dimensional Illustration without Plinth Plan latérale, sans jupe Leerrohr für Stromversorgung Beleuchtung, lichter Innen-Ø 25 mm * Wiring conduit for current supply il lu mi na tion, clear inner-Ø... -
Page 10: Packaging Contents/Variants
Verpackungsinhalt/Varianten Packaging Contents/Variants Contenu des emballages/variantes Duschwanne Shower tray Receveur de douche Beipack-Checkliste DT 90 Säule 28540xxx Aktiva A'8 Handbrause 1 Stück 28246xxx ISIF.1,6 Brauseschlauch 1 Stück 1x2281xx Stopfen Klemmleiste 3 Stück 10583200 Verschluss-Stopfen 3 Stück 10053910 Silikon (essigsäurefrei!) 1 Stück 30903910 Befestigungsteile DT 90 1 Stück... -
Page 11: Éléments De Montage
Verpackungsinhalt/Varianten Packaging Contents/Variants Contenu des emballages/variantes Tür, Seitenscheibe Door, Side panel Porte, Panneau latéral en verre Option: Schürze Duschwanne Shower tray plinth Jupe receveur de douche Duschtempel ® DT 100 Montage-Set Installation set Éléments de montage Art.-Nr. 2960xxxx (nur bei Montage mit Schürze*) (only for installation with plinth*) (pour montage avec jupe* uniquement) 4 Kontermuttern... - Page 12 Verpackungsinhalt/Varianten Packaging Contents/Variants Contenu des emballages/variantes Befestigungsset Duschwanne (Eckbefestigung und Wandbefestigung) Shower tray fi tting set (corner fi tting and wall fi tting) Éléments de fi xation du receveur de douche (fi xation en angle et fi xation en paroi) Eckbefestigung: Wandbefestigung: 1 Stockschraube...
-
Page 13: Required Tools
Benötigte Werkzeuge Required Tools Outillage nécessaire Werkzeuge/Tools/Outillage SW10 ARMATURENFETT SW12 SW13 SW17 SW19 SW24 Nicht im Lieferumfang enthalten/not supplied/non inclus... -
Page 14: Water Connection
Anschluss Wasser Water Connection Raccordement eau Vorab sind Anschluss Water inlet and drain Les raccordements 650 mm für Wasserzulauf und must fi rst be installed ac- d’arrivée et d’écoulement 350 mm i d e a l -ablauf nach den derzeit cord ing to the currently d’eau doivent être ré- gültigen DIN 1988 und... -
Page 15: Shower Tray Feet Preparation
Vorbereitung der Wannenfüße Shower Tray Feet Preparation Préparation des pieds du receveur Befestigungsmuttern Duschtasse – Wanne Shower tray – tray fitting nuts Écrous de fixation – receveur de douche Beide Muttern vom Wannenfußgewinde abnehmen. Remove both nuts from shower tray foot threads. Enlever les deux écrous du pied de receveur. -
Page 16: Shower Tray Feet Installation, Magnetic Holder Setting
Montage der Wannenfüße, Einstellung Magnethalter Shower Tray Feet Installation, Magnetic Holder Setting Montage des pieds du receveur, positionnement des supports d’aimant Wannenfüße mit aufgeschraubten Magnethaltern durch die jeweiligen Bohrungen stecken, Befestigungsmutter aufschrauben, mit Schlüssel SW19 festziehen. Push shower tray feet with screwed on magnetic holders through the respective drill holes, screw on fi... -
Page 17: Shower Tray Feet Setting/Alignment And Positioning Shower Tray
Einstellung Wannenfüße Shower Tray Feet Setting Réglage des pieds du receveur Abstand Unterkante Wanne zum Boden: +/– ca. 125 mm, Abstand ggfl s. anpassen. +/– ca. 125 mm Distance of bottom edge of shower tray to bei Montage mit Schürze fl... - Page 18 Ausrichtung Duschwanne Shower Tray Alignment Mise de niveau du receveur de douche Vor Ort das Maß x oder y für Bohrloch Stockschraube ermitteln. Determine measure x or y for threaded pin drill hole on site. Déterminer sur place la cote x ou y du trou de perçage de la vis.
- Page 19 Ausrichtung Duschwanne/Positionierung Duschwanne Shower Tray Alignment/Shower Tray Positioning Mise de niveau du receveur de douche/positionnement du receveur de douche Wanne stellen. Ablaufmitte auf Boden deutlich markieren. (A) Eingezeichnete Bohrlochmarkierung für Ø 14 mm überprüfen (a). Beide Bohrlochmarkierungen Ø 10 mm durch die Befesti- gungslasche (b) links und rechts anzeichnen.
- Page 20 Ausrichtung Duschwanne/Positionierung Duschwanne Shower Tray Alignment/Shower Tray Positioning Mise à niveau du receveur de douche/positionnement du receveur de douche Positionierung Duschwanne Positioning the shower tray Positionnement du receveur de douche Wanne abnehmen. Löcher bohren, Dübel setzen. Beim Bohren auf Rohrleitungen achten: Fußbodenheizung, elektr.
-
Page 21: Drain Connection Preparation
Vorbereitung Ablauf-Anschluss Drain Connection Preparation Préparation du raccordement de l’écoulement Siphonoberteil herausschrauben. (zusätzlich mitgelieferter Ablaufstutzen dient als Schlüssel). Screw out siphon top. Ablaufstutzen (drain socket supplied extra serves as wrench). Drain socket Tubulure d’écoulement Dévisser la partie supérieure du siphon. (la tubulure d’écoulement supplémentaire incluse Siphon-Oberteil dans la livraison sert de clé). -
Page 22: Shower Tray Positioning, Earthing
Platzierung Duschwanne Shower Tray Positioning Mise en place du receveur de douche Raumhöhe und Leerrohrmaß nochmals überprüfen. Recheck room height and wiring conduit dimensions. Contrôler de nouveau la hauteur de la pièce et le diamètre des gaines. Schallschutzband befestigen, Wanne einpassen. Attach sound insulation band, fi... - Page 23 Platzierung Duschwanne/Erdungsmaßnahmen Shower Tray Positioning/Earthing Mise en place du receveur de douche/mise à terre Die Erdungsmaßnahme ist nach VDE 0100 Teil 410 und Teil 540 durchzuführen. Earthing to be performed according to local regulations. La mise à terre doit être effectuée conformé- ment aux prescriptions nationales en vigueur.
- Page 24 Vorbereitung Montage Klemmleiste/ Wandausgleichsprofi l/ Haltewinkel Traverse (Türanschlag rechts) * nicht bei Duschtempel 29 42x xxx und 29 43x xxx...
-
Page 25: Preparation For Installation Of Bracket/Wall Levelling Section/Angle Bracket
Preparation for Installation of Bracket/ Wall Levelling Section/ Tie-Bar Angle Bracket (Door with Right Hinge) Wiring conduit clear inner diameter 25 mm transformer cable Wiring conduit level 2040 mm (+/- 20 mm) t r a f s h n g l e d g a t i o t a l l... -
Page 26: Préparation Du Montage Profi Lé D'arrêt/Profi Lé De Raccord Mural, Équerre De Fi Xation
Préparation du montage, profi lé d’arrêt/ profi lé de raccord mural/ équerre de fi xation traverse (butée de porte à droite) gaine Ø intérieur 25 mm pour câble transformateur Hauteur de la gaine 2040 mm (+/- 20 mm) e v e r e c u r e r i e... - Page 27 Montage Klemmleiste/Wandausgleichsprofi l (Türanschlag rechts) Installation of Bracket/Wall Levelling Section (Door with Right Hinge) Montage du profi lé d’arrêt/profi lé de raccord mural (butée de porte à droite) Vor dem Festschrauben der Klemmleiste und des Wan- dausgleichsprofi ls: Jeweils über die Gesam- tlänge durchgehend Silikon (essigsäurefrei) aufbrin- gen.
-
Page 28: Power Supply Preparation, Angle Bracket Installation
Vorbereitung Stromversorgung*, Montage Haltewinkel Power Supply Preparation*, Angle Bracket Installation Préparation de l’alimentation électrique*, montage de l’équerre de fi xation Stromversorgungskabel für Beleuchtung durch das Leerrohr ziehen. * Leerrohr, lichter Innen-Ø 25 mm Pull power supply cable for lighting through wiring conduit. * Trafokabel Wiring conduit clear inner diameter 25 mm... -
Page 29: Function Column Preparation And Installation, Connection Water Supply
Vorbereitung Montage Funktionssäule Function Column Preparation and Installation Préparation du montage de la colonne de commandes Mutter für Wasseranschluss Nut for water connection Écrou pour raccordement d’eau Unterseite Funktionssäule Function column Kunststoff-U-Scheibe underside Plastic washer Dessous de la Rondelle en matière synthétique colonne de commandes Kunststoff-U-Scheibe... -
Page 30: Montage Funktionssäule Installation Function Column Montage De La Colonne De Commandes
Montage Funktionssäule Installation Function Column Montage de la colonne de commandes Schrauben nur so fest anziehen, dass Lippe von Formdichtung nicht nach außen drückt. Tighten screws only so much that the lip of the moulded seal is not pressed towards the outside. Serrer les vis de sorte que la lèvre du joint moulé... - Page 31 Montage Funktionssäule Installation Function Column Montage de la colonne de commandes Adapter + 90°-Bogen und Kunststoffschlauch vorrichten: Join adapter + 90° bend and plastic hose: Kaltwasser Warmwasser Raccorder la pièce intermédiaire Untersicht Duschwanne et le coude à 90° avec le tuyau Shower tray bottom view en matière synthétique: Receveur de douche, vue de dessous...
-
Page 32: Tie-Bar Preparation And Installation
Vorbereitung Montage Traverse Tie-Bar Preparation and Installation Préparation du montage de la traverse Zuleitung Trafo/Transformer supply line/Câble transformateur Steckverbindung Licht/Light plug connection/Connecteur éclairage Steckverbindung Licht/Light plug connection/Connecteur éclairage Kupplungsstecker Wasseranschluss (mit Armaturenfett leicht einfetten). Pièce de raccordement pour alimentation d'eau Water connection coupling plug (graisser légèrement les joints torique (slightly grease with fittings grease). - Page 33 Montage Traverse Tie-Bar Installation Montage de la traverse Traverse in Haltewinkel – 2 Steckverbindungen (Licht) * einschieben, mit Fixiermutter – Zuleitung Trafo * sofort sichern. – Kupplungsstecker Wasseranschluss verbinden Push tie-bar into angle bracket, secure immediately with – Connect 2 plug fi...
-
Page 34: Montage Traverse Tie-Bar Installation Montage De La Traverse
Montage Traverse Tie-Bar Installation Montage de la traverse Falls zwischen Traverse und Funktionssäule Spalt erken- M 5x10 M5 x10 M5 x10 U-Scheibe 5,3 Washer 5.3 Rondelle 5,3 nbar, Feinjustierung über Haltewinkel. Eckabdeckung/Corner cover Couvercle d'angle If there is a noticeable clear- ance between tie-bar and func tion column, fi... -
Page 35: Left Side Panel Installation
Montage Seitenscheibe links Left Side Panel Installation Montage du panneau latéral en verre, côté gauche Profilés colonne de douche prémontés Vormontierter Profilkomplex Duschsäule i b e f n a a t i l s e L o g 2 Innenliegende 1 Außenliegende Profilschiene Profilschiene... - Page 36 Montage Seitenscheibe links Left Side Panel Installation Montage du panneau latéral en verre, côté gauche Geraden Inbusschlüssel M4 verwenden, Schrauben gerade ansetzen. Dichtlippe an Glasscheibe entsprechend kürzen: Scheibe auf Wannenrand zwischen Klemmleiste Wand und Klemmleiste Duschsäule platzieren. Überstand am Dichtprofil anzeichnen.
- Page 37 Montage Seitenscheibe links Left Side Panel Installation Montage du panneau latéral en verre, côté gauche Use straight hexagon screwdriver M4, insert screws straight. Shorten sealing lip on glass panel accordingly: Position panel on shower tray edge between wall bracket and shower column bracket.
- Page 38 Montage Seitenscheibe links Left Side Panel Installation Montage du panneau latéral en verre, côté gauche Utiliser une clé pour vis six pans creux droite M4, poser les vis droit. Raccourcir la lèvre d’étanchéité du panneau en verre en conséquence: Placer le panneau en verre sur le bord du receveur, entre le profilé...
- Page 39 Montage Seitenwand links Left Side Panel Installation Montage du panneau latéral en verre, côté gauche Seitenscheibe mit einer Hand kräftig senkrecht nach unten ziehen (Dichtlippe wird dabei auf Wannen- rand gedrückt), gleichzeitig während des Ziehens mit- tlere Schraube b festziehen. Anschließend die beiden Schrauben a und c anziehen.
-
Page 40: Door Installation With Right Hinge
Montage Tür Rechtsanschlag Door Installation with Right Hinge Montage de la porte, butée côté droit Tür in Wandausgleichs - profi l einsetzen. Insert door in wall levelling section. Poser la porte dans le profi lé de raccord mural. (En cas de butée de (Bei Türanschlag links (For left door hinge, po- porte côté... - Page 41 Montage Tür Rechtsanschlag Door Installation with Right Hinge Montage de la porte, butée côté droit (Bei Türanschlag links Klemmleiste an der re- chten und Wandausglei- chsprofi l an linker Wand platzieren).
- Page 42 Montage Tür Rechtsanschlag Door Installation with Right Hinge Montage de la porte, butée côté droit (For left door hinge, po- si tion bracket on right wall and wall levelling section on left wall).
- Page 43 Montage Tür Rechtsanschlag Door Installation with Right Hinge Montage de la porte, butée côté droit (En cas de butée de porte côté gauche, placer le profi lé d’arrêt sur le mur droit et le profi lé de raccord mural sur le mur gauche).
-
Page 44: Cover/Cover Strip Installation
Montage Abdeckungen/Abdeckleiste Covers/Cover Strip Installation Montage des bouchons/du profi lé de fermeture 3 asymmetrische 3 symmetrische Schraubabdeckungen Schraubabdeckungen anbringen. anbringen. Fit 3 asymmetric Fit 3 symmetric screw covers. screw covers. Poser les 3 bouchons Poser les 3 bouchons filetés asymétriques. filetés symétriques. - Page 45 Abdichtung Sealing Étanchéifi cation An den nachfolgend gekennzeichneten Stellen Silikonab- dichtung durchführen. Silikonabdichtung (außen) Silikonabdichtung (außen) Silikonabdichtung Wandausgleichsprofil/Türscharnier Profilschiene Wand - Dichtlippe Profilschiene Funktionssäule - Außenseite, durchgehend von Dichtlippe außen nach innen Silikonabdichtung (innen) Silikonabdichtung (innen) Profilschienen Funktionssäule - Wandausgleichsprofil/Türscharnier Dichtlippe Innenseite Funktions-...
-
Page 46: Sealing
Abdichtung Sealing Étanchéifi cation Seal with silicon at the positions marked below. Silicon sealing (outside) Silicon sealing (outside) Silicon sealing function wall levelling section/door hinge wall moulding – sealing lip column moulding – outside, continuously from the sealing lip outside to the inside Silicon sealing (inside) Silicon sealing (inside) function column moulding –... -
Page 47: Étanchéifi Cation
Abdichtung Sealing Étanchéifi cation Étanchéifier au silicone les endroits suivants. Étanchéification au silicone (extérieur) Étanchéification au silicone Étanchéification au silicone Profilé de raccord mural/charnière (extérieur). Profilé mur – lèvre Profilé colonne de commandes – de porte. Côté extérieur, en continu d’étanchéité... -
Page 48: Hose/Hand Shower Fitting
Montage Schlauch/Handbrause Hose/Hand Shower Fitting Montage du fl exible/douchette à main Dichtring Brauseschlauch zu Dichtring Brauseschlauch zur Duschtempel ® 100 Quadra Handbrause Sealing ring shower hose to Sealing ring shower hose to Show er Temple hand show er Joint en caoutschuc du fl exible Joint en caoutschuc fl... -
Page 49: Adjustment And Servicing Thermostat
Thermostat einstellen/warten Thermostat Adjusting/Servicing Réglage/Entretien du thermostat 1 Haupthahn Wasserleitung 4 Thermostatgriff abnehmen. aufdrehen. 1 Open main cock of water 4 Remove thermostat grip. sup ply. 1 Ouvrir le robinet principal de 4 Enlever la poignée du la conduite d’eau. thermostat. -
Page 50: Shower Functions Setting
Brausenfunktionen Shower Functions Setting Des commandes de douchettes Einstellung Brausenfunktionen Setting of shower functions Réglage des commandes de douchettes Seitenbrause Body shower and Douchette latérale et und Kopfbrause geschlossen overhead shower shut off douche de tête fermées Seitenbrause Body shower Douchette Overhead Douche de tête... -
Page 51: Lighting
Beleuchtung Lighting Éclairage nicht bei Duschtempel 29 42x xxx und 29 43x xxx not at shower temple 29 42x xxx and 29 43x xxx ne concerne pas les 29 42x xxx et 29 43x xxx 1 Trafo ans Netz anschließen. 1 Connect transformer to mains. -
Page 52: Removing The Overhead Shower
Kopfbrause demontieren (nur falls Auswechslung erforderlich) Removing the Overhead Shower (only when it must be replaced) Démontage de la douche de tête (uniquement s’il est nécessaire de la remplacer) 1 Schraube auf Traversenoberseite lösen. 1 Loosen screw on tie-bar top. 1 Desserrer la vis sur la face supéri- eure de la traverse. -
Page 53: Spare Parts
Serviceteile Spare parts Pièces détachées Description Pos. Bezeichnung Description Nr./No./Nr. Strahlkörper kpl. für Bodyvette spray head c/w fi xing for Bodyvette diffuseur pour Bodyvette 95066XXX Griff "Quattro" Quattro handle poignée "Quattro" 36993XXX Hülse sleeve douille 98078XXX Einsatz kpl. diverter unit mécanisme complet 96604000 Griff... -
Page 54: Service Information
Bei der Pfl ege der Armaturen und Brausen gilt jedoch grundsätzlich zu beachten, dass • nur die Reinigungsmittel eingesetzt werden, die für diesen Anwendungsbereich aus drück lich vor ge se hen sind - z. B. Hansgrohe Schnellentkalker, der über den Sa ni tär fach han del bezogen werden kann. -
Page 55: Consignes D'entretien
• seulement les produits de nettoyage seront utilisés, qui sont formellement prévus pour ce domaine, par exemple le détartrant ra- pi de Hansgrohe qui peut être fourni par les grossistes. • aucun contact avec l´application de nettoyants contenant de l´acide chlorhydrique, de l´acide formique ou de l´acide acétique, qui peuvent causer de considérables détériorations. - Page 56 Pharo prod ucts? Wir helfen Ihnen gerne weiter: We would be de light ed to help: Hansgrohe · Postfach 1145 · D-77761 Schiltach · Telefon +49 (0) 78 36/51-1282 · Telefax +49 (0) 7836/511440 E-Mail: info@hansgrohe.com · Internet: www.hansgrohe.com...